A Sharpening Strategy: beyond a sharp edge.

I love using handtools and I hate sharpening. I hate sharpening so much that I became as expert as I could on sharpening just to find a shortcut.
There are certain basic rules.
The given is that the front and back of a blade must be honed to the same high level. “Sharpness” is really about “smoothness”, and one can only be as smooth as the side with the lesser surface. So you must use, for example, your 8000 waterstone equally on both the front and the back of the bevel. The back of the blade is as important as the front (bevel edge). This article is all about that …
And then the aim is to maintain the steel at that level as long as possible, because – just in case you have forgotten – I hate sharpening! The following is how you get to do that …
There are differences in the way one approaches bevel up (BU) or bevel down (BD) plane blades. I tried to treat BU blades the same as BD blades for a few years, and struggled. I finally accepted that they needed a different approach.
Secondary bevels and backbevels
These really complicate sharpening. Sometimes they are a necessary evil. Sometimes they really work magic. But sometimes they are a Royal Pain in the Whatsit.
I think this way about David Charlesworth’s “Ruler Trick”. This is a terrific – brilliant! – strategy for speeding up the sharpening of old blades – ones with pitted or warped backs – which is what I believe David conceived the method to be. It should not be necessary to use on modern blades, which now either arrive flat or require very little work to become flat. As you will see, the Ruler Trick actually makes sharpening more difficult in the long run.
My approach to sharpening keeps re-sharpening in mind. I really do not want to be going back to my waterstones all the time. I also do not want to rely on the steel to be so tough that it holds its edge a longer time – because then there will be an emotional aversion to sharpening the dull blade. If sharpening can take just a few seconds, or hardly be needed at all, then it will not feel intrusive.
Bevel Down ….
All my BD plane blades and all chisels are hollow ground (even – increasingly – my Japanese chisels). Some BD plane steel is best with a primary bevel of about 30 degrees, some will cope with about 25 degrees. I have found that A2 steel improves as it is ground back, so I have not had a problem with edges folding when a 25 degree bevel is used in a LA Jack on the shooting board. It also gets very sharp, certainly sharp enough for my purposes. At one time I considered that 30 degrees would be too high in a paring chisel (my HCS Bergs are at 20 degrees, which is considered by some to be ideal), but the A2 Blue Spruce dovetail chisels get very sharp and hold a good edge at 30 degrees. As do my Iyoroi bench chisels.
I prefer to hollow grind on a Tormek (although I also have a half-speed 8″ grinder with a blue 46 grit Norton 3X wheel). The Tormek makes it so much easier to grind to the very edge of the bevel. With so little steel to hone, at this point, one can easily get away with just a 1000 (to flatten the bevel) and 8000 (to smooth the steel) waterstones.
The other point is that I hone freehand. I hone directly over the hollow, using the hollow as a reference for stability. This is really easy. Nothing machismo here. Just hold the bevel flat on the hollow and move it until you feel an even wire edge (your guarantee you have not dubbed the edge). It takes about three swipes. That is all. I use a side sharpening technique as this also avoids the danger of dubbing. You end up with a microbevel that is coplanar with the back of the bevel. This is also relevant as you will see shortly.
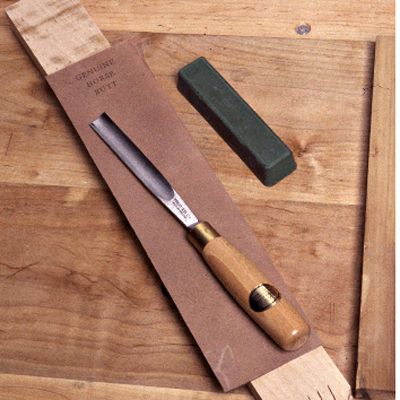
The importance of avoiding a secondary bevel (“grinding at 25 and honing at 30”) is that re-sharpening is made easier. I depend on a strop to maintain the edge between honings. There is an article I put on my website recently on this (http://www.inthewoodshop.com/WoodworkTechniques/Stroppingwithgreenrougeversesdiamondpaste.html). It is extremely difficult to maintain the angle of a microbevel when freehanding on a strop. It is easy enough to create a microbevel on a stone, but returning to it later is a recipe for dubbing.
Another of the reasons I avoid a non-coplanar secondary bevel is that adding one to a chisel is like using the Ruler Trick with plane blades. What it does is make stropping more difficult, but also removes the registration from the chisel bevel when using a chisel bevel down. I know that some argue that they can pare with a non-coplanar bevel, but I am simply pointing out that a coplanar bevel is more reliable and easier to use.
Hopefully you are still with me.
Bevel Up …
So on to BU planes. Some are concerned that BU plane blades suffer premature dulling as a result of a larger wear bevel – and I am not refuting that this occurs or that it causes deterioration of a plane’s performance. However I do not experience any issues myself, and this may be due to my blade maintenance strategy.
Where BU blades differ from BD plane blades is that the cutting angle is a combination of the bed and bevel angles. Since I use steep cutting angles on the BU smoothers and want to add a little camber, it is not appropriate to attempt to hollow or flat grind these at that angle. That is why I came up with a cambering strategy for BU blades in this article: http://www.inthewoodshop.com/WoodworkTechniques/TheSecretToCamberinBUPlaneBlades.html. I fought against using a honing guide for a long while, but eventually just accepted that BU planes must be done this way. While the bevel angle is relatively unimportant on a BD plane blade, the accuracy of it is all important on a BU plane blade. This is what turns so many older woodworkers off BU planes. However their performance is just so good that I will put up with the extra rigour of a guide.
The problem with using a secondary/microbevel on the BU blade is that it restricts stropping for edge maintenance. Since you cannot get away without using a microbevel, stropping can only take place on the back of the blade. So – full circle – you cannot use the Ruler Trick as it would prevent stropping. Of course, ignore all the above if you do not plan to strop. My sharpening system is built around stropping.
The act of stropping the back of the BU blade is what removes the wear bevel. I simply do not allow it to get to the point where it might intrude (I empasize “might” since there are many BU plane users who do not experience in practice what is stated in theory).
So there you have it. A more complex answer to an outwardly simple issue!
Regards from Perth
Derek


Comments
Derek
I used a leather strop for a number of years. However, around 10 years ago I changed to using a piece of 18mm MDF with a very small dab of "Autosol" chrome polish ( Repco stock this ). I have found this gives a much better edge with less danger of Drubbing the edge. A piece of fairly coarse abrasive on the back of the MDF will prevent this moving around the bench.
To test the cutting edge, I use a piece of end grain Jelutong, which shows a clear glossy finish when the edge is nice. Otherwise it will show scratches when their are minute nicks in the blades or a fuzzy finish when the edge is not truly sharp.
Regards
I 've used stones for years but now I've switched to the MDF-method. I normally hollow grind the primary bevel, use a very very light touch on my small shopmade belt grinder (300 grid) and then go to an MDF-wheel, one inch wide at the same belt grinder. I put the chisel tip in some car rubbing compound and strop the bevel for 10 seconds at the spinning MDF (2900 rpm). I use a support in front of the wheel. If I want to avoid any rounding up of the back I use the edge of another piece of MDF for honing of the back. Otherwise I use the support/spinning MDF in the same setup.
In about one minute I've created a razorsharp polished edge
with a bevel that stays consistent.
I don't hate sharpening but the joy and results of a razor sharp edge (experienced through the use waterstones uptill 8000 and stropping) made me think about a method which combines,speed, accuracy and sharpness at a more optimal level.
Key is the use of the support in front of the wheel and a high RPM in combination with a fine compound and a nicely turned MDF-wheel.
Regards
I have tried this method as well (I have tried a great many methods! :) ). I have no doubt that this method(using the Tormek's leather wheel) can work well for creating a smooth/sharp bevel. I have found it useful for chisels especially. However ..
It is an unreliable method for BU blades with specific microbevel angles, and it is not a method that one can use on the backs of blades (any blades).
I would also argue that it is much easier to dub an edge on a wheel strop than on a flat strop. I have compared both motorised versions of the above and a manual strop.
The bottom line, however, is what works for you.
What I have attempted to do here is draw attention to what lies beyond sharpening, that is, thinking ahead to when one will need to re-sharpen the edge. What then? What you did to get a sharp edge, is that going to make the next step easier or more difficult? Will you have to re-grind to re-sharpen? Or can you restore the blade to a working sharpness with minimal effort and time?
Regards from Perth
Derek
What puzzles me is the complete absence of mention of the rubberised abrasive wheel ,which with the use of the revolving strop,completely revolutionises the business of sharpening,
Log in or create an account to post a comment.
Sign up Log in