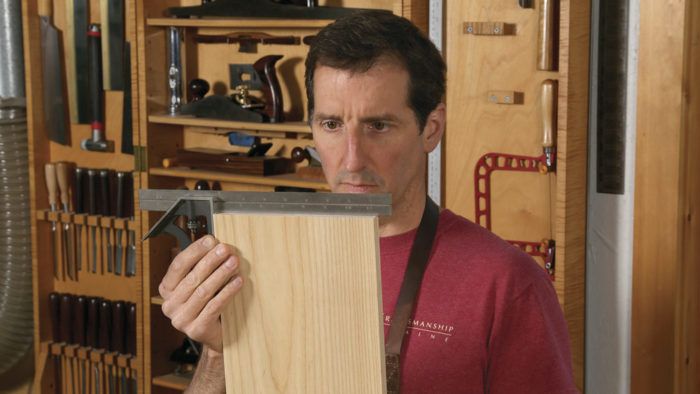
Combo Squares: The Basics and Beyond
Tim Rousseau gives tips and tricks for getting better joinery from the combination square, a must-have layout tool.

Synopsis: Perhaps the most useful of all layout tools, the combination square is widely used for laying out joinery and checking to see if the corner of a case is square. But it’s also invaluable for diagnosing why a joint won’t come together or close up without gaps, and for checking a joint’s accuracy after it is assembled. Veteran furniture maker Tim Rousseau tells you which combo squares you need and how best to use them to do better work.
Every fall, a new group of students begins the 12-week furniture-making program at the Center for Furniture Craftsmanship in Maine, where I teach. They spend the first few weeks learning to tune and use essential hand tools like chisels, planes, and saws. They also learn about layout tools, and it doesn’t take them long to understand why one layout tool, the combination square, is perhaps the most useful of all. I know I couldn’t work without at least one close to hand.
Many woodworkers understand the fundamental uses for combination squares, such as laying out joinery or checking to see if the corner of a case is square. But they’re good for so much more. I find them invaluable for diagnosing why a joint won’t come together or close up without gaps, and for checking the joint’s accuracy after it is assembled. Here, I’ll help you master this fundamental tool. Once you do, the combination square will help you do better work.
Start with a 6-in. square
Combination squares come in a variety of sizes, but the most useful sizes for furniture making are the 4-, 6-, and 12-in. models. Of the three, I use my 6-in. square the most. It’s small enough to fit into joints like mortises and between dovetails, but it’s big enough for machinery setup. It’s also easy to control when laying out joints. However, I do use the 12-in. square often, and I keep a 4-in. square in my apron pocket to help fit dovetails and to quickly check edges for square. If you’re just starting out, get the 6-in. combination square first, and then the 12-in. model. The 4-in. square can wait.
The rule etched into the blade of a combination square is available in a dizzying array of scales, but almost all of them are meant for machinists and other metalworkers. As a woodworker, you should get the “4R Grad” rule, which has 1⁄8-in. and 1⁄16-in. increments on one side and 1⁄32-in. and 1⁄64-in. increments on the other. If you’re in the mood to lavish yourself with a specialized tool, get a combination square with a 24-in. blade. With a second head attached, it becomes a great layout tool for case joinery. As for what brand to buy, I’ve had good luck with Starrett combination squares, and I recommend them to my students.
For the full article, download the PDF below:
Fine Woodworking Recommended Products

Lie-Nielsen No. 102 Low Angle Block Plane

Starrett 12-in. combination square

Veritas Wheel Marking Gauge


Log in or create an account to post a comment.
Sign up Log in