How to Get the Most from Your Tape Measure
Asa Christiana shares some tips and tricks to help get the best use out of your trusty tape measure.

Synopsis: Accuracy is the most important feature of a tape measure, and the most accurate, most convenient tapes on the market are not necessarily the most expensive. Find a tape measure that you can trust, and you’ll use it in countless ways for woodworking, from measuring boards at the lumberyard to laying out individual parts, marking rough lengths and widths, laying out joinery, and checking machine setups.
The tape measure is largely a contractor’s tool, but every woodworker needs at least one. Mine travels with me to the lumberyard and stays in my pocket for a host of tasks around the shop, from rough layout to setting up machines for milling lumber. It has endless possible uses—and there are a few tips and tricks that will help you make the most of it.
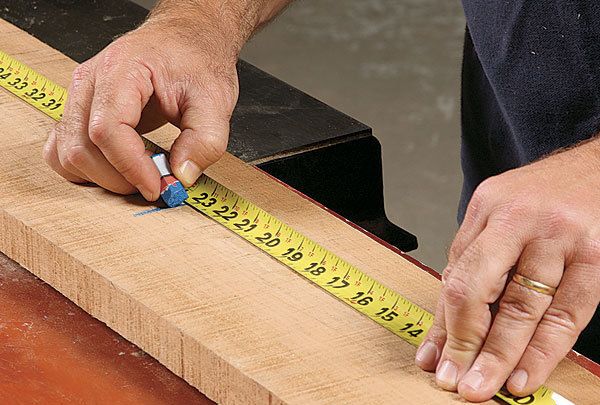
I can’t count all the ways I use my tape, but the first is at the lumberyard when checking stock against my cutlist. At home, I use it to lay out parts, marking rough lengths and widths with a lumber crayon. I use it at the chopsaw, when I cut those boards to rough length, and at the bandsaw when ripping them to rough width. Later, as a piece develops (and I need to build doors and drawers to fit, for example), I use my tape to grab measurements and lay out rough stock.
But rough work isn’t the only reason I reach for my spring-loaded buddy. Since I know my tape is accurate, I use it to lay out joinery on big pieces, like dadoes in bookcase sides. I trust it for machine setups, too—especially for measurements that are too big for a combo square, like when I’m working with plywood, or setting up a stop block in my crosscut sled. Even an accurate tape can’t replace stop blocks or a story stick when they’re called for, but you want a tape you trust, so you can use it to set up those stop blocks in the first place.
I’m not the first to use these, but I have a few favorite tape tricks. They may not be amazing, but they’re handy. Here’s a no-brainer: When you need to be precise, pivot the tape so that one side is lying down flat on the work. There are times you need to measure from one mark to another and the hook becomes a liability; it’s much more accurate to measure from a line somewhere along the tape. I used to start at the 1-in. mark, but after forgetting to add that inch back in a couple of times— with disastrous results—I now start from the 10-in. mark. It’s an adjustment that’s too big to forget. Then there is the trick at the chopsaw (or miter saw), where I bring the blade down onto the tape and board at the same time to line up a measurement.
For the full article, download the PDF below.
Fine Woodworking Recommended Products

Olfa Knife

Suizan Japanese Pull Saw

Tite-Mark Marking Gauge


Log in or create an account to post a comment.
Sign up Log in