How to Sharpen a Chip-Carving Knife
Flatten and polish both faces of the knife, then establish and hone the bevels of this simple carving tool.
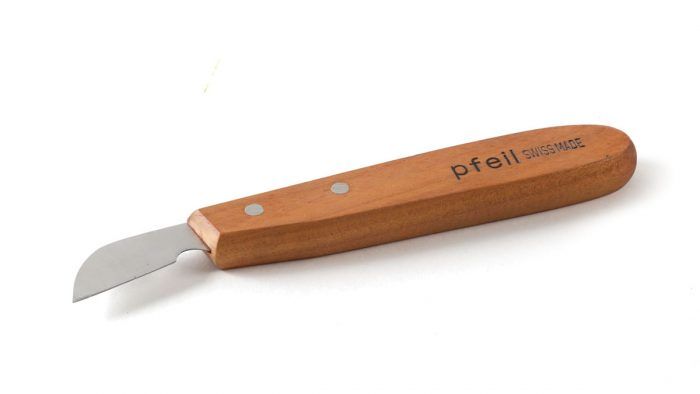
The chip-carving knife, though simple in the extreme, employs some special geometry that makes it a versatile tool for removing faceted chips of varying shapes and sizes. The blade, cocked forward at a slight angle to the handle, is typically about 1 1/2 in. long and very thin with a curved back edge. The cutting edge must be perfectly straight to produce the flat facets that make up the recess left by a properly carved chip. The blade’s point should be needle-sharp to allow all the incisions to meet precisely at crisp corners. The sides of the blade should be polished to a mirror finish to reduce friction as the knife cuts, and to lightly burnish the facets left behind as chips are carved away. The edge is sharpened symmetrically at a very shallow angle, about 8º to 10º on both sides. The bevel is very slightly bellied.
Flatten and polish both faces
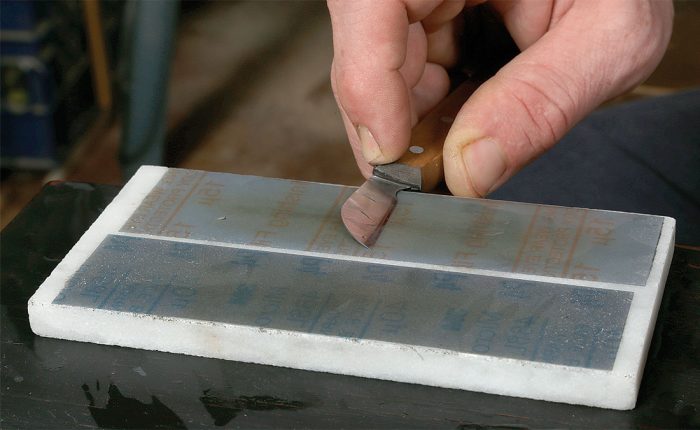
When I get a new knife, I ensure that both faces are flat by working them from 40-micron to 0.3-micron sandpaper. It’s imperative the blade’s edge remains straight. The adhesive-backed sandpaper is 3M Aluminum Oxide Films for Sharpening from Lee Valley, and the substrate is a polished marble tile.
Establish and hone bevels
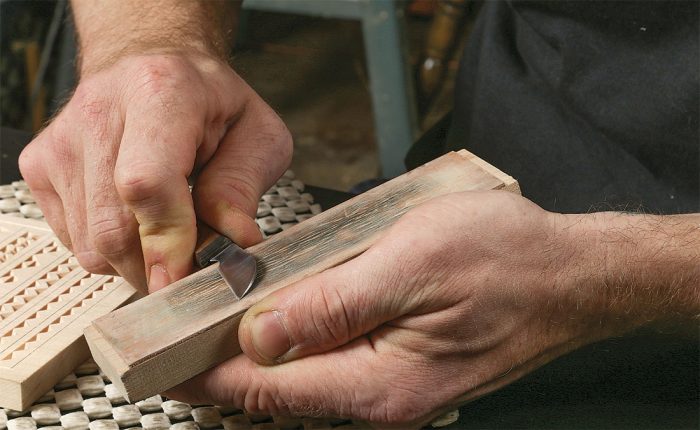
Aim for 8º to 10º, raising the back of the blade about the thickness of a dime. After forming the bevels on coarse grits, hone them slightly convex, so they burnish the surface as they cut. While carving, strop regularly on a piece of leather charged with yellow compound.
This is an excerpt from Daniel’s article Start Chip Carving in Fine Woodworking issue #278
Fine Woodworking Recommended Products

Honing Compound
Norton Water Stones
Rockler Silicone Sharpening Stone Tray


Log in or create an account to post a comment.
Sign up Log in