Japanese Chisel Tuneup: Conditioning the Back and Preparing the Handle
In the first of three parts, Jay Speetjens shares his method for tuning up a new Japanese bench chisel.

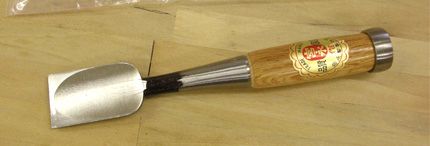
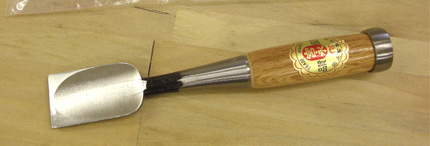
Think this chisel is ready to roll right out of the box? Think again.
Japanese chisels, or “nomi,” are available in a wide variety of styles and quality. Here I’ll share my method for tuning up a new bench chisel called oire-nomi. Most chisels regardless of quality will require a few steps to get them ready for use. On the surface it may seem counterintuitive that finer handmade tools may need even more work to get them ready for use. I think this is because the artisan tool maker focuses more attention on the quality of materials and the forging and shaping processes. Additionally, craftsman traditionally like to set new tools up to satisfy personal preferences.
The most important part of tuning up a new chisel is to adjust the blade geometry so that it will cut well for the intended materials and use, and sharpen quickly and cleanly. The back of the blade or ura on Japanese chisels is hollow ground, which makes removing the burr during sharpening easy. However, the land around the edge needs to be as flat as possible. This is done with a combination of honing and gently tapping the blade with a hammer on an anvil. The bevel may need to be flattened and the angle will often need to be adjusted to your preference. Typically, I keep my bench chisels around 30°. I find this is a good compromise for Western hardwoods: steep enough to hold up to chopping but fine enough to pare and shave. Paring chisels or chisels used extensively for softwoods I set finer, around 25° and mortising chisels somewhat steeper. The last main step to preparing a new chisel is setting the hoops on the handles. Although I have seen some mass-produced chisels with this done at the factory, most oire-nomi will come with hoops that need to be set.
Handle Preparation
Nomi come with a lacquer finish on the handle, blade, neck, and hoop. Depending on whether or not you like the look and feel of the finish on the handle, the first step is to remove the finish from at least all of the steel parts. Start by removing the hoops; some will slide off but others will need to be tapped free. To do this I hold a block of wood along with the chisel handle vertically in one hand. With the block supporting the underside of the hoop I then place a socket that is just smaller than the inside diameter of the hoop onto the end of the handle. I then tap the socket, occasionally rotating the chisel until the hoop pops free.
Paste stripper works well if you want to remove the finish from just the blade and neck. Otherwise soaking the hoops and the whole chisel in lacquer thinner will quickly remove the finish. In this case, I remove the finish everywhere so I can adjust the end of the handle, after which I reapply a few coats of wipe on varnish.
The handles of oire-nomi are barrel shaped with the thickest point in the middle. With the hoop removed check to make sure that there are no steps left during the original pressing on of the hoop. Carve away any steps, making the transition smooth. The hoop should firmly fit by hand so that the hoop and end of the handle are roughly in line. If the initial fit is close, the end of the handle can be compressed slightly by gently tapping around the end of the handle while it is held against a hardwood surface. Ideally the hoop will fit snug and need to be driven with a hammer so that 1/16 in. of handle sticks out past the hoop. If the hoop is too big or the handle too small, the hoop can be tapped slightly oval or a little of the handle can be cut off.
Coming installment
Japanese Chisel Tuneup – Part 2 will cover flattening the back of the chisel using waterstones, a flattening plate, and an anvil, along with tips on sharpening.
 Jay Speetjens is a professional woodworker and cofounder of Two Pines Trading Company, which sells Japanese woodworking tools and offers classes on their use and care. |

Think this chisel is ready to roll right out of the box? Think again.


Log in or create an account to post a comment.
Sign up Log in