Bill Pavlak’s All-Time Favorite Tool
Learn why a 1-3/4-in. paring chisel is the top choice for a journeyman cabinetmaker at Colonial Williamsburg.
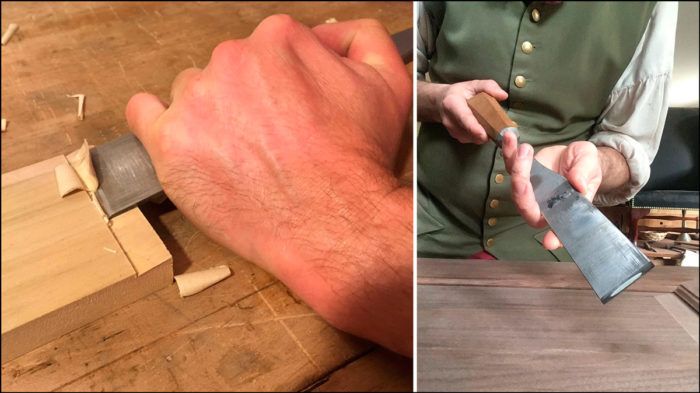
At least once week a visitor to the Hay Shop at Colonial Williamsburg will ask if I have a favorite tool. As I say “yes,” I reach into my tool chest for my 1-3/4-in. paring chisel made by our blacksmiths. Admittedly, a guy in costume smiling while waving around 14 in. of sharpened steel may seem kind of creepy, but I really do like that chisel. No, there’s nothing Freudian here, it’s simply an incredibly versatile tool. While paring chisels are often dismissed as the kind of overly specialized items best left for tool hoarders, I’d argue that wide ones—say 1-1/2 to 2 in.—are indispensable. I use mine for obvious tasks like paring and fine-tuning joinery, but I find that it’s also ideal for heavy sculptural work like shaping cabriole legs and fairing curves.
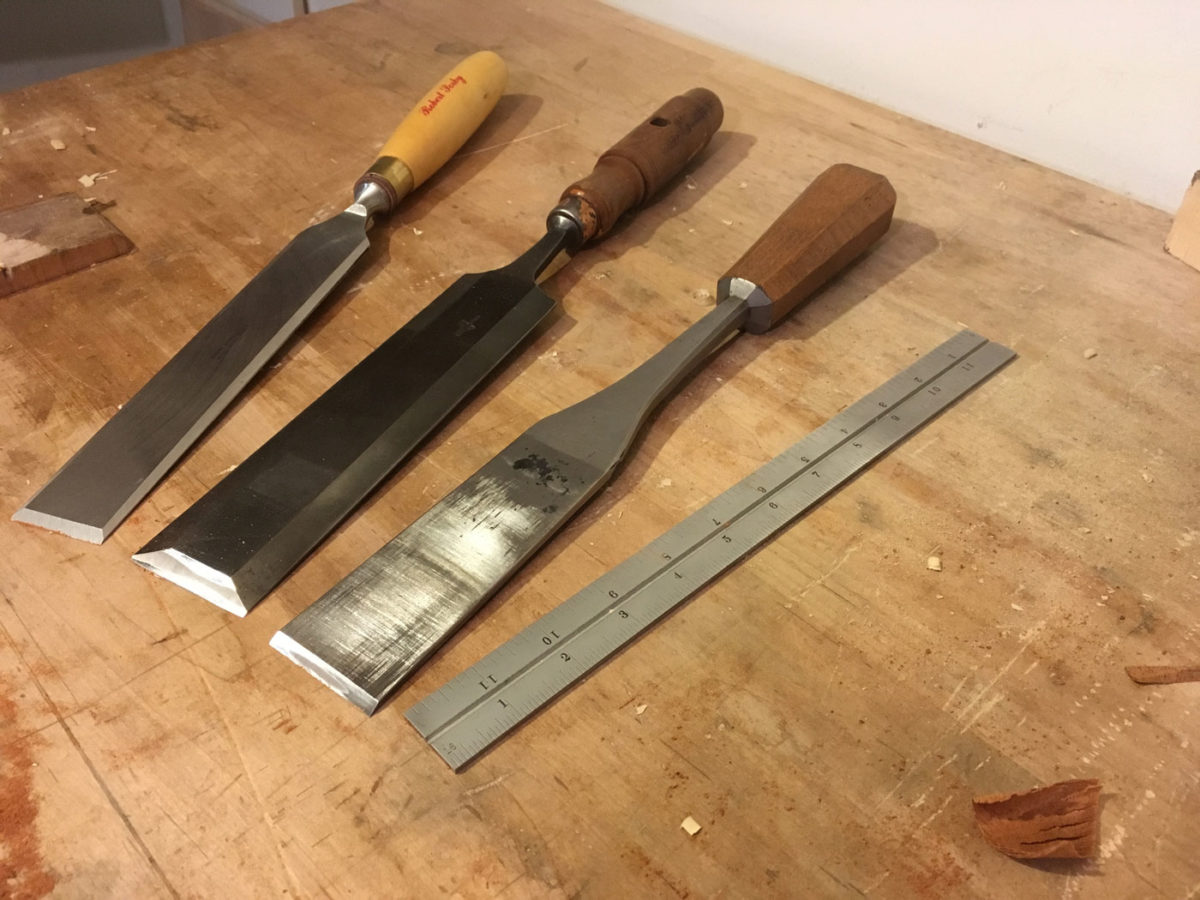
Before I get into some of my favorite ways to use the tool, let’s take a closer look at it and at paring chisels in general. Two of this chisel’s most useful features are immediately noticeable: it’s not bevel-edged and it is substantially longer than a bench chisel. Paring chisels, because of their thin blades, are always pushed or pulled through the wood, never struck with a mallet. Considering the amount of steel that has to push through wood, the tool’s extra length (typically 14 to 16 in. overall) is essential as it gives the user more power from less effort. More power with less effort always yields far greater control. The square cross section of my chisel also makes it more comfortable to handle. Although commercially available bevel-edge paring chisels will work fine, easing the long edges with sandpaper or sharpening stones will help prevent you from cutting your hands during use. In order to get the kind of versatility I expect from a chisel, I suggest that you scrap the 20° bevel ground by the manufacturer and raise it to the standard 27.5°. This holds up much better in a greater variety of work, especially with a lot of hard end grain when truing up tenon shoulders.
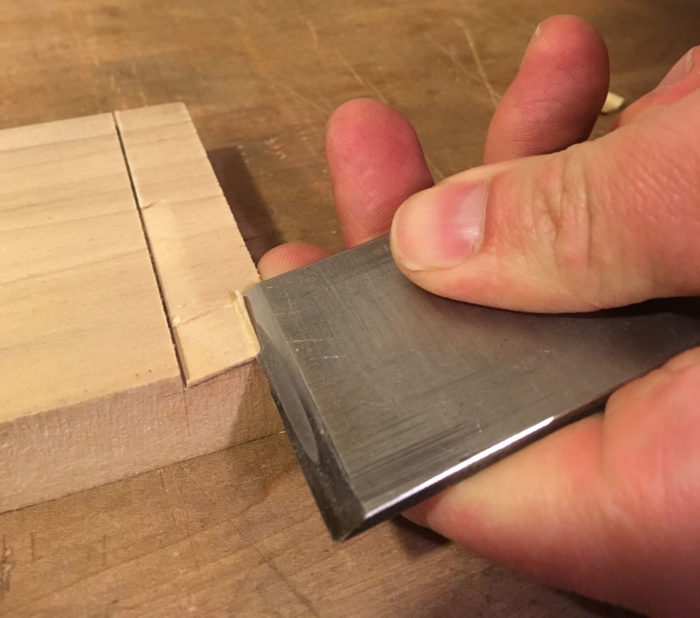
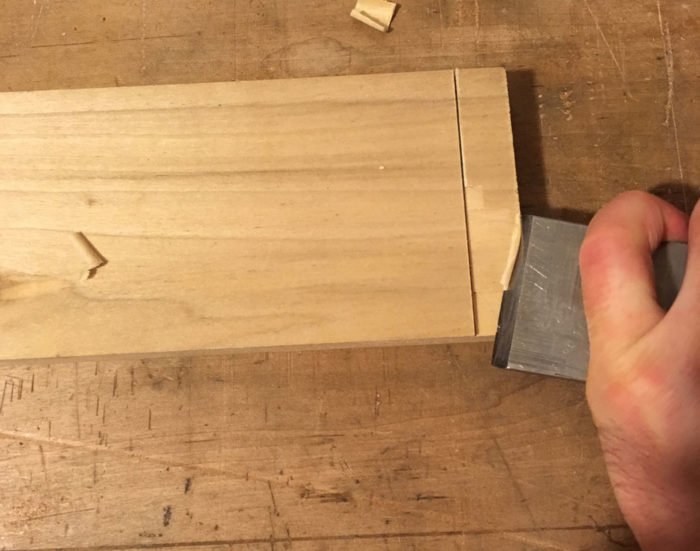
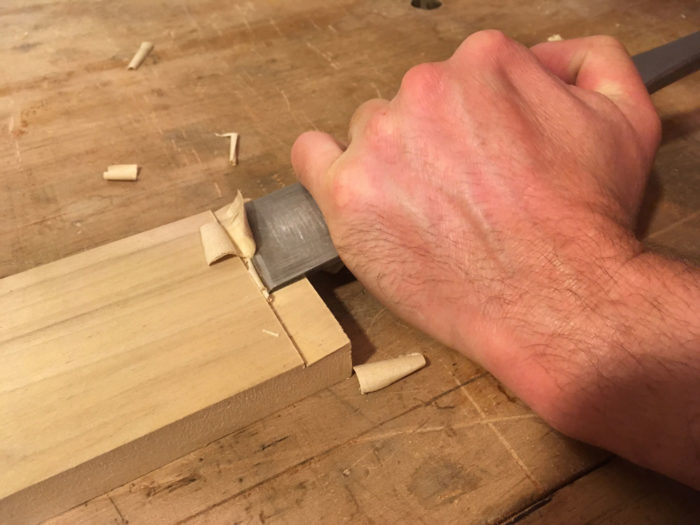
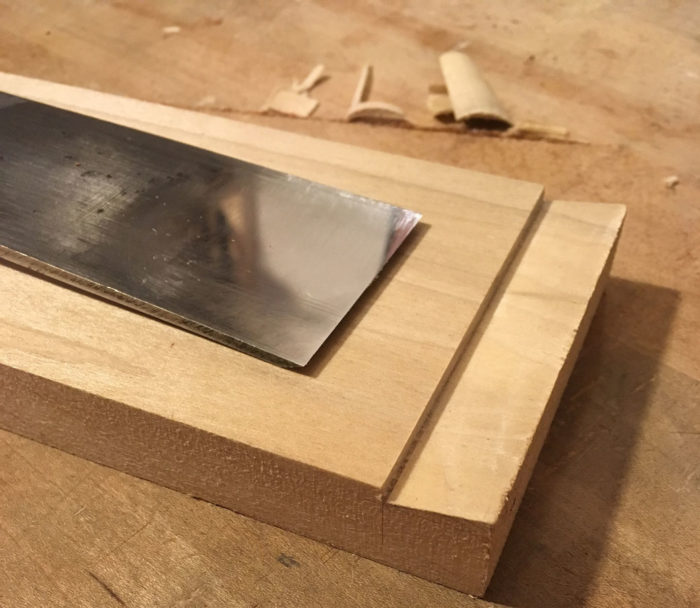
One of the chief reasons wide paring chisels excel at joinery work is that the chisel has its own built-in reference surface. As a portion of the chisel cuts through wood, the remainder of the wide, flat back can ride along an adjacent surface known to be true and guide the tool accurately. Rather than provide an exhaustive list of all the tasks in which this principle applies, let me illustrate the point with an example of how I cut the tail for shallow sliding dovetails used in case construction (see pictures below). After sawing the shoulder to depth, I use about 1/2 in. of the chisel’s width to carefully pare the end of the dovetail down to the line. I then slide the chisel down the length of the tail another 1/2 in. or so, register the rest of the tool’s back against the accurate cut I’ve just made, and allow that to guide the next cut. With one hand down near the cutting edge, I anchor the tool and pivot it on the reference surface, while my other hand back on the handle powers the tool forward with a slicing motion. After I repeat this process down the length of the tail, I check my work with a straightedge and pare where necessary. In this way I’m able to create accurate tapered sliding dovetails—sometimes as long as 21 in.—with very basic tools. For those of you less inclined to do this by hand, the same technique can be used for things like trimming surfaces flush with one another (pegs, dovetail pins, through-tenons, etc.) or for tuning up very small miters with the aid of a guide block.
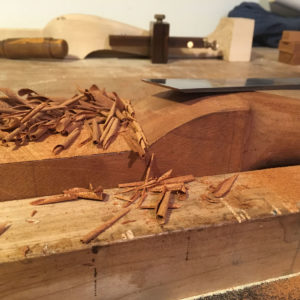 My favorite use of the big paring chisel is in more sculptural work like shaping the knees on cabriole legs. Instead of sawing the upper portion of the knee, and then finessing it with a spokeshave and chisel, I can hog off most of the waste quickly and then refine it to a surface ready for scraping and sanding with just the paring chisel. This all can be done in under two minutes with one tool and with no need to reposition the work. The photos below give a sense of how I work diagonally across the knee in both directions with shearing cuts and how, once again, the lower hand anchors the tool and finesses it while the upper hand drives it with larger sweeping motions. I’d also recommend that you force yourself into doing this kind work ambidextrously, as it pays big dividends in terms of efficiency and accuracy (eventually). For those of you who do this work with a bandsaw, the paring chisel still excels at cleaning up the saw marks and blending surfaces together (effecting a smooth transition from knee blocks into the knee, for example).
Of course, I could rattle off countless other examples of when I use this tool, but the basic techniques outlined here apply to almost all of those situations. Whether you are a hand-tools-only or a hand-tools-sometimes furniture maker, a wide paring chisel shouldn’t be relegated to specialty status. This is a versatile and fundamental tool—I mean, you could flip a burger with this thing in a pinch. Could you do that with a corner chisel?
Fine Woodworking Recommended Products

Starrett 4" Double Square

Suizan Japanese Pull Saw

Veritas Precision Square



Comments
I couldn't agree more. I use a wide 1 1/2 everyday. I can't imagine not working with it everyday for slicing, paring, carving, or shaping material. Great post.
Thanks for a great story its always a pleasure when you turn in a new piece and I'm happy you joined the fine woodworking team.
Is these any other reason you like your wide chisels without bevel edges other than hand comfort? And also what kind of steel is you chisel made of and how do you care for it? It looks different somehow...
Thanks
Thanks slowman and Periodcraftsman! The issue with the bevel is mainly about comfort. My hands spend a lot of time on this blade in different positions, so comfort is a big deal. The tool is also really well balanced. I asked the blacksmiths exactly what type of steel they used, but they weren't certain since they use a variety of types and this was made 15-20 years ago. The tool looks different because it is made of iron with steel hammer welded to the back side (by the later 18th century many thinner chisels like this were made entirely of cast steel) The hammer weld was often done to economize - steel was expensive and labor was relatively cheap. This way the cutting edge would be steel, but the rest of the tool could be the cheaper iron. You're also seeing some of the superficial imperfections that come with blacksmith made tools like this. Regardless, it holds an edge well, but is mild enough to sharpen without much fuss. There are really no special steps in caring for it.
Thanks for an interesting article, Bill.
In the photo of the three chisels, the blacksmith-made one appears to have tapered sides. Is this so? Also, how thick is it - it seems about 3/16 inch.
And one of the chisels pictured has bevelled sides - do you find yourself reaching for it for some jobs?
Log in or create an account to post a comment.
Sign up Log in