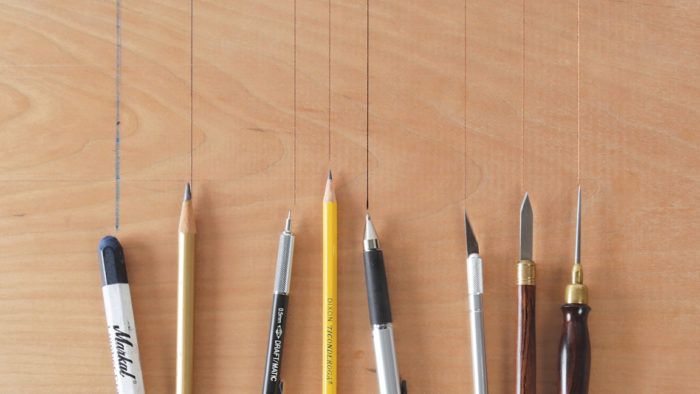
Understanding the Three Types of Layout Lines
Layout lines vary, and understanding when to use each type is fundamental to fine work.

Synopsis: On the surface, a layout line is a simple thing. But laying out a woodworking project calls for such a variety of marking tools and techniques that it pays to learn about them. Here is an overview of the layout lines in the life of a project. Some are penciled, rough or fine; others are scribed with a knife or marking gauge. Learn the differences, and your work will rise to a new level.
Cutting to the line is a simple concept. Hidden within that simple idea is a complex set of skills that are a gateway to accurate work.
The way you lay out lines and the way you cut to them are different in different contexts. Take cutting out curved parts vs. sawing dovetails: You’ll almost always smooth out a curved part after cutting, which gives you a chance to refine the shape afterward. With dovetails, on the other hand, the goal is to get the joint to fit with as little adjustment as possible. This requires added precision in the layout as well as the execution.
These two tasks are just the beginning. Here, I’ll take a close look at the various layout lines in the life of a project. Some are penciled, rough or fine; others are scribed with a knife or marking gauge. Each has its purpose. Master the subtleties, and your work will rise to a new level.
Layout tasks can be grouped into three categories: rough layout, mid-level layout, and fine layout. Each calls for a different approach. Rough layout, done with pencil, chalk, or crayon, includes working out how you’ll break down a board into manageable sizes, marking out the grain orientation, and marking reference faces for milling or joinery. Mid-level layout is usually for machine work, where the machine setup will control the precise location of the cuts. And fine layout lines are for precise sizing of parts or joinery, and are actually cut into the wood as opposed to being simply marked on it, using a knife or point-shaped tool.
For rough layout—when breaking down rough lumber and labeling parts, for example—a lumber crayon, chalk, carpenter’s pencil, and a fat 6mm artist’s pencil are ideal. Go with the crayon or fat pencil if you need the marks to remain visible for a while. Save the chalk for marks that you want to easily brush or rub off.
For mid-level layout such as marking curves to be cut on the bandsaw, pens and sharp pencils are best. Keep in mind that tracing a pattern means your layout will be slightly bigger than the original pattern. This is usually a good thing, since there will be some smoothing to do after bandsawing out the part.
For the full article, download the PDF below.
More on FineWoodworking.com:
- 10 Essential Layout Tools – Ten tools that every woodworker should have to lay out the next project
- Perfect Dovetails on a Curve – Nesting blocks ease layout, clamping, and cutting
- Cut Matching Curves – Router templates ensure a perfect fit between panels and solid-wood edging
Fine Woodworking Recommended Products

Stanley Powerlock 16-ft. tape measure

Blackwing Pencils

Sketchup Class


Log in or create an account to post a comment.
Sign up Log in