Making Molding with a Stanley #55
A classic but cantankerous plane behaves long enough to run molding for a small cabinet.

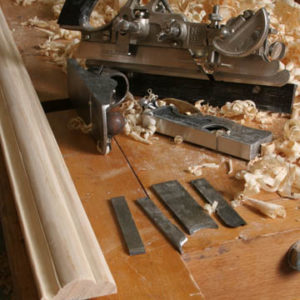
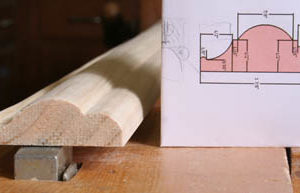
The molding I made, using the four cutters in the foreground and the Stanley #55 plane.
It worked.
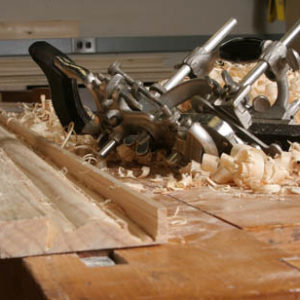
I cut the crown molding for a small cabinet using a Stanley #55 molding plane. It’s the most work I’ve ever gotten from this cranky, fussy, cantankerous, mulish tool.
The profile I designed complements the design of the fireplace surround in the room where this small cabinet will one day sit. The surround molding was undoubtedly cut by an 18th century farmer with whatever molding planes he happened to own. My profile used three shaped cutters: a cove with bead, a half-round, and a quarter-round. I used a plain 1/2-in. cutter to plane away most of the waste.
I began with the cove and bead. Rather than try to run the bead at the very edge of my workpiece, I left about half an inch of waste, which gave the plane’s fence a nice shoulder to ride on. After plowing a groove with the plain cutter, I kept going with the cove-and-bead profile, deepening and shaping the groove.
Next, I ran the half-round profile. This wide cutter could have wreaked all sorts of havoc, stalling, chattering, and otherwise misbehaving as I tried to muscle it along the wood. Fortunately, it, too, behaved itself. Then I finished with the quarter-round cutter. It gave me the most trouble, because it was nearly impossible to push in the groove. Then I remembered a piece of advice that my colleague Matt Kenney offered: work backwards. So I made a series of short cuts, beginning at the far end of the molding and working back toward the near end. That did the trick.
Of course, every time I changed cutters I had to loosen and tighten a dozen set screws to adjust the fence, the blade height, the height of the runners that serve as the plane’s sole, and the depth stop. You cannot rush when using a #55. You also can’t take shortcuts. If you don’t tighten all the set screws, the plane is guaranteed to wander.
The molding needed a fair amount of cleanup to remove chatter marks and several stray gouges. For that, I used a shoulder plane, a block plane, and P220 sandpaper wrapped around a small block. This also allowed me to refine the quarter-round and half-round profiles, which were kind of gnarly right off the #55.
The finished molding is smooth but far from perfect. That’s the whole idea. The molding will be just the ticket to make my new cabinet look right at home in 250-year-old surroundings.


Comments
I also make moldings with a 45 (similar to the 55). But I find it quite simple to use, and leaves a great surface. I find the biggest pproblem with these seems to be the blades. Basically I find them to be junk and lose thier edge almost immediatly.
If you get a sheet of 1/8" A1 tool steel (unharded) it's easy to quickly grind your own blades. I harded them with a propane torch and cooking oil. I heat the blade above the edge and wait until the straw color goes to the end. I find that holds an edge great and can be resharpend.
I usually go straight to finish without neededing any cleanup or sanding.
'We should all be so lucky to be chained to a rock and have our livers eaten daily by an organ-hungry raptor than to suffer the agony of this contraption.' -Patrick Leach
In spite of Mr Leach's endorsement of the Stanley #55, I have had some success with it. Practice and patience are the key. Also stay with the single skate profiles. When you try to set it up for muliple skates is when it quickly approaches Rube Goldberg status.
-Chuck
With a molding using more than one cutter, the 55 generally works best if you use the same strategy you would use with traditional hollows and rounds -- make a series of rebates very close to the finished profile. That is, remove a lot of the bulk material first. And it would be unheard of to rough-in the profile with a gouge or two (after rebating) and let the 55 clean it all up.
There were guys who used to demonstrate the 55 across the country and they would walk into the room with the rabbets already run and then finish the molding lickety-split with the 55.
Log in or create an account to post a comment.
Sign up Log in