The Physics of Handplaning
How the parts of a handplane work together to make perfect cuts.
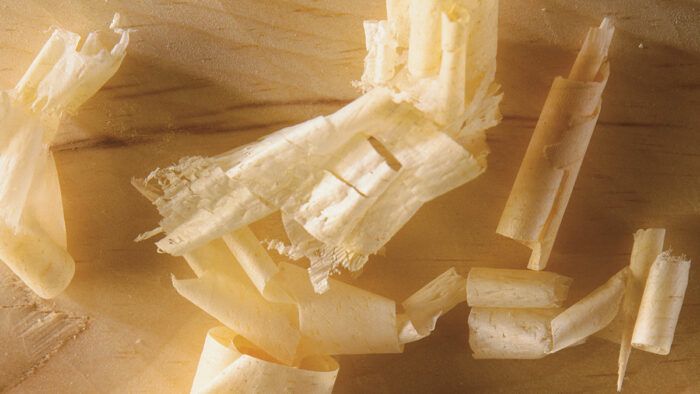
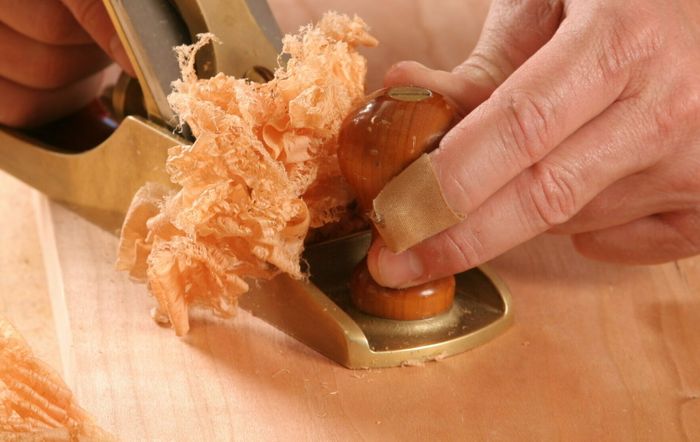
Planes are more than just a collection of parts fitted together. Clearly some planes work a whole lot better than others. Why is this? Why can one plane curl up shaving after shaving from obstinate curly maple and leave a surface with an almost polished smoothness, where another plane chatters and clogs after a few uneven planing strokes? Certainly it’s a matter of tuning and a certain harmony among the parts, a sharp iron, choosing the right plane for the work, and knowing how to use it. But it’s more than this. Some planes just have physics in their favor.
Chip Formation
The dynamics of the cut is fairly basic physics. The plane’s cutting iron contacts the wood, driving a shaving into the throat that curls and breaks against the cutting edge of the iron (and against the cap iron, too, if the plane has one). Every part of the plane in contact with the shaving affects the physics: the sharpness of the iron, the size and smoothness of the throat opening, the pitch of the iron, and its bevel angle. Understanding some of the subtle aspects of this physics will really help in fine-tuning your planes, or it might inspire you to build a “better” plane.
A plane iron is really no different from a chisel; the plane body supports the iron in a way that allows good control of the cutting action. Imagine driving a chisel into a block of wood along the grain: Not only will the fibers be cut, but some splitting will occur as well. Areas where the grain splits out (otherwise known as tearout) are rough; cut areas are considerably smoother. The physics of a plane is simply an attempt to control the splitting in favor of cutting for a smooth final surface.
The quality of the cut is affected by the hardness of the material or its resistance to being cut, the cutting angle or pitch that the cutting edge makes with the surface, the direction of the wood grain, and the thickness of the shaving. If this same chisel had an acute edge similar to a knife, the wood was straight grained and easily worked, and a fine rather than a coarse shaving was cut, then very little splitting would occur and the resulting surface would be quite smooth. Working with the grain, any splitting ahead of the cut would be above the final cut surface and be of minor significance. Also, less force is needed to cut with an iron with a thin edge profile. In theory, this is how a low-angle plane or spokeshave works.
 |
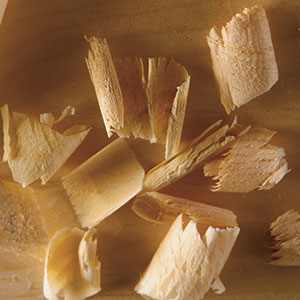 |
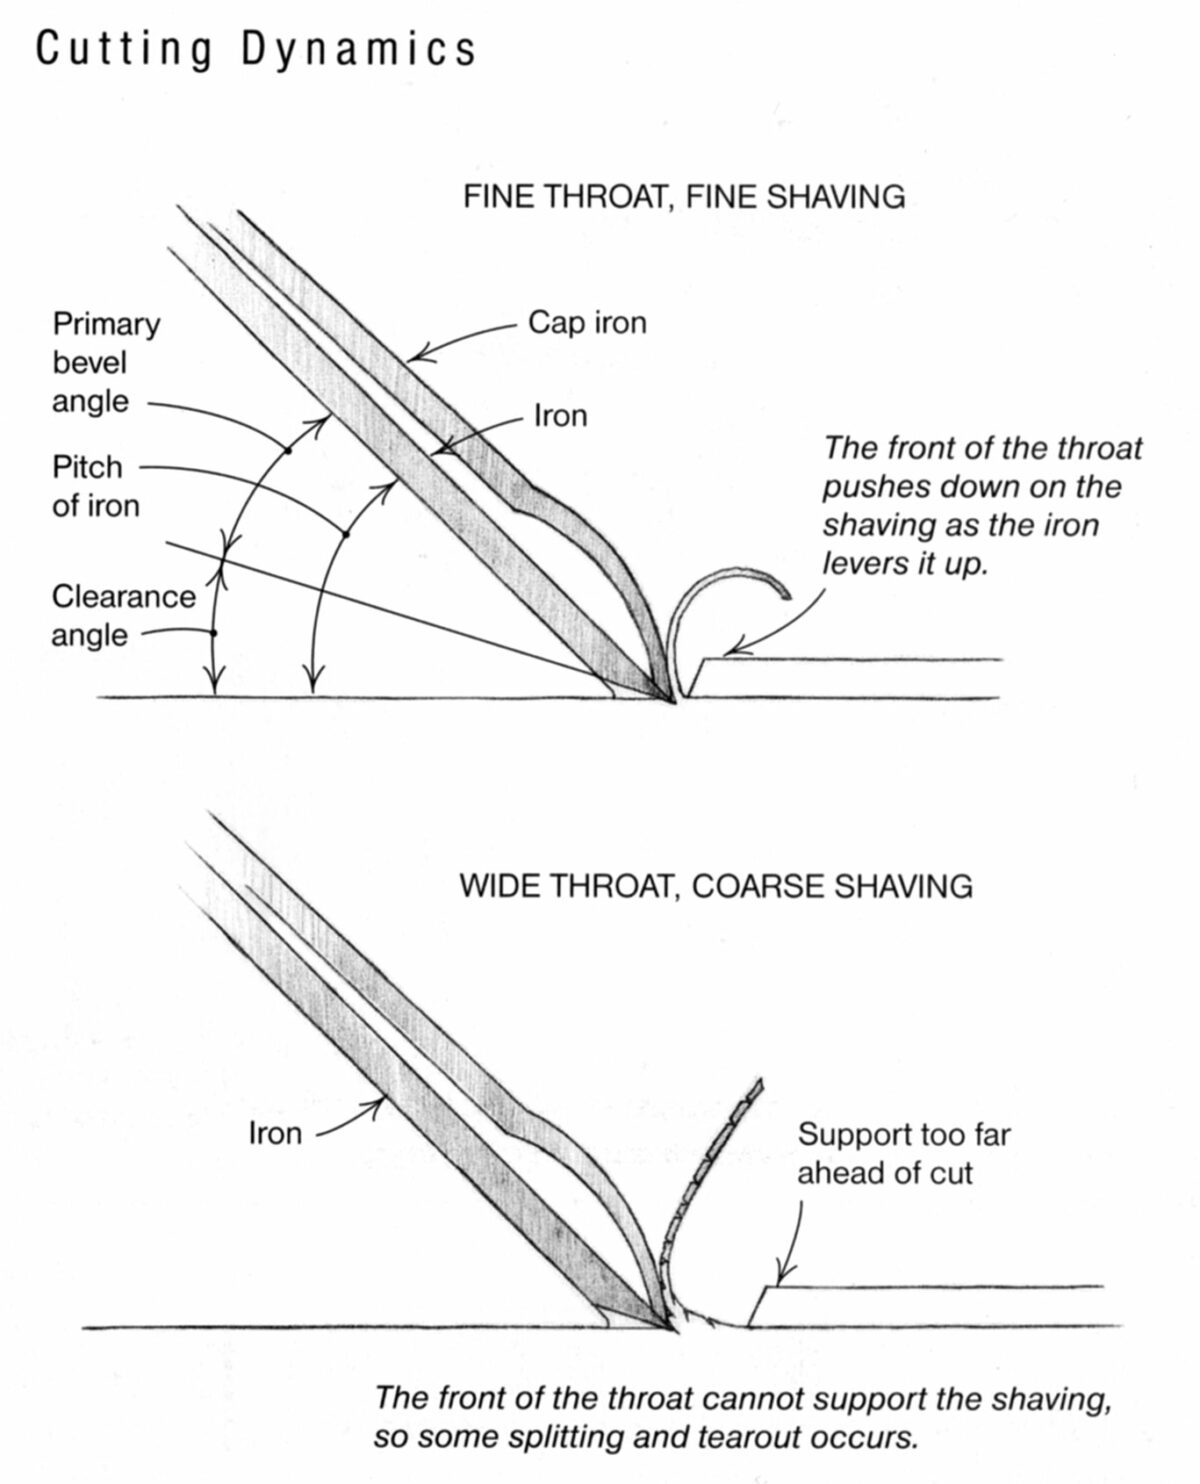
The problem comes in cutting anything other than well-behaved woods with the grain, which is where a plane has distinct advantages over a chisel. Forcing the shaving into the throat of the plane causes it to be curled and repeatedly broken in a levering action that limits potential tearout. The drawing above shows the cutting edge lifting a chip, forcing it upwards, and breaking it against the forward part of the throat as this part of the sole exerts downward pressure. Some splitting is bound to happen when planing against the grain; the best you can do is keep the tearout as fine as possible. A sharp iron, cutting a thin shaving, and a tight throat will all help. This makes it easier to understand why a wide throat (caused by wear or inattention) often does not give good performance—the chip is supported too far ahead of the cut and too much splitting goes on. Of course, for rough work and planing thick shavings, a wider throat is necessary.
Effectively curling and breaking the shaving depends on more than just the width of the throat, but also on the inclination of the iron to the sole, or pitch, and the presence or absence of a cap iron. For hard or figured woods a steeper pitch is necessary for good results. The steeper the pitch, the more abruptly the shaving is curled and, assuming the fibers are pressed downward by the front of the throat, splitting out ahead of the cut is less likely. But the pitch of the iron has a dramatic effect on the force required to drive the plane; the steeper the pitch, the more force needed. This can be more easily understood by comparing the force needed to cut a shaving with a knife edge at a low angle to the surface (a thin wedge at 25° pitch) to the force needed to cut with a chisel held at a high angle to the surface (a thick wedge at 45° or higher pitch).
A cap iron (also known as a chip breaker) presents a steeper angle than the pitch of the cutting iron and helps curl and break the shaving, but at the cost of slightly greater resistance. The closer the cap iron is set to the cutting edge, the more effective the cap iron. Most important is that the leading edge of the cap iron lie completely flat against the cutting iron to help stabilize it and not allow any shavings to lodge between the two and clog the smooth escape of new shavings.
Skewing the Iron
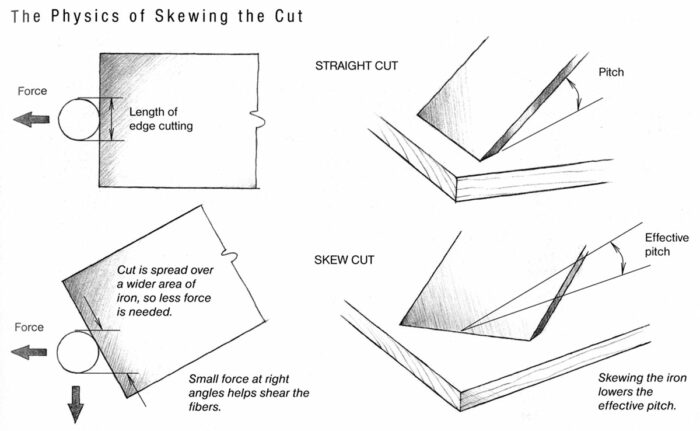
Skewing the cut is one way to have your cake and eat it too, so to speak—good performance and reduced cutting force. Rotating or skewing the plane at either a slight or great angle noticeably improves the cutting dynamics. Three things happen: The effective cutting angle is lowered, the iron presents a smaller profile to the cut so there is less resistance, and a slicing force is added to the cut (see the drawing above).
Skewing is an incredibly effective strategy, especially for beginning a stroke smoothly. Skewing in one direction will often make a very noticeable difference over cutting the opposite way, especially in areas of swirled figure or knots. Increasing the skew of the plane can sometimes help, too, although with too much skew the plane is making only a narrow cut. At this angle the dynamics can also be so different that with some woods you start to get some tearout. The key is to experiment.
 Excerpted from The Handplane Book (The Taunton Press, 1999) by Garrett Hack.
Available at Amazon.com.
Fine Woodworking Recommended Products
Veritas Micro-Adjust Wheel Marking Gauge

Veritas Precision Square

Suizan Japanese Pull Saw



Comments
Great excerpt. Clearest explanation I've seen. Thank you.
Awesome excerpt!
For readers who want even more, I also highly recommend "Making and Mastering Wood Planes" by David Finck. I only made 1 handplane from it, but the lessons he gave on steel and sharpening really helped my woodworking. Outside of in-person classes, that book probably had the biggest impact on my craft.
Log in or create an account to post a comment.
Sign up Log in