7 Things to Know about Hand-Cut Mortise-and-Tenon Joints
Bill Pavlak offers some less well-known tips for mortise and tenoning.
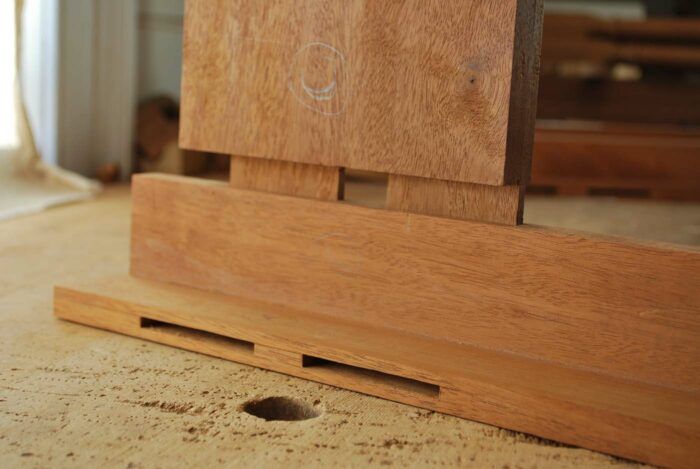
People think hand-tool woodworking is peaceful and quiet. That’s often true, but not when it comes to chopping mortises. Repeatedly beating a stout chisel into a block of wood with a hefty mallet is loud and violent. To the uninitiated, it also makes little sense. How could such brutality lead to the precision required for a well-fitting joint? In time you learn. The mallet blows are intentional (though still pretty loud), the tools are sharp, and the method is capable of efficiency and accuracy in high degrees. The world is filled with solid instructions on how to chop a mortise – yes, there are many variations – so I won’t add to that here. Instead, I’ll offer up a handful of suggestions that don’t get as much press to make your mortise-and-tenoning experience a little better.
Number 1: The bottom of a mortise doesn’t need to be flat. Everybody knows that, but I suspect most folks assume that means the bottom can have slight undulations and a little overcut here or there. That’s what I always thought people meant by not flat until I started studying antiques. By not flat, think of a bottom that describes the Himalayas silhouetted by the setting sun. As long as you don’t leave wood behind that will prevent the joint from closing or chisel all the way through when you don’t want to, you’re good. If you don’t believe me, have a look at this radiograph of a mortise-and-tenon joint on a fine English antique from the 18th century. Chris Swan, Colonial Williamsburg’s furniture conservator who took that image, says this is what he sees more often than not. Once I stopped trying to over-fuss mortise bottoms, my work picked up speed.
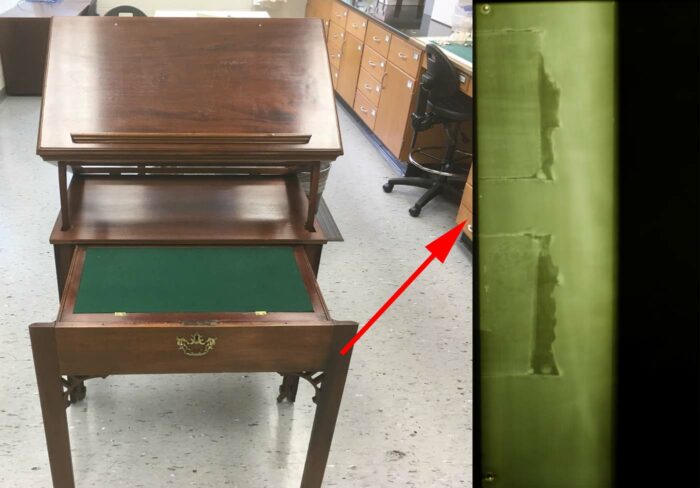
Number 2: If the bottoms of mortises don’t need to be flat, then the ends of tenons don’t need to be square (look at the bottom tenon in the radiograph above). When working by hand, there is no need to square the ends of your tenon stock. Save your time. Square ends are important for some machine approaches, but in handwork simply get your shoulder-to-shoulder measurements right and leave enough wood beyond for a suitably sized tenon. Use a square and a marking knife to mark the shoulder rather than a gauge registered off of the end.
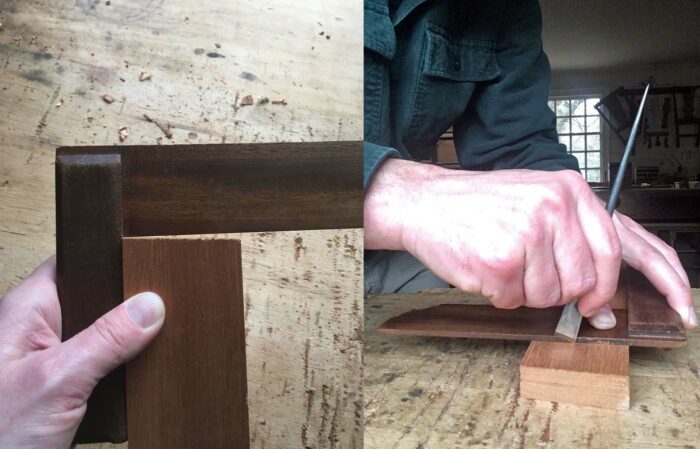
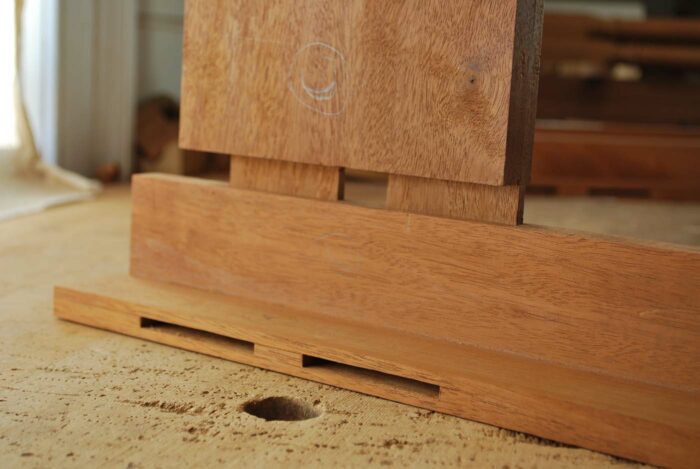
Number 3: Period tenons are rarely shouldered on the bottom end. On the plus side, this gives you one less patch of end grain to pare to perfection. Conversely, it can reveal a mortise that’s gotten a little oversize thanks to chisel creep. When I’m designing my own pieces, I ask myself if an exposed bit of mortise matters or not. Usually they would wind up out of sight in obscure areas. If they wouldn’t I might add a little shoulder to the bottom.
Number 4: Don’t feel like your mortise needs to be absolutely perfect right off the mortise chisel. I beat myself up over this for a long time for no reason. Chop your joint as true as possible. I trust my sense of square for 90° joints, but sight against a bevel gauge for everything else. I’m rarely dead on my angle, but usually only off by a few degrees. Use a wide paring chisel to tweak the offending areas of the mortise wall to get the angle right. The beginner’s mistake is to chop undersize mortises and then rely on paring. If you chop mortises the correct size first, you’ll still be able to pare a little away without opening anything up too much and you’ll go much faster. Remember, you cut your tenons to fit your mortises, so you’ll have a chance to account for any extrawide mortises later.
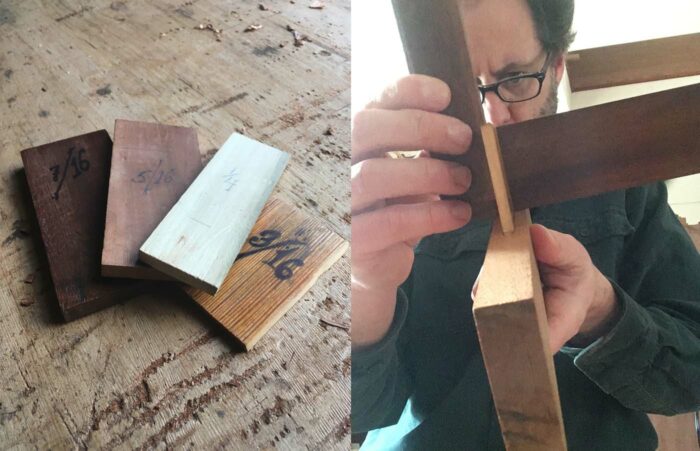
Number 5: Check your mortise accuracy with little dummy tenons. I learned this trick from my colleague Brian Weldy and I don’t know how I ever got by without it. Make up blocks thicknessed to your usual tenon sizes (I keep several in typical sizes in my tool chest). Once your mortise is chopped, slide in one of these (there should be some resistance) and check it with a square or bevel gauge. You should be checking the cheek of the tenon in relation to the surface the mortise is cut into. This simple test will tell you if and where your mortise needs adjusting. When it’s time to cut and fit your tenon, you’ll know the mortise is correct, and this allows you to make further adjustments on the tenon. This technique also limits the amount of testing I have to do. The more I put that joint together and take it apart, the looser it will become.
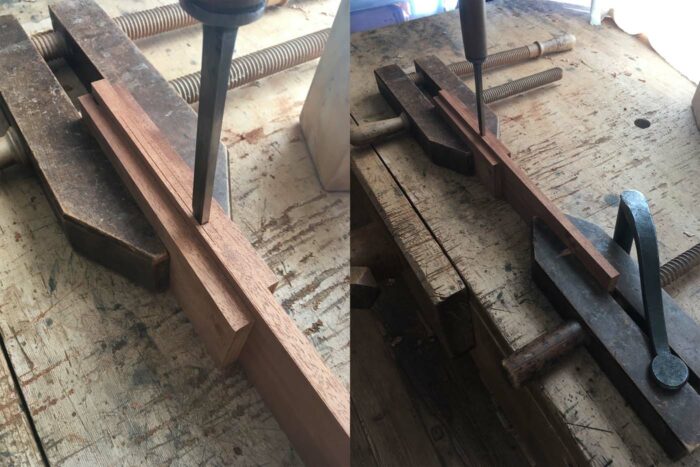
Number 6: Support narrow stock carefully. I’ve had to cut my share of 3/16-in. mortises in 7/16-in.-thick stock. That does not leave much wood on either side of the mortise, making splitting things apart a real danger. In these situations, I fool my stock into thinking it’s thicker. I do this by clamping a hand screw to the board so its jaws are on either side of the mortise to be cut. In some situations, I insert a board on either side, or gang together a few parts for mortising to add some thickness and – hopefully – some support. The hand screw can then be secured to the benchtop with a holdfast. This hand screw and holdfast combination is usually how I hold stock for mortising anyway.
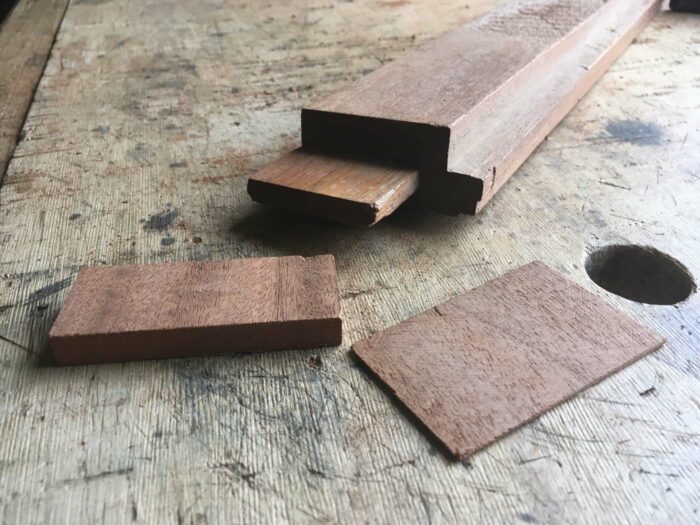
Number 7: There’s no harm in shimming a tenon – who’s going to see it? If your tenon gets a little undersize, simply build it back up. Here’s my approach: ignore the amount your tenon is off and just glue an oversize block to one of the cheeks – I usually use the scrap from cutting the tenon in the first place. Make this cheek a nice, flat glue surface so your shim mates it with integrity. Once it’s dry, recut the tenon. I used to add a little slip of veneer and work it with a file, but this never worked quite as well for me. The veneer can easily start to flake off as the joint is test-fitted and I find it harder to fine tune than just re-cutting the joint. In the end, the effect is the same, but I find this approach usually works better.
Curved molding by hand
A very good cabinetmaker
Bill Pavlak’s Oddly Essential Tools
Fine Woodworking Recommended Products

Starrett 4" Double Square

Marking knife: Hock Double-Bevel Violin Knife, 3/4 in.

Suizan Japanese Pull Saw


Comments
Good tips! I wonder if you have any advice about problems I've had using mortising chisels, in particular. If I try and use a 1/2" mortising chisel to cut a 1/2" mortise, I find the sides of the chisel tend to cut the sides of the mortise as I go down and enlarge it. I love the leverage I get with a mortising chisel. I generally find myself using a smaller size, like 3/8" for a 1/2" mortise, but that seems clunky to me. Or is it the right things to do?
Great insight. I LOVE the radiograph image.
Wonderful set of what I’ll call second-level tips—beyond those found in so many introductory how-to articles on M&T joinery. Helps one take one’s work to that next level, too!
Thank you, Bill, for giving some perspective to preparing good, quality M&T joints. We often waste too much time on things that don't matter. Great tips!
Another great article. Thank you.
Log in or create an account to post a comment.
Sign up Log in