A Greene and Greene Blanket Chest Comes Together with Finger Joints
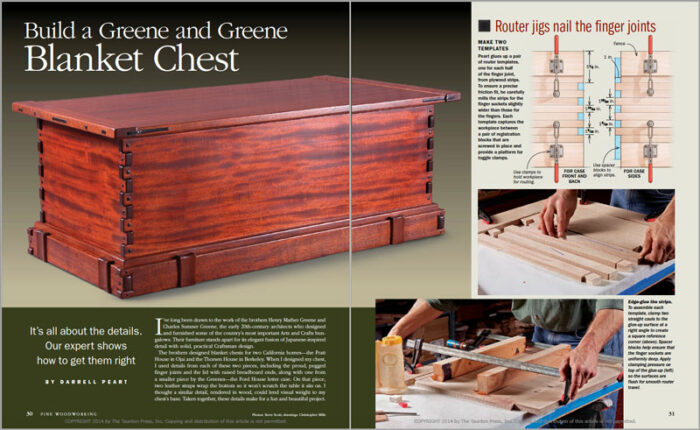
A pair of router jigs ensure precise friction-fit joints at the corners of the chest.
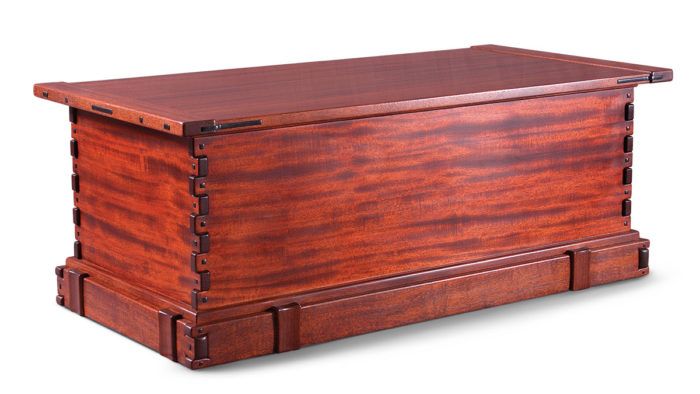
Synopsis: Proud, pegged finger joints, a lid with raised breadboard ends, and faux “leather” straps on the base are some of the Greene and Greene details that Darrell Peart incorporated into the design of this blanket chest. Taken together, these details make for a fun and beautiful project. A pair of routing templates makes cutting the finger joints easy. Ebony plugs and splines add interest to the finger joints and the breadboard ends, and the strap, made out of wood, adds visual weight to the base of the piece.
I’ve long been drawn to the work of the brothers Henry Mather Greene and Charles Sumner Greene, the early 20th-century architects who designed and furnished some of the country’s most important Arts and Crafts bungalows. Their furniture stands apart for its elegant fusion of Japanese-inspired detail with solid, practical Craftsman design.
The brothers designed blanket chests for two California homes—the Pratt House in ojai and the Thorsen House in Berkeley. when I designed my chest, I used details from each of these two pieces, including the proud, pegged finger joints and the lid with raised breadboard ends, along with one from a smaller piece by the Greenes—the Ford House letter case. on that piece, two leather straps wrap the bottom so it won’t scratch the table it sits on. I thought a similar detail, rendered in wood, could lend visual weight to my chest’s base. Taken together, these details make for a fun and beautiful project.
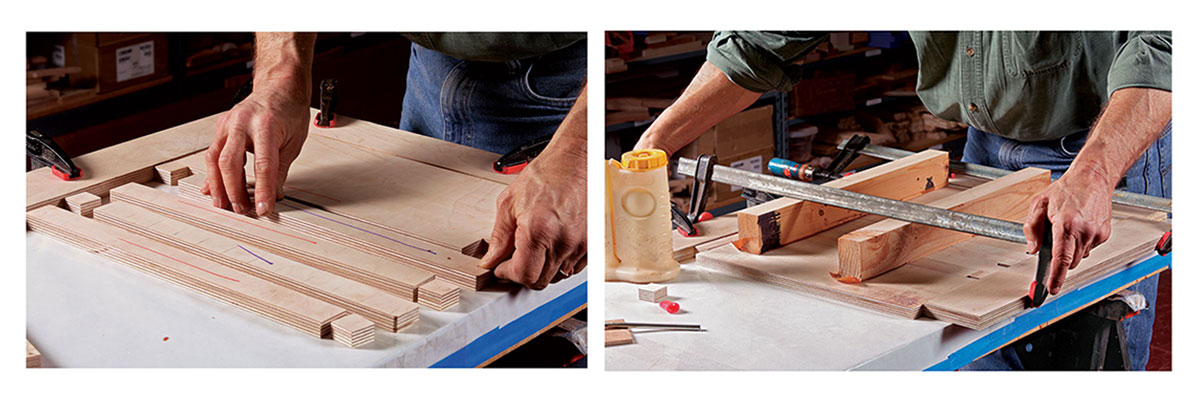
To create the large finger joints on the case, make a pair of routing templates by edge-gluing strips of 3/4-in. Baltic-birch plywood or MDF. For a snug fit, cut the strips for the template fingers about 1/64 in. narrower than the strips for the gaps.
After the glue dries, the templates may need flattening with coarse-grit sandpaper. I use a wide-belt sander here, but a belt sander would also work. Then attach the registration blocks and toggle clamps that lock in the workpiece. Be sure to cut some test joints before using the templates on your project.
To start the joinery, mark the finger locations on the blanks and jigsaw away the bulk of the waste between them. Clamp each blank to the template and rout, using a 1/4-in.-dia. spiral flush-trimming bit with a bottom bearing. This leaves the inside corners on each finger with a 1/8-in. radius. To create a matching 1/8-in. roundover on the mating fingers, remove the workpiece from the template and rout the finger edges with a miniature bearing, 1/8-in.-radius roundover bit (Amana Mr0112). The joints should close on dry-fit with medium clamping pressure. If not, carefully clean up the inside corners with a rat-tail file.
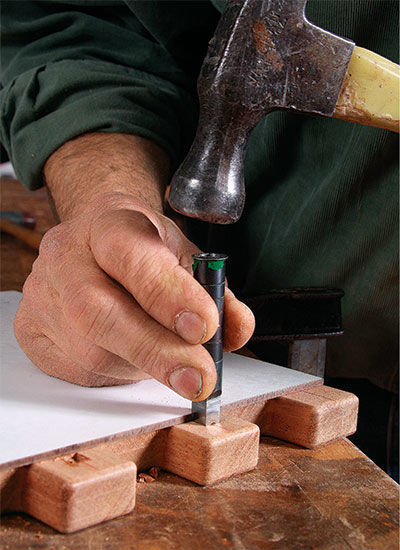
The finger joints are reinforced with screws hidden by square ebony plugs. To cut the square holes, I use a hollow punch from Lee Valley. To help align the holes, I clamp a straightedge to the workpiece. After laying out the peg locations, register the punch against the straightedge and strike it with a steel hammer to set it in place. Then use a twist bit inside the punch and drill about 3 ⁄ 8 in. deep. Remove the bit and punch the tool to the depth of the drilled hole. You can re-insert the bit to remove debris, but don’t make the hole any deeper.
– Darrell Peart makes furniture in Seattle.
Photos: Steve Scott.
Drawings: Christopher Mills.
For the full article, download the PDF below.
Fine Woodworking Recommended Products
Freud Super Dado Saw Blade Set 8" x 5/8" Bore

Stanley Powerlock 16-ft. tape measure

Veritas Precision Square




Comments
I have a set of these punches that Darrell refers to and they work fantastic. Still available from Lee Valley, i forget the price but I got the whole set and the grinding cones for sharpening them. Indispensable for G&G furniture makers. And Darrell is a nice guy on top of that 😀
Log in or create an account to post a comment.
Sign up Log in