How to Cut Perfect Dovetails with Tape
Learn how painter's tape can help you cut perfect dovetails.
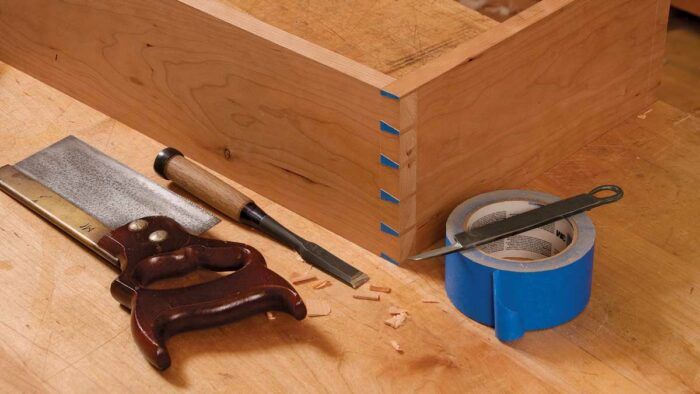
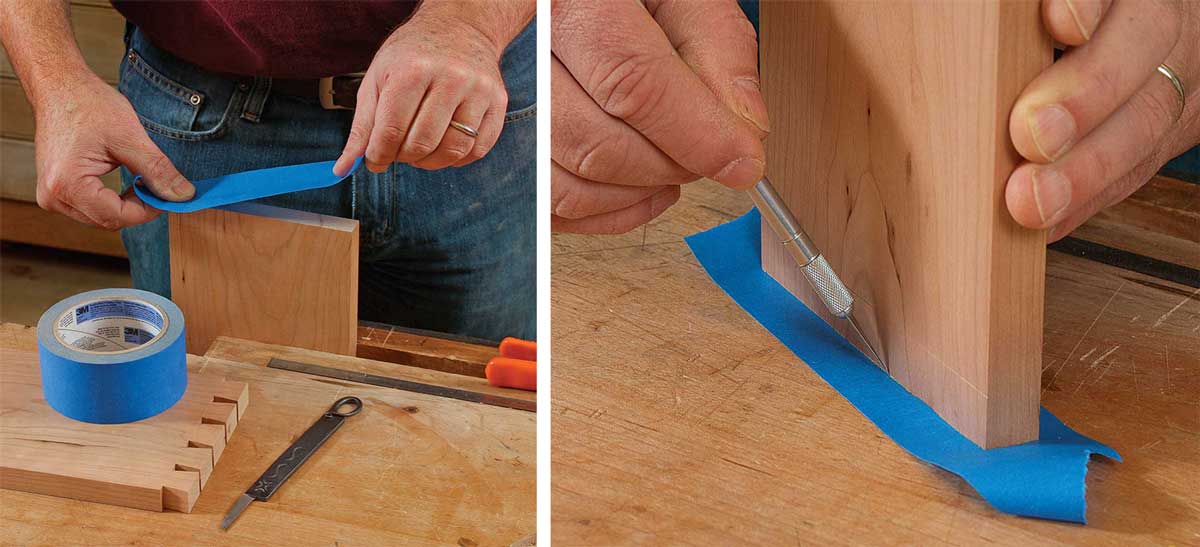
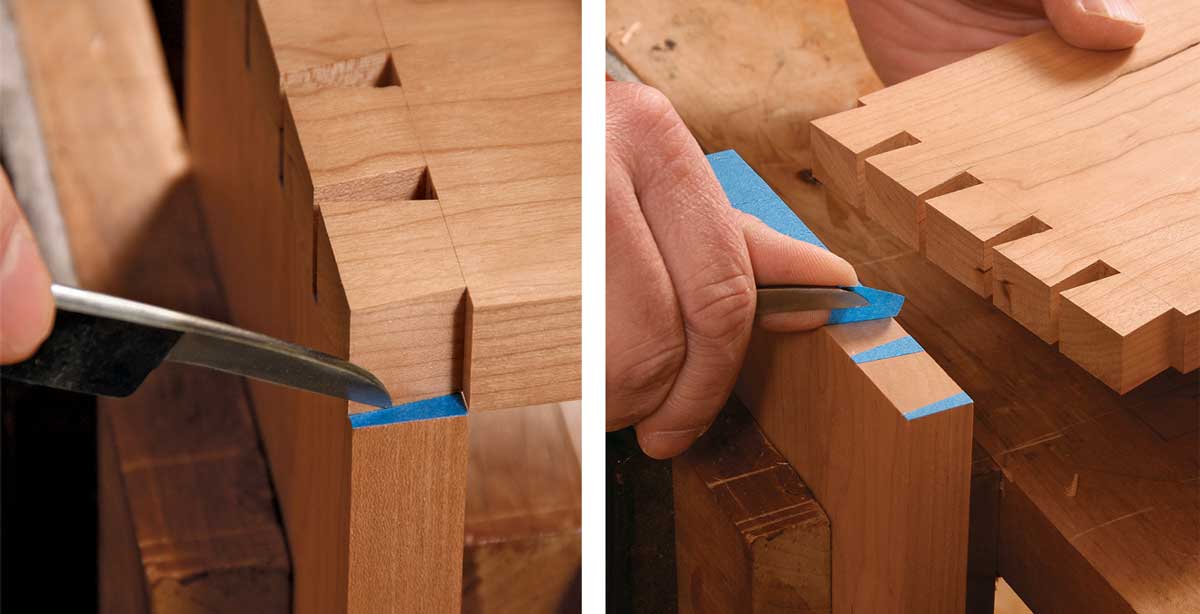
Synopsis: Learn how ordinary blue painter’s tape can help you cut tight-fitting dovetails every time. Michael Pekovich’s method has been tested on novice woodworkers and it works remarkably well. Just lay a strip of blue tape across the end grain and scribe the joint. Peel away the waste areas, and use the tape as a guide for sawing and paring. Not only does it make layout lines easier to see, but it also serves as a guide for your saw and chisel, ensuring accurate dovetails.
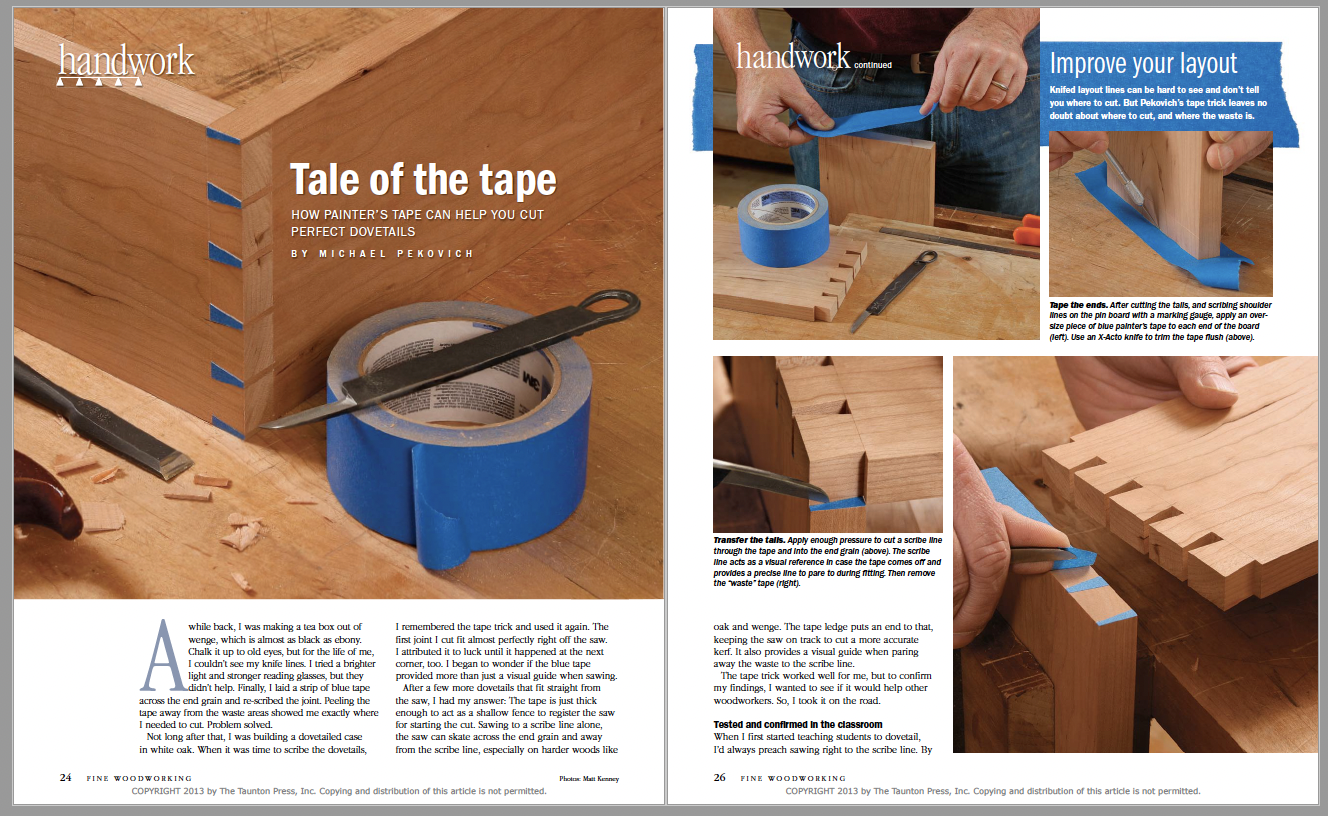
A while back, I was making a tea box out of wenge, which is almost as black as ebony. Chalk it up to old eyes, but for the life of me, I couldn’t see my knife lines. I tried a brighter light and stronger reading glasses, but they didn’t help. Finally, I laid a strip of blue tape across the end grain and re-scribed the joint. Peeling the tape away from the waste areas showed me exactly where I needed to cut. Problem solved.
Not long after that, I was building a dovetailed case in white oak. When it was time to scribe the dovetails I remembered the tape trick and used it again. The first joint I cut fit almost perfectly right off the saw. I attributed it to luck until it happened at the next corner, too. I began to wonder if the blue tape provided more than just a visual guide when sawing.
After a few more dovetails that fit straight from the saw, I had my answer: The tape is just thick enough to act as a shallow fence to register the saw for starting the cut. Sawing to a scribe line alone, the saw can skate across the end grain and away from the scribe line, especially on harder woods like oak and wenge.
The tape ledge puts an end to that, keeping the saw on track to cut a more accurate kerf. It also provides a visual guide when paring away the waste to the scribe line. The tape trick worked well for me, but to confirm my findings, I wanted to see if it would help other woodworkers. So, I took it on the road.
Tested and confirmed in the classroom
When I first started teaching students to dovetail, I’d always preach sawing right to the scribe line. By cutting closer to your mark, you’ll do more accurate work with less fitting. While it’s great in theory, it was not so great in practice. Students tended to shy away from the scribe line when cutting pins, resulting in more paring and fitting. It was also common for students to cut on the wrong side of the line, which guarantees gappy joints.
When I taught a class at the Marc Adams School of Woodworking that involved a dovetailed case, I decided to break out the blue tape to see if it would help any of the students. I was amazed at how quickly they blazed through the dovetailing process and I was equally stunned by the exceptional results they achieved. Not only did the tape guarantee that the students were cutting on the right side of the scribe line, but it also gave them the confidence to saw right up to it. I think that it must be easier to envision cutting next to a piece of tape than cutting exactly adjacent to a skinny little knife line. No matter the reason, I am convinced that the tape trick wasn’t just an illusion.
 From Fine Woodworking #240
For the full article, download the PDF below:
Fine Woodworking Recommended Products

Marking knife: Hock Double-Bevel Violin Knife, 3/4 in.
Freud Super Dado Saw Blade Set 8" x 5/8" Bore

Starrett 4" Double Square




Comments
Does the blue tape trick work as well with pins first?
Log in or create an account to post a comment.
Sign up Log in