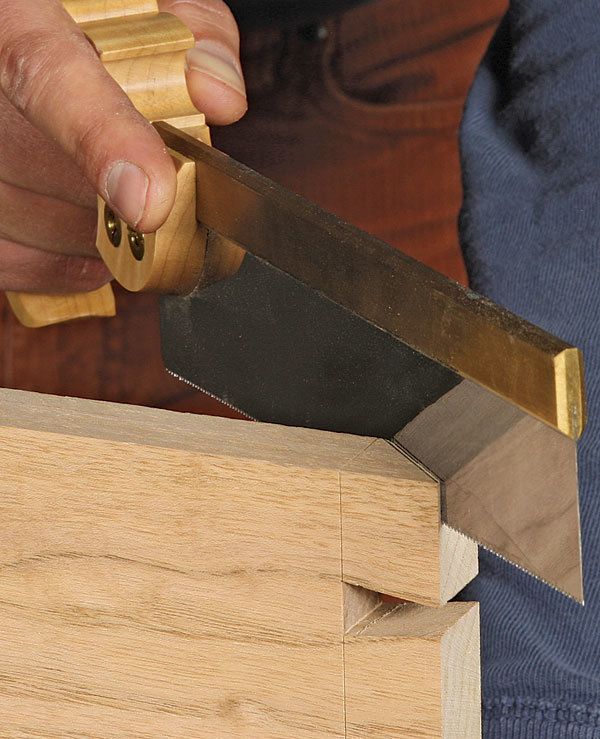
Mitered Dovetails
A bit of chisel work adds sophistication to a mitered dovetail joint.

Synopsis: A dovetailed box is a fine example of craftsmanship in its own right. Add a miter to the top edge and it’s even more slick. Add a second miter to hide the through-grooves the the bottom panel and you’ve got something even better. Here, John Tetreault shows you how to use miters to kick up the refinement of your pieces just a notch. It isn’t difficult, and it pays off handsomely in the finished look of the piece.
My town’s agricultural fair has a farm museum that includes a woodworking shop. When I was asked to demonstrate hand-tool techniques at the fair, I decided to make this kindling box as I did so. It’s a traditional piece that’s also useful in the modern home. Simple and sturdy, the box has through-dovetails at the corners; however, to give it a more refined look, I mitered the joint at the top edge. I also mitered a section of the joint so I could hide the through-grooves for the bottom panel.
You might think that mitering a dovetail joint is difficult, but it isn’t very different from cutting a normal through-dovetail joint. In fact, it differs only in the two spots where there are miters: at the top edge and where the groove is. Because I cut tails first, nothing about the technique changes until I transfer the tails. Fortunately, it’s not complicated.
Lay out the miters after cutting the tails
I start this joint as I would any through-dovetail joint—by laying out and cutting the tails. There is one thing to keep in mind when laying out the tails: Make sure to use a half-tail at the top edge of the board, where it will be mitered.
After cutting the tails, I transfer them to the pin board with a marking knife. It’s necessary to do this before you miter the tail board, because after mitering there will no longer be a surface to register the knife against. Now, pull the tail board out of the way and raise up the pin board in the vise so that you can wrap the marks you just made down the outside face of the board to the shoulder line. A pencil and square do that job well.
Next, flip the board around and mark three lines down the inside face of the pin board. These lines indicate where the joint will be mitered: one line for the miter at the top edge, and two for the miter at the groove.
For the full article, download the PDF below:
Fine Woodworking Recommended Products

Marking knife: Hock Double-Bevel Violin Knife, 3/4 in.

Suizan Japanese Pull Saw

Veritas Precision Square


Log in or create an account to post a comment.
Sign up Log in