Try This Versatile Mortising Jig
Learn how to build an adjustable jig to cut mortises in curved or straight parts.
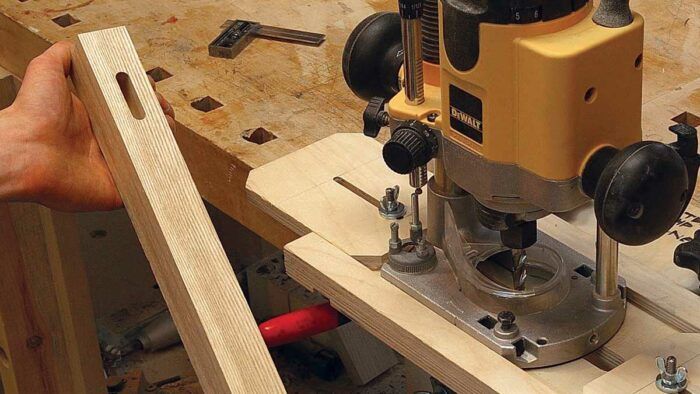
Synopsis: Learn how to build a versatile jig to cut mortises in three ways using a router. Michael Fortune first created this ingenious jig to make clean and accurate mortises in curved pieces. He soon discovered that the jig works just as well in straight pieces and is flexible enough to use for end-grain mortising, such as for slip tenons. Fortune shares detailed information on building and using the jig. The article includes a project plan as well.
One of the challenges when working with curved parts is how to cut joinery on them. When tapering solid stock, it’s best to cut the joinery before cutting the taper, but this is not possible with laminated work, such as the bent, tapered laminations described in the previous article. A few years back, I created a simple jig that enables me to cut mortises in a variety of curved pieces. I’ve since discovered that the jig works equally well when mortising straight pieces, or cutting mortises in end grain.
The jig consists of a mounting block, a fixed vertical piece, and a sliding top surface. The mounting block is secured to the front edge of a workbench between two benchdogs. Alternatively, it can be screwed to a longer piece of plywood that is clamped to the top of the workbench.
It is important that the dadoes in the top surface and the mounting block are in matching locations to receive the 3⁄4-in.-thick ultrahigh molecular weight (UHMW) plastic slide bars. The plastic and other hardware is available at www.rockler.com.
Lay out the mortise on the workpiece and then clamp it to the front vertical surface of the jig, touching the underside of the top. Now slide the top forward until the mortise is centered in the large viewing slot. Eyeballing it is sufficient, as once set up, the jig will cut matching parts identically. Now place the router on the jig and lower the bit until it just touches one end of the mortise. Slide the adjustable stop up to the base (round or square) of the router and tighten the wing nut. Repeat these steps at the other end.
Setup in 3 steps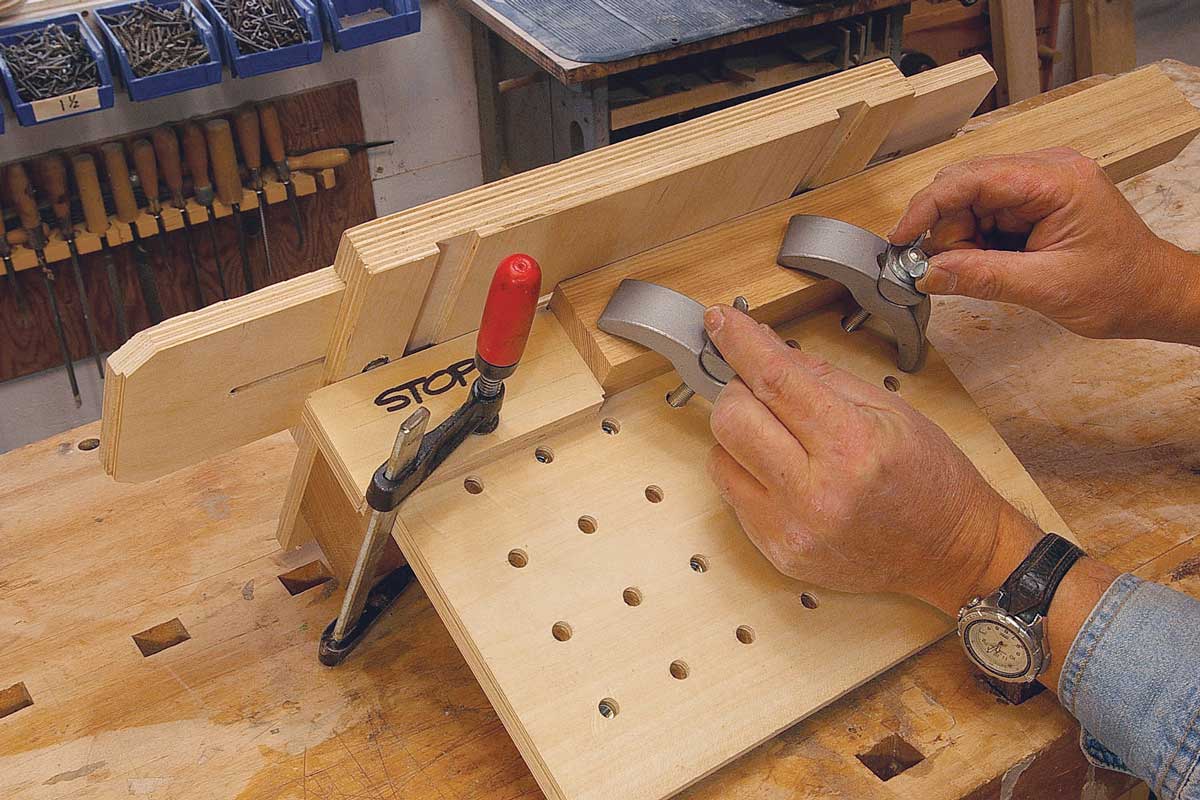 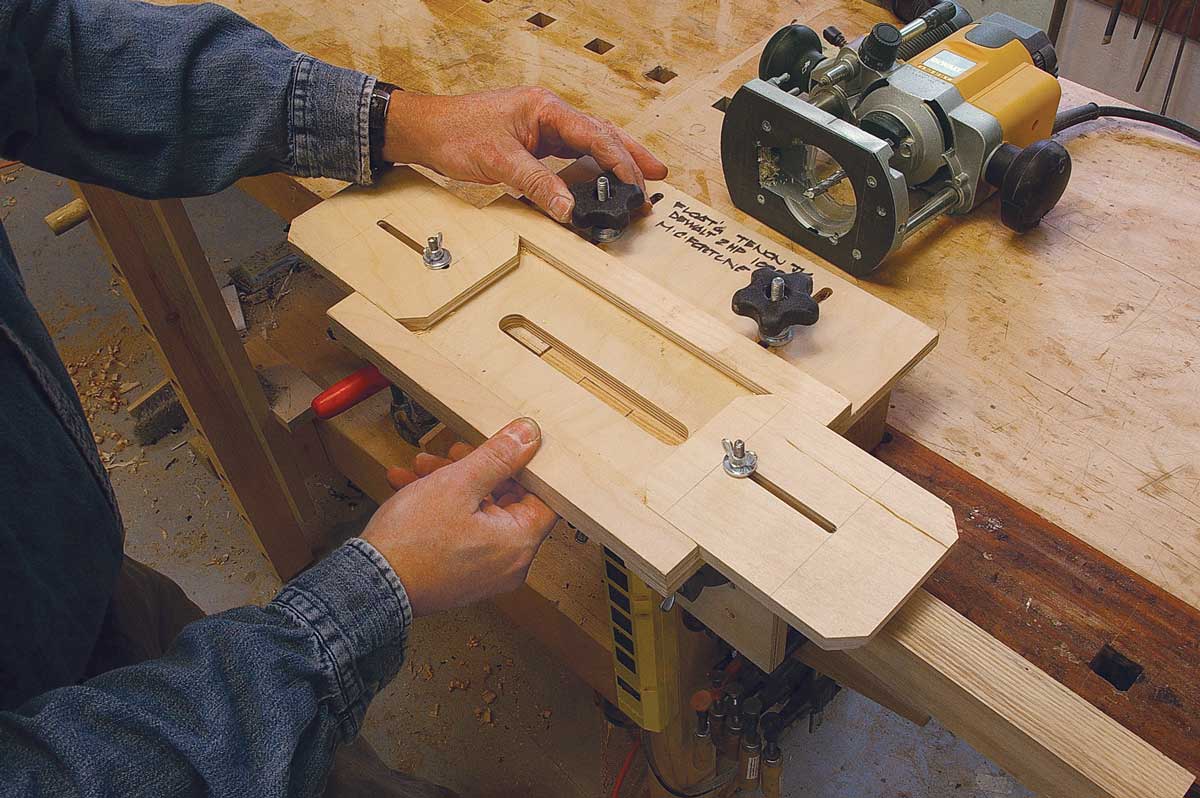 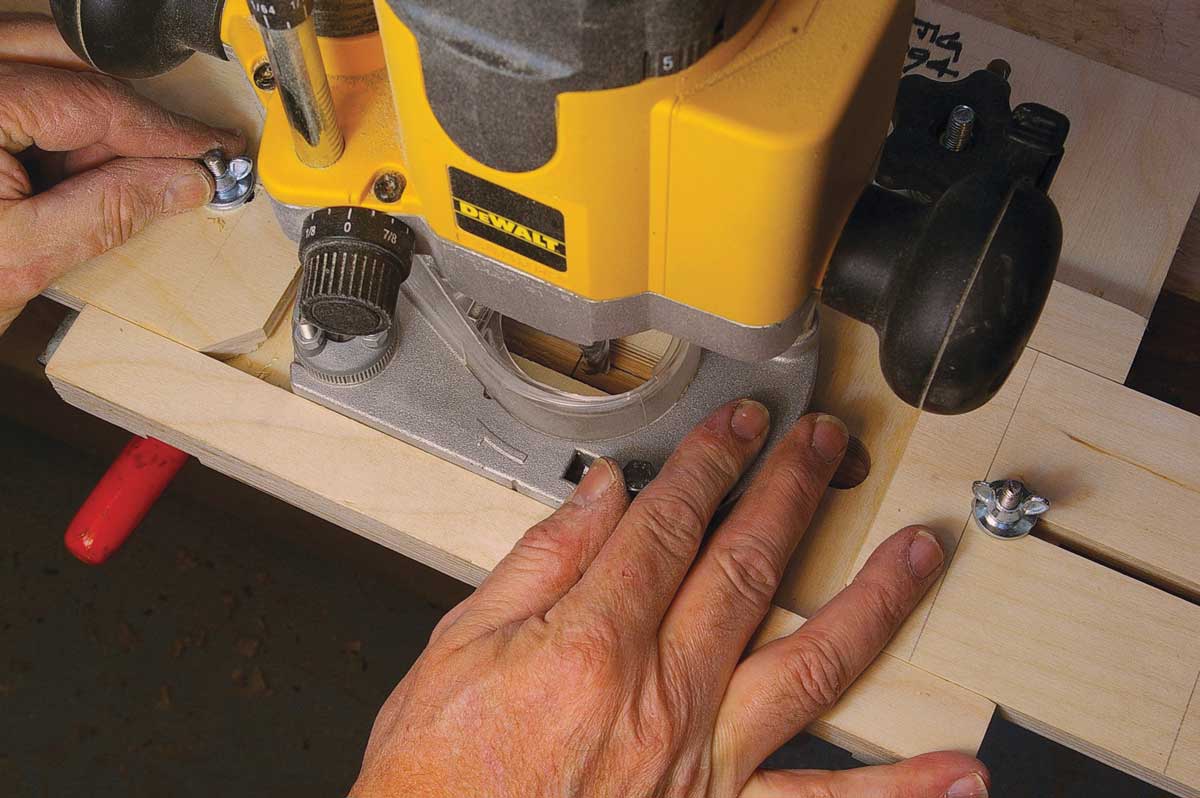 |
Although you can use any straight bit, I use two-flute (three- or four-flute bits won’t plunge) high-speed end mills available at www.wttool.com. You will need to buy a collet adapter for the 3⁄8-in. dia. shaft. The bits work perfectly at 12,000–20,000 rpm. I plunge in a maximum 1⁄8 in. and do a medium-fast pass from side to side, not hesitating at the ends. The bit’s spiral upcut design clears the chips from the mortise and a vacuum attached to the router removes them.
From Fine Woodworking #197
For the full article, download the PDF below:
Fine Woodworking Recommended Products
Incra Miter 1000HD
Hedgehog featherboards
Woodriver Circle Cutting Jig


Log in or create an account to post a comment.
Sign up Log in