A Trick for Cutting Smooth Curves on the Bandsaw
Using the back edge of the bandsaw blade to pivot through curves leads to less waste and more accurate cuts.

Ben Strano: I’ve been working on a ukulele build this week, which involves making lots of particle board templates. As part of that, I’ve been cutting a lot template parts on the bandsaw, trying to get as close to the line as I can so I don’t have to route away a lot of waste. In order to do that, I’ve been using the Michael Fortune technique (see below) of pivoting off the back of the blade, especially for starting tapered cuts on the bandsaw in the middle of an edge.

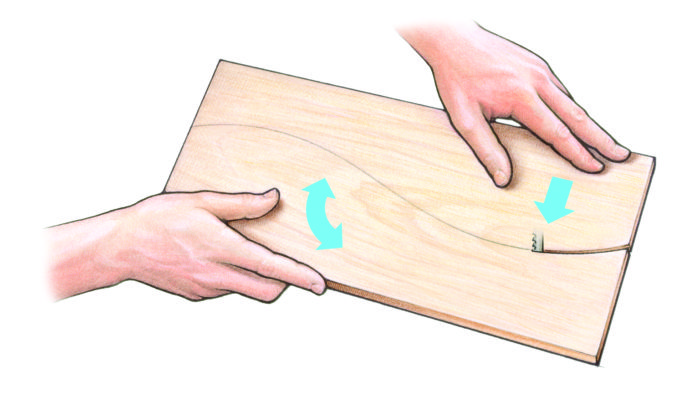
Mike Pekovich: That’s cool. I’ve heard Michael Fortune describe how use the back of the blade to pivot when you’re already inside the cut. Basically, when you’re cutting a curve, you can’t pivot off the teeth because they’ll gouge into the wood as you’re rotating. If the rear of the blade is just centered in your kerf, there’s no bearing point at all so if you don’t move the wood with perfect precision, you’ll get a wobbly cut. But if you rotate the stock just a little bit so that the rear of the blade is touching one side of the kerf as you cut, you have a pivot point off of which to steer. He’d be using a wider blade, like a half inch blade. How wide of a blade are you using?
Ben: Actually, right now I’m in love with my 3/16-in blade. It was the sharp blade I had on hand.
Mike: Wait, you’re riding the back edge of a 3/16-in blade? That seems kind of narrow.
Ben: It works specifically when starting a tapered cut off of an edge, like when you want to go from parallel to the edge and transition into a curve. You put the piece up against the side of the blade, and then pivot off of the back of the blade into the cut. Doing that, you can start the cut exactly where you want and the blade doesn’t drift at all.
Mike: Wow! That’s a cool technique! Normally going into that kind of cut the blade would get all squirrelly and want to bend away from the stock.
Ben: Yep, but this way you can stick the piece in place, start the cut and then roll. It takes a little practice but once you get the hang of it, it’s very precise.
(Taken from Shop Talk Live Episode 187)
From “Flawless Curves on the Bandsaw” by Michael Fortune, Issue #199
(Read Fortune’s full article here.)
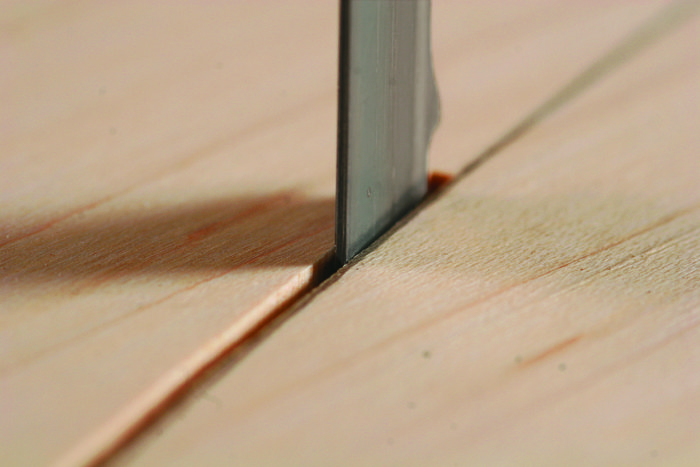
The most common problem encountered when cutting a freehand curve is that the cut is wavy and not always precisely parallel with the line you want to follow. The set on the blade’s teeth (the distance the teeth project from the sides of the blade) allows the wood to move from side to side until it encounters the flat sides of the blade. I found a way to overcome this problem by slightly twisting the wood during the cut so that one side of the kerf remains in contact with the back edge of the blade (see photos, below). In essence, the back of the blade serves as a steady rest, eliminating the side-to-side wobble and allowing you to control the cut with precision. The technique certainly takes some practice (you may want to try it with a wider blade at first), but you’ll be shocked at the results.


Comments
I've been doing some cutting and had the same problem. I'll try this technique with my 3/8 inch blade.
Thanks!
Good live video! Good luck guys in the next times!
Nice video and interesting article with helpful information. Thanks.
Log in or create an account to post a comment.
Sign up Log in