Flatten Boards Without a Jointer
A sled lets you use just your planer to mill lumber to any thickness.
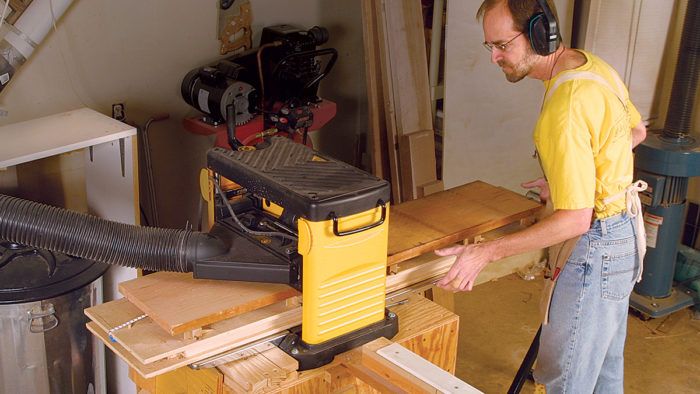
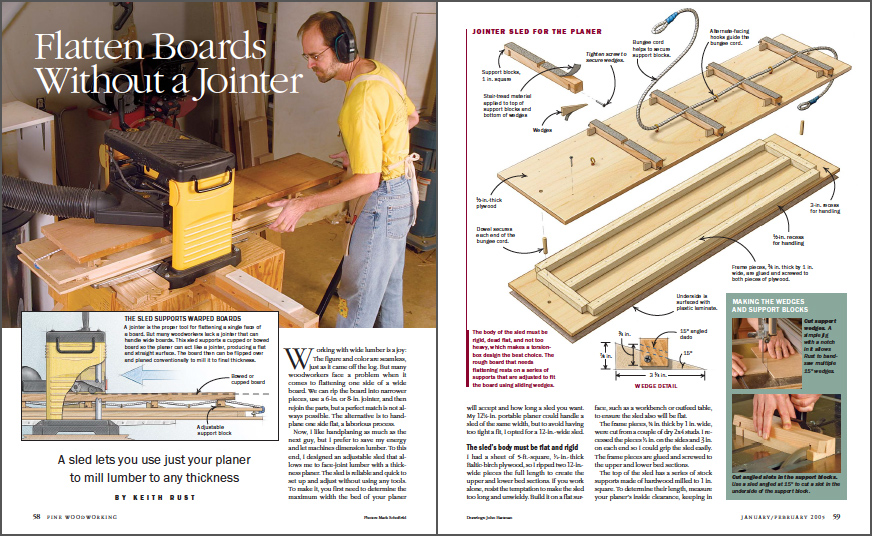
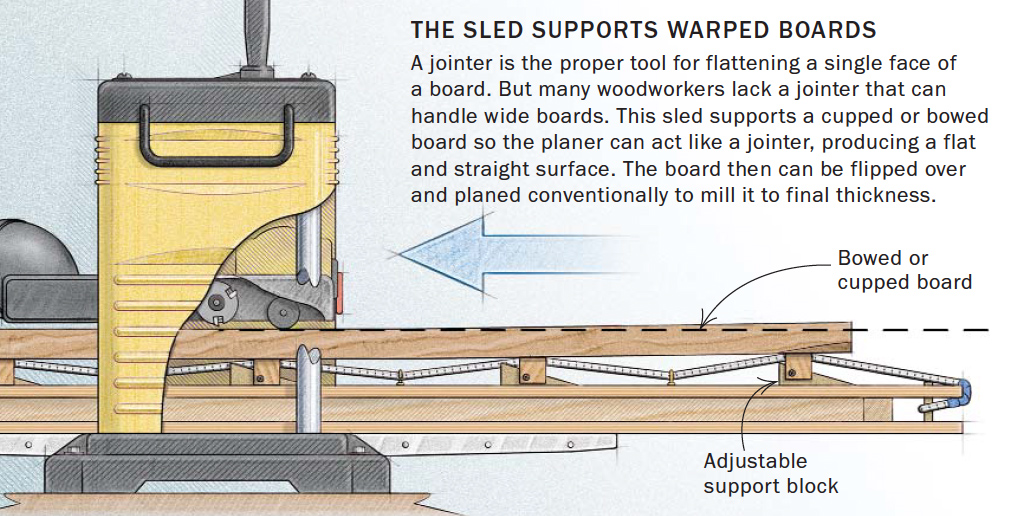
Working with wide lumber would be a joy if not for the dilemma of how to flatten the boards. The obvious method is to rip a wide board into narrower strips, use a 6-in. or 8-in. jointer, and then rejoin the parts. Finding this unsatisfactory, woodworker Keith Rust designed an adjustable sled that lets him mill wide boards with a thickness planer. The body of the sled uses a torsion-box design, which keeps it rigid and flat without adding too much weight. The board to be flattened rests on a series of adjustable supports. Now Rust is flattening 12-in. boards and loving it.
Now, I like handplaning as much as the next guy, but I prefer to save my energy and let machines dimension lumber. To this end, I designed an adjustable sled that allows me to face-joint lumber with a thickness planer. The sled is reliable and quick to set up and adjust without using any tools. To make it, you first need to determine the maximum width the bed of your planer will accept and how long a sled you want. My 12-1/2-in. portable planer could handle a sled of the same width, but to avoid having too tight a fit, I opted for a 12-in.-wide sled.
The sled’s body must be flat and rigid
I had a sheet of 5-ft.-square, 1/2-in.-thick Baltic-birch plywood, so I ripped two 12-in.- wide pieces the full length to create the upper and lower bed sections. If you work alone, resist the temptation to make the sled too long and unwieldy. Build it on a flat surface, such as a workbench or outfeed table, to ensure the sled also will be flat.
The frame pieces, 3/4 in. thick by 1 in. wide, were cut from a couple of dry 2×4 studs. I recessed the pieces 1/2 in. on the sides and 3 in. on each end so I could grip the sled easily. The frame pieces are glued and screwed to the upper and lower bed sections.
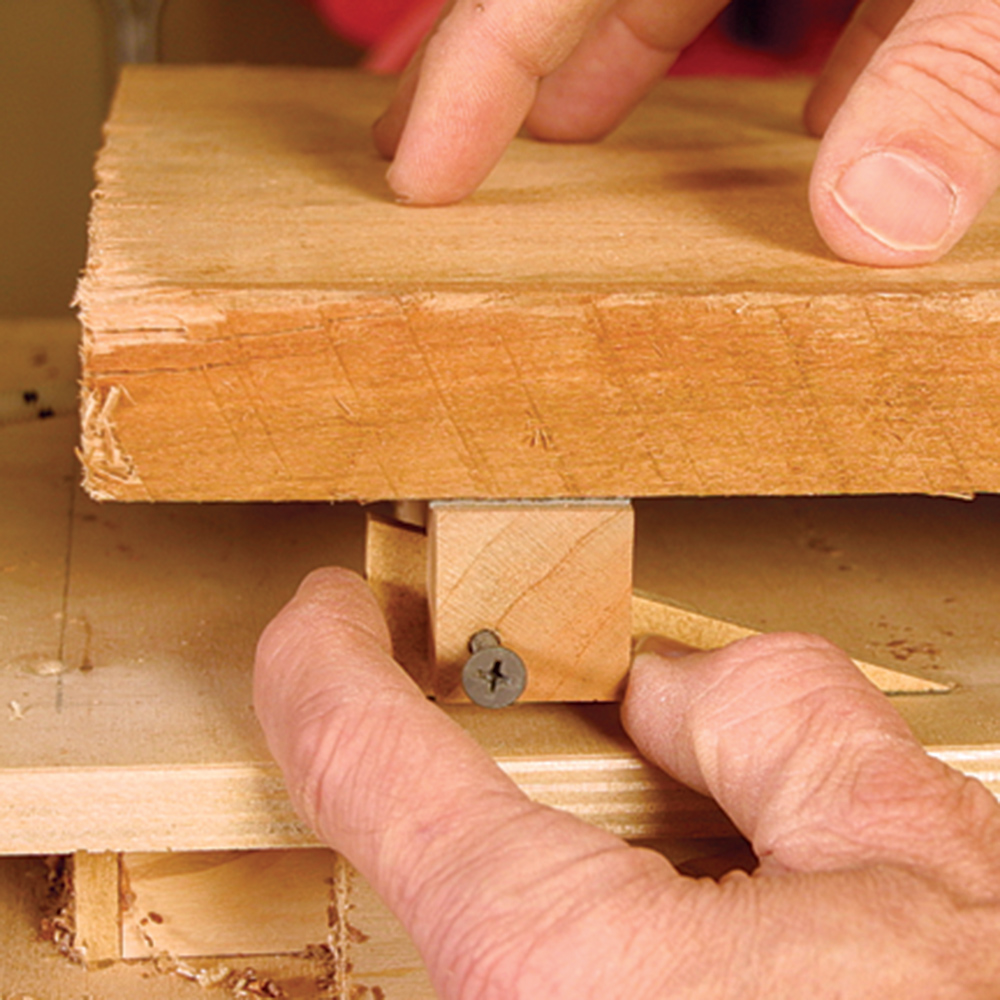
The top of the sled has a series of stock supports made of hardwood milled to 1 in. square. To determine their length, measure your planer’s inside clearance, keeping in mind that the supports will have about 1/2 in. of a drywall screw sticking out each end. My planer allowed for 11-1/2-in.-long supports with no danger of a screw head touching anything on the way through.
Click here to watch a video of the planer jig in action.
From Fine Woodworking #175
To view the entire article, please click the View PDF button below.
Fine Woodworking Recommended Products
Grout float

Starrett 12-in. combination square

Stanley Powerlock 16-ft. tape measure



Comments
I've been using this planer jig for a month now and it works like a charm!
Thanks Keith you've made my life a lot easier.
I've been using this planer jig for six months now and it's saved me a lot of time and enhances the look of my projects. Thanks Keith for and outstanding idea!
I've had a sled I've been using for many years using a similar principle as Keith's. But i really like Keith's plan, especially the wedges. I've modidfied mine now. A couple features I incorporated: 1) the lower board is a piece of melamine (old sled), replace the bungee cord with a piece of wood, and 3) place a stop at the end of the sled that is about 1/4-1/2 above the last support block to prevent the board being planed from slipping.
Thanks Keith!
Log in or create an account to post a comment.
Sign up Log in