Learn to Resaw
Tim Rousseau shares expert tips on setting up a bandsaw to cut perfect veneers and custom parts.
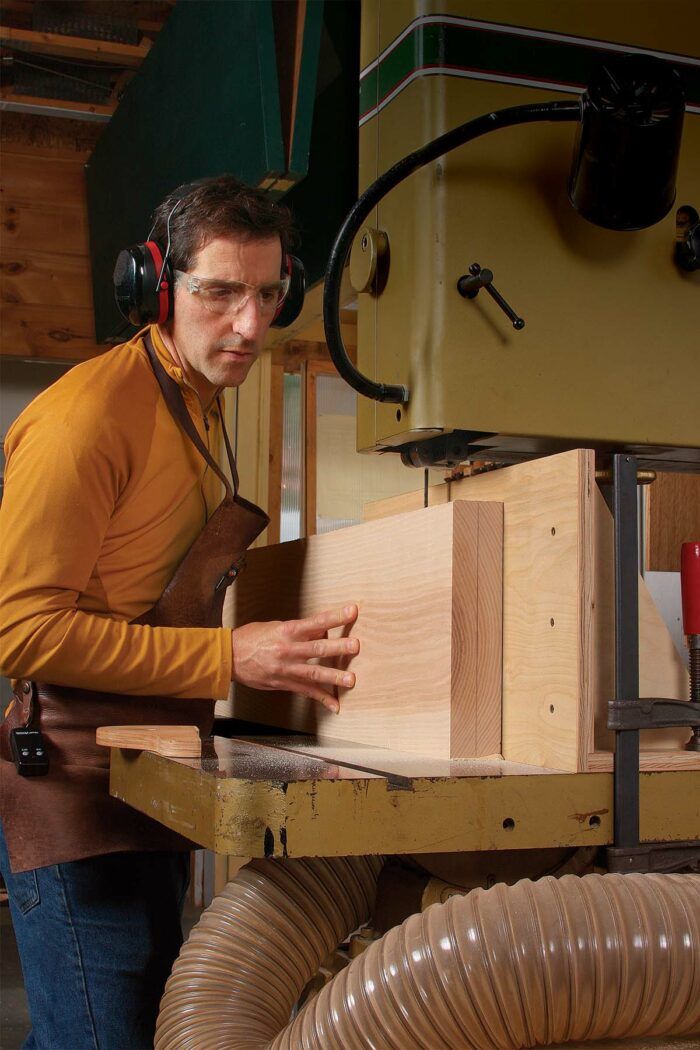
Synopsis: Resawing, the process of cutting thinner boards or veneers from thick stock, comes as a revelation to many beginning woodworkers. It’s what frees you from the dimensional constraints of the boards available at the sawmill and allows you to create perfect boards of multiple sizes and thicknesses. All it requires is a bandsaw and some know-how, and Timothy Rousseau has both. Here, he shows you how to set up the bandsaw for resawing, choose the correct blade, add a shop-made resaw fence, and finally, make a series of thinner boards out of one thick one. Master resawing and your furniture designs will take off.
Few techniques in woodworking can have as much impact on the design of your furniture as resawing. resawing, the process of cutting thinner boards or veneers from thick stock, frees you from the dimensional constraints imposed on the board at the sawmill. rather than compromising your design to work with the lumber as you bought it, you can saw the wood to create perfect boards for the project at hand.
The bandsaw is the ideal tool for this task, whether you have a 14-in. saw with 6 in. of resaw capacity or a 20-in. monster that can handle boards 12 in. or wider. With the right setup, you can cut thin book-matched or slip-matched boards for a door panel, create frames with perfectly straight grain, or slice a gorgeous board into a stack of thin veneers, ready for a tabletop, drawer fronts, or case construction.
Ready your bandsaw for resawing
No matter what size saw you have, you won’t resaw successfully if it isn’t set up well. Especially important areas are the blade, guides, and fence.
After putting the blade on the saw, many woodworkers fuss with centering it perfectly on the top wheel in an effort to eliminate drift, where the blade doesn’t cut in a straight line. But that works only if the wheels are perfectly coplanar, which may not be the case with every saw. My simple approach is to get the blade aligned in the center as best I can, set its tension, and then move on to the guides. I can adjust the saw’s fence to match the blade’s drift later.
Every bandsaw has two sets of guides— one above and one below the table. Each set has two guides on the side of the blade and one behind it. Set up correctly, the guides keep the blade cutting straight without deflecting. Start with the top set. It’s critical to get the guides as close as you can to the blade without them being in constant contact, which means that when the blade is spinning, the guides should touch it only intermittently. With bearing guides, you’ll see the guide spin-off and on. If you have block guides, listen for the sound of the blade running against them. Set up the side guides first, and then the thrust bearing. Set up the guides beneath the table last.
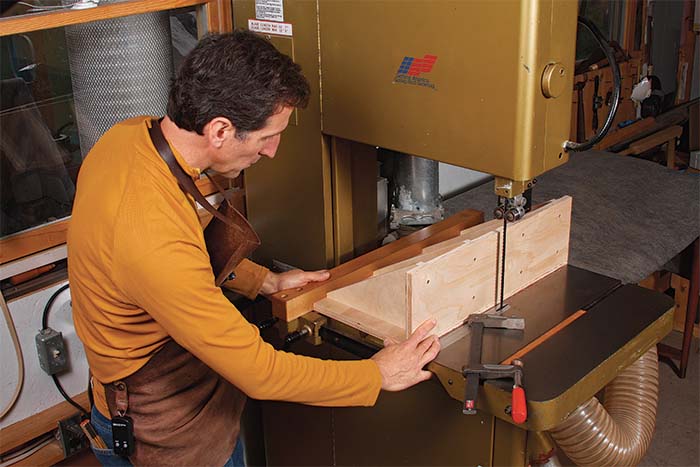
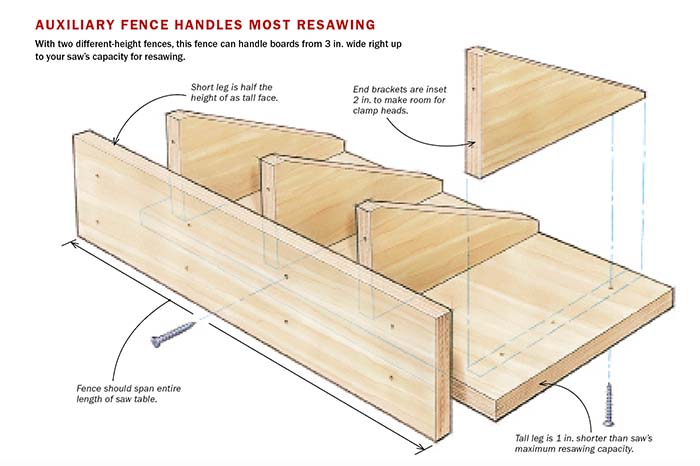
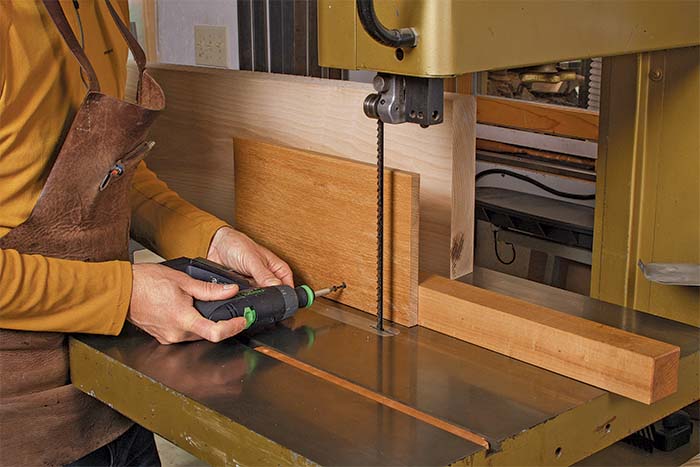
A properly set up fence ensures that the veneers and boards you cut are of a consistent thickness. Most stock fences can be used to resaw narrow boards. My saw’s fence is 2 in. tall, and I use it for boards up to 3 in. wide. For anything wider, I use an auxiliary fence clamped to the bandsaw table. My fence is shaped like the letter L. The short leg is 6 in. tall and handles boards up to 8 in. wide, while the longer leg is 1 in. short of my saw’s resaw capacity (13 in.), and I use it for boards wider than 8 in.
Clean and straight resaw cuts—ones that create veneer and boards with parallel faces—are impossible if the fence isn’t parallel to the blade’s drift, or the angle of its cut. Fortunately, adjusting the fence to account for drift is a simple process.
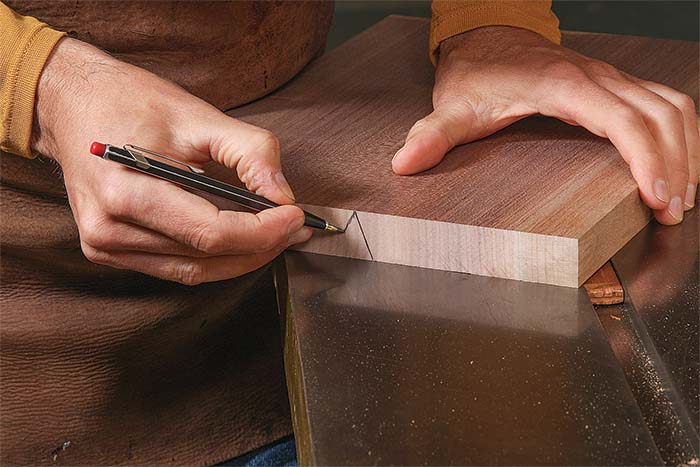
Mill a board flat and square, and then draw a line down its length, 1⁄4 in. from the edge. Cut along this line until the board is 8 in. or more past the blade. More than likely you’ll notice that the board is slightly angled inward or outward. That angle shows which way the blade is drifting. Turn off the bandsaw, clamp the board in place, and bring the saw’s fence up to the board’s edge. Adjust the fence angle so that it touches the board along its full length. Lock it at that angle. The fence is now aligned to the blade’s drift so that the saw will cut in a straight line.
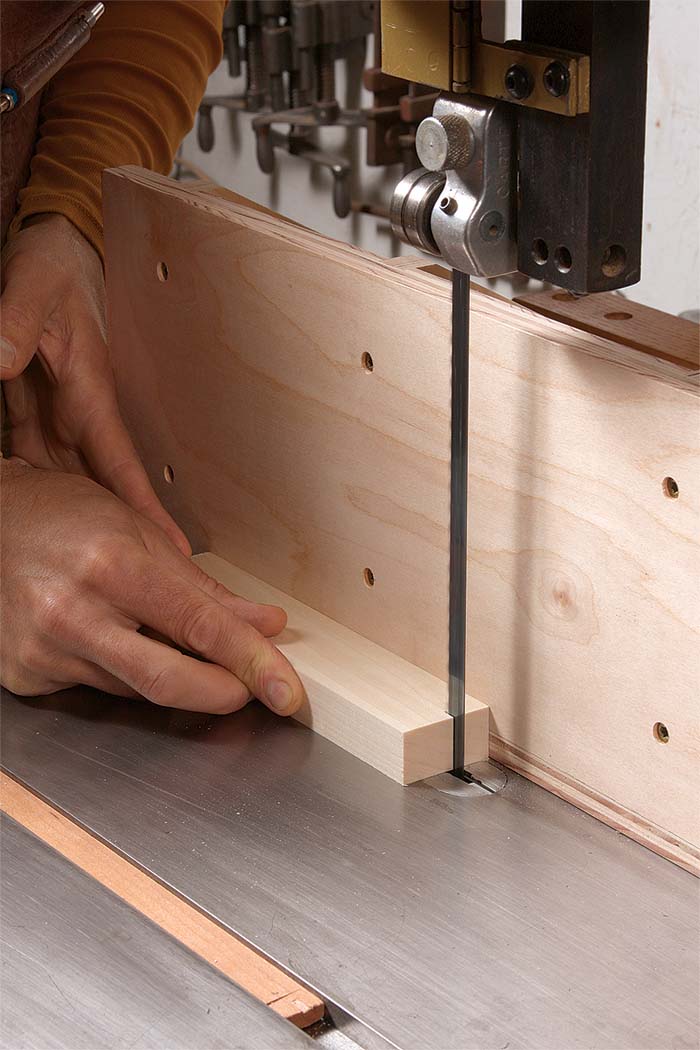
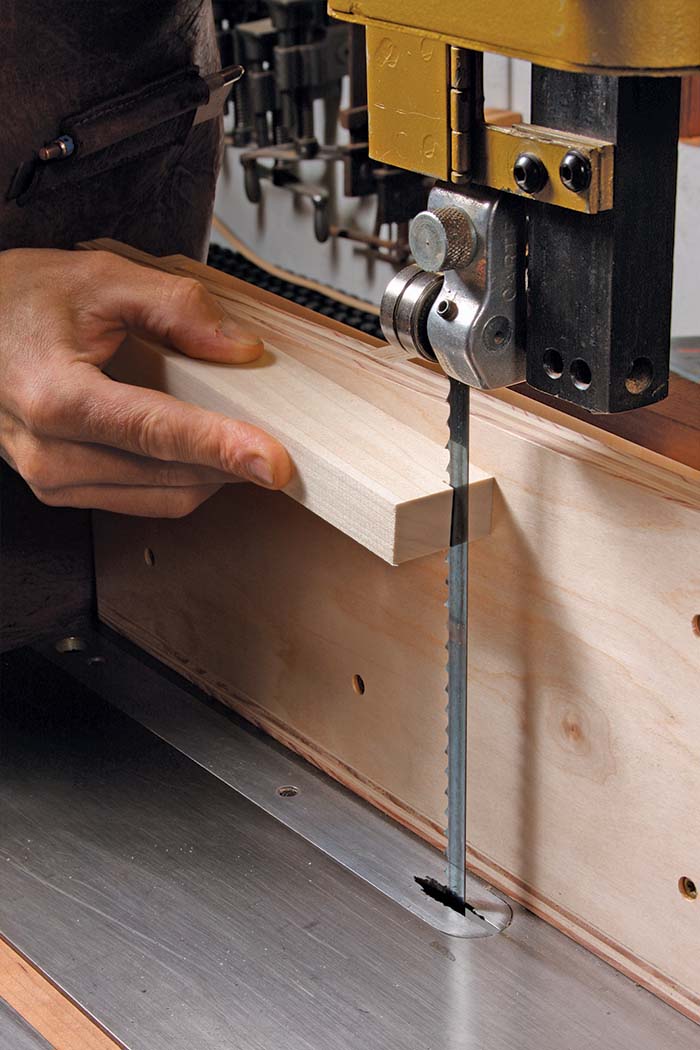
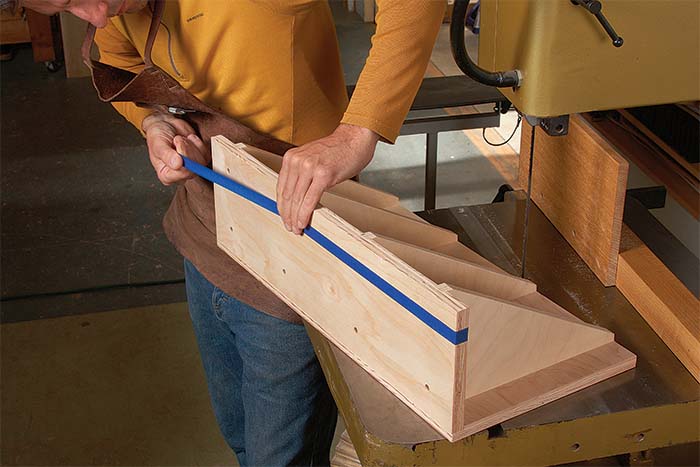
Finally, make sure that the fence’s vertical alignment is also parallel to the blade (see p. 57). Otherwise, the veneer and boards you cut won’t have parallel faces. If it’s not, shim the base with blue tape.
Technique: Steady feed rate improves the cut
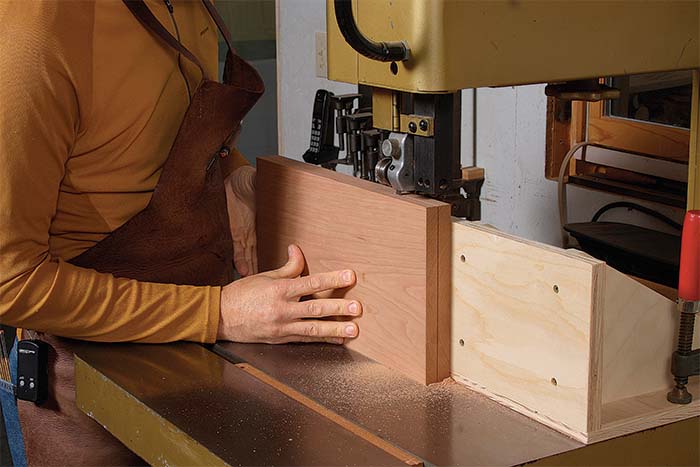
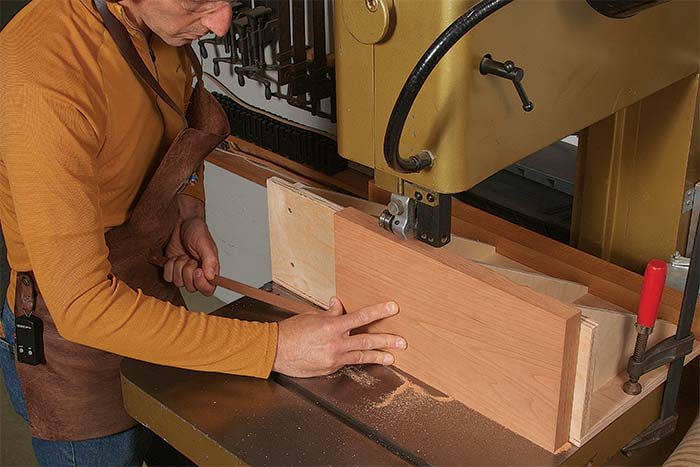
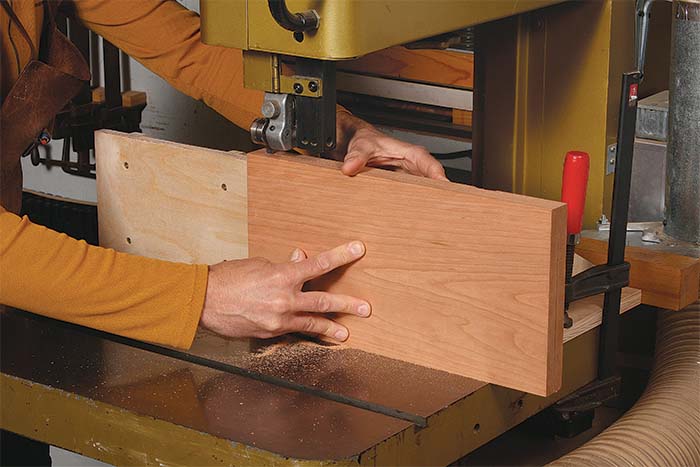
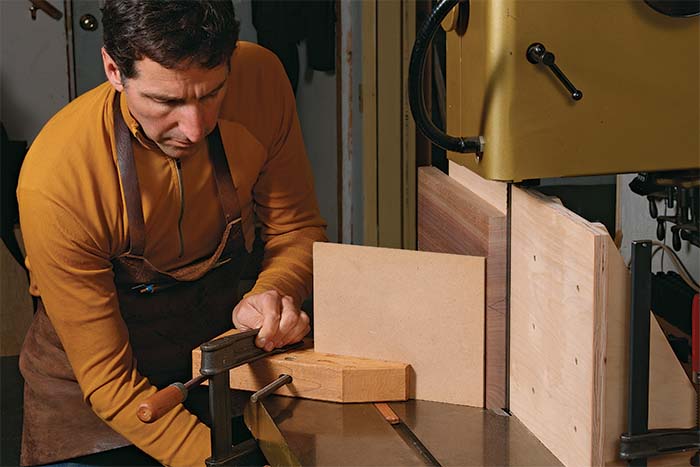
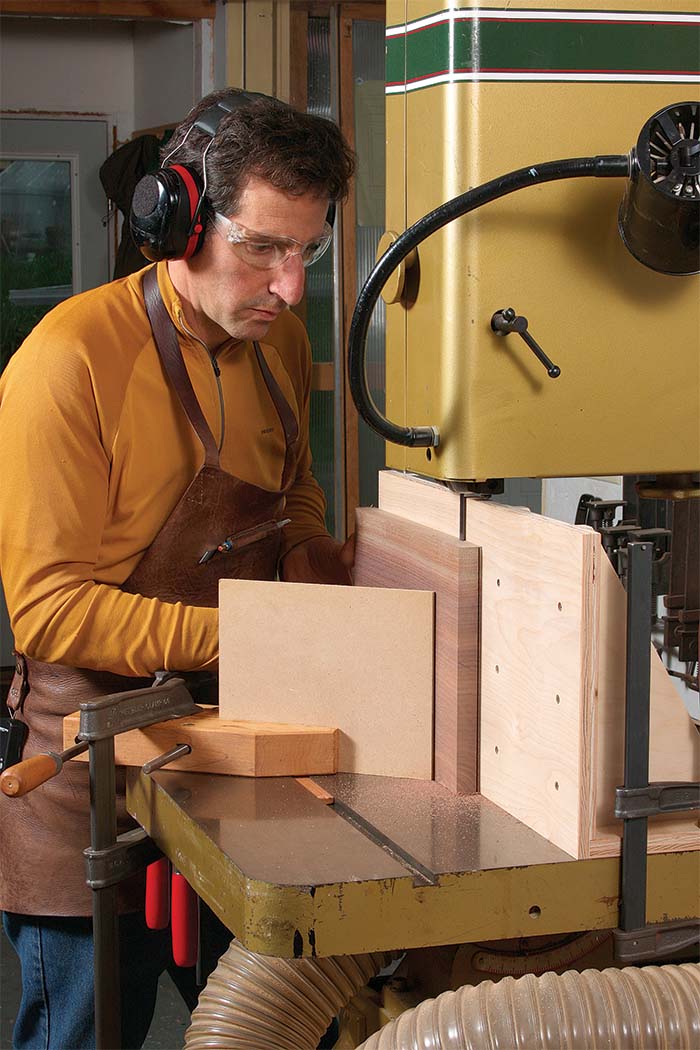
When resawing, it’s critical to apply sideward pressure to the board so that it stays tight against the fence. To saw a thick board into thinner ones, I use my right hand to apply this pressure. However, when cutting veneers, a better option is a tall shopmade featherboard. I use a piece of 1⁄4-in. MDF is held by a hand clamp, which spreads pressure over the entire width of the board, helping to create veneers of consistent thickness.
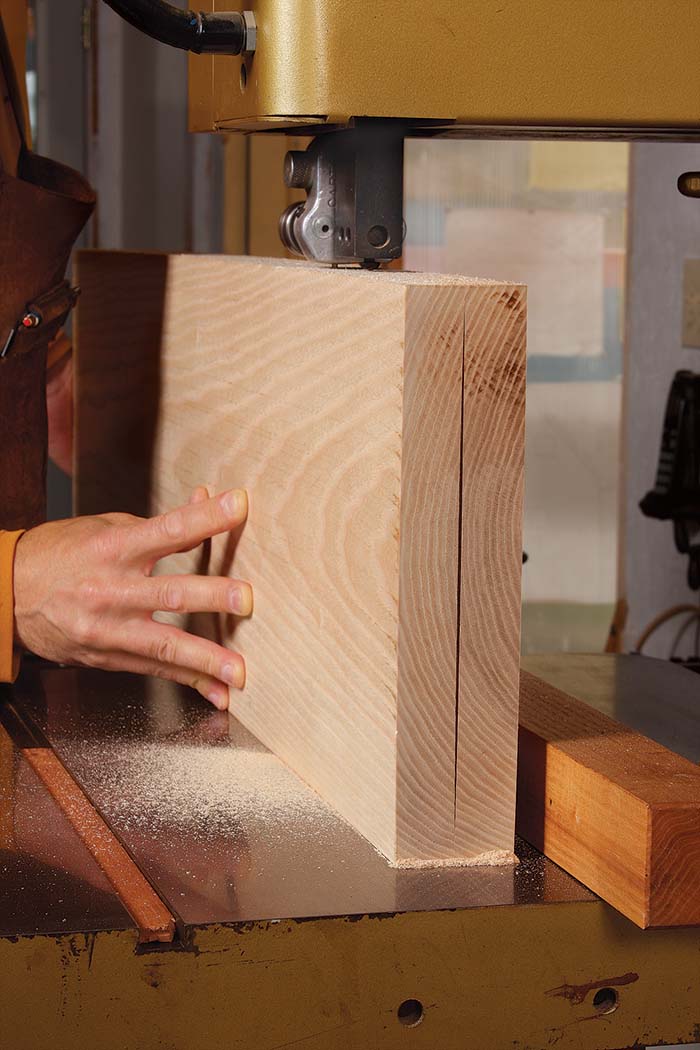
Equally as important as sideward pressure on the board is that you maintain a consistent feed rate as you send the board through the blade. Halting or stuttering the feed creates a much rougher cut, and that means you have to remove more material from the resawn face later to get it straight, flat, and smooth. And removing more material will worsen any book-match you’re trying to achieve.
By the way, if you’re cutting three or more thin boards from a single thicker one, rejoint the face between each cut. If you’re just cutting a thick board into two thinner ones, you can save the jointing until after you’ve let the boards sit for a while.
Sticker boards before milling
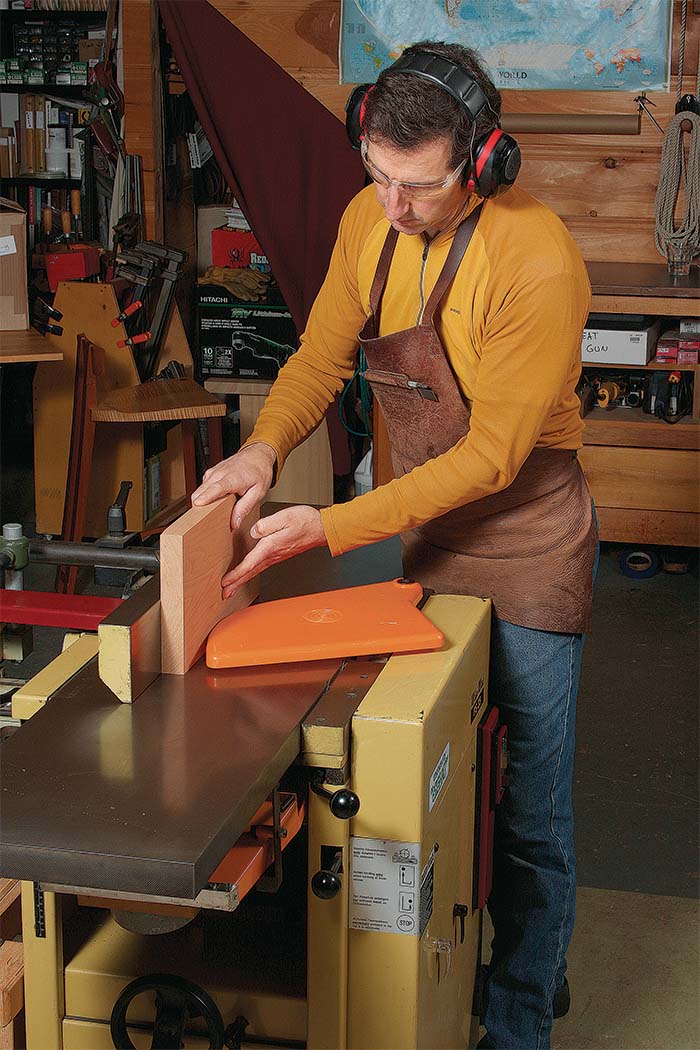
After resawing, new boards and veneers must be treated differently. The veneer is so thin that even if it’s cupped or bowed you can still glue it to a substrate because clamping pressure will flatten it easily. As for smoothing it, the most reliable way is with a drum sander, a handplane, or a cabinet scraper. Another possibility is a planer with a segmented cutterhead (see photos, right), but you should expect that some of the veneer will get chewed up by the cutters and will not be usable. Don’t use a planer with straight knives, which eat up thin veneers like a kid mauling a bag of candy on Halloween.
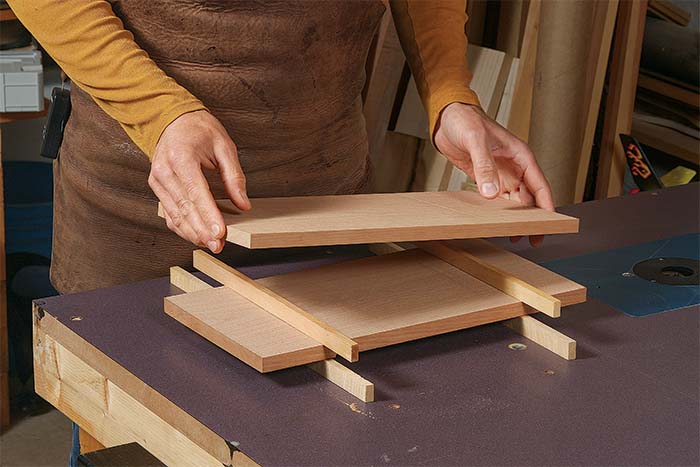
Anything thicker than veneer should be treated just like lumber that hasn’t been resawn. Resawing can release internal tensions that cause the new boards to move, so saw them over thick to allow for cupping, bowing, and other movements. How much? That depends on the board, but air-dried lumber is generally more stable than kiln-dried, quartersawn boards more stable than flatsawn, and boards that have a consistent moisture content throughout their thickness are more stable than those that don’t. After resawing, give the freshly cut boards 24 hours to settle down, making sure to sticker them to allow airflow all around them. You can then joint and plane them. After this initial milling, let them rest again and proceed to mill to final dimensions as you normally would.
Get the guides right
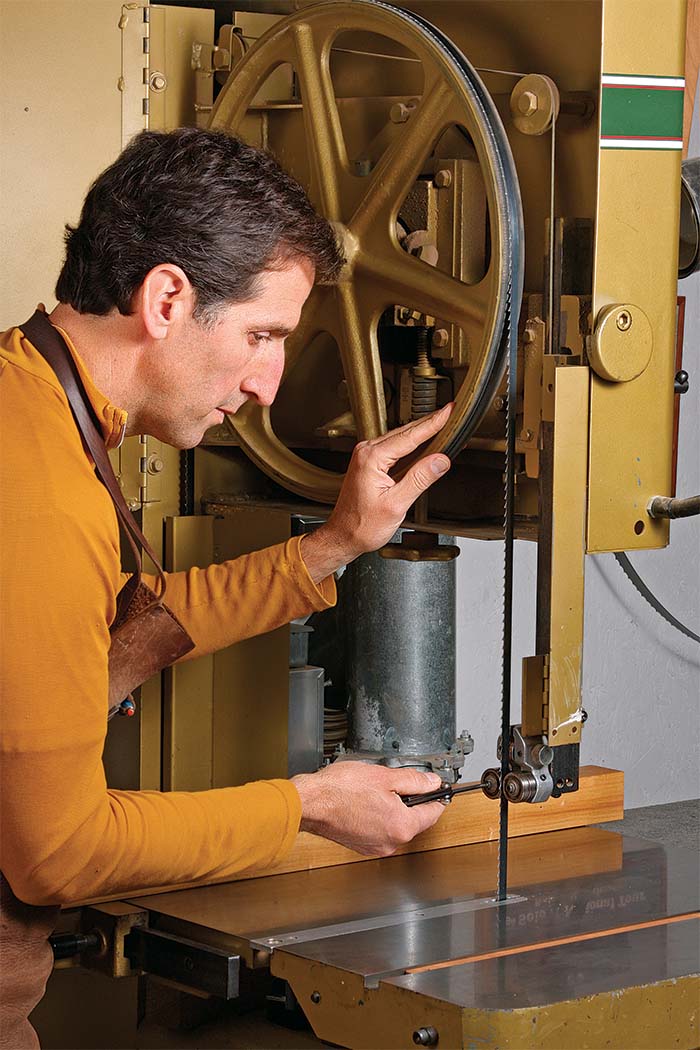
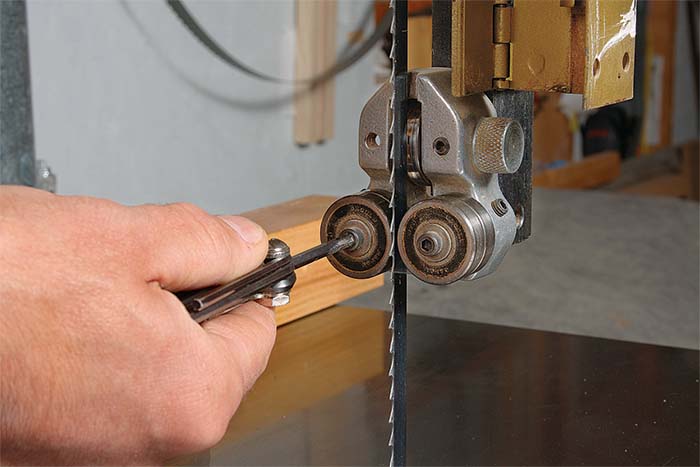
After installing and tensioning the blade, adjust the thrust bearing and side guides so that they just kiss the blade. The side guides should be just behind the blade’s gullets. This setup keeps the blade aligned and prevents binding.
 |
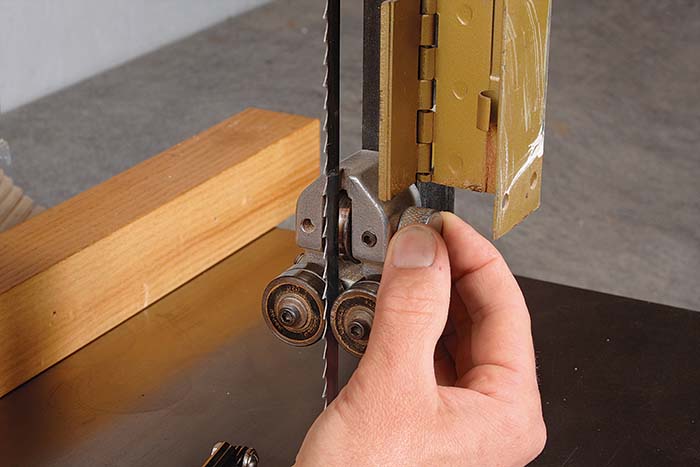 |
Snug the thrust bearing. Move it up until it begins to spin, then back it off a fuzz. When you spin the top wheel, the thrust bearing should spin intermittently.
Add a resaw fence
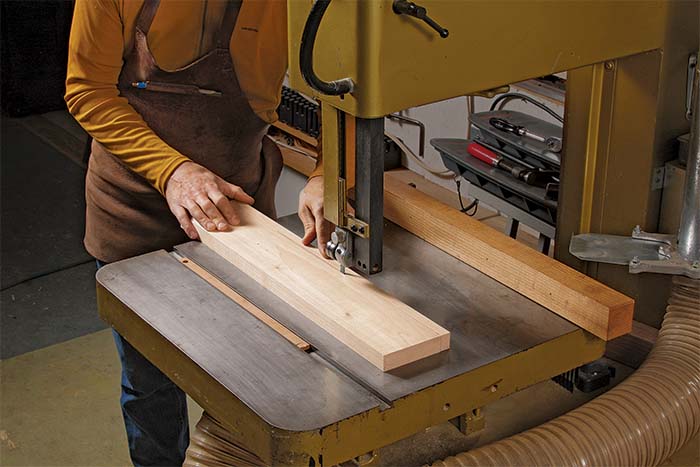
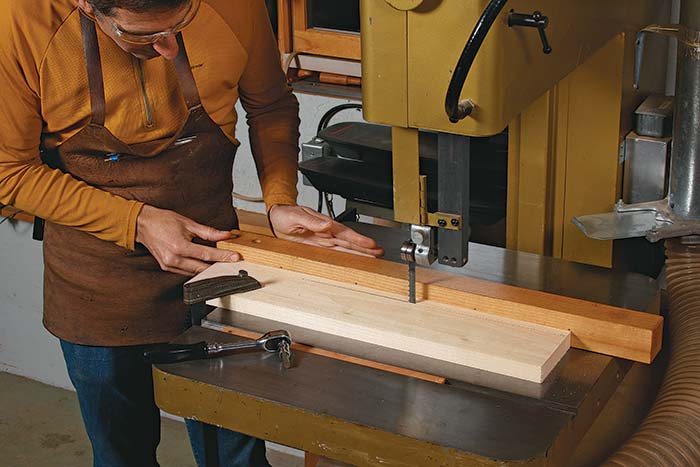
Start by adjusting your saw’s fence parallel to the blade to eliminate drift. Then use it to align the resaw fence when clamping it in place.
 |
 |
 |
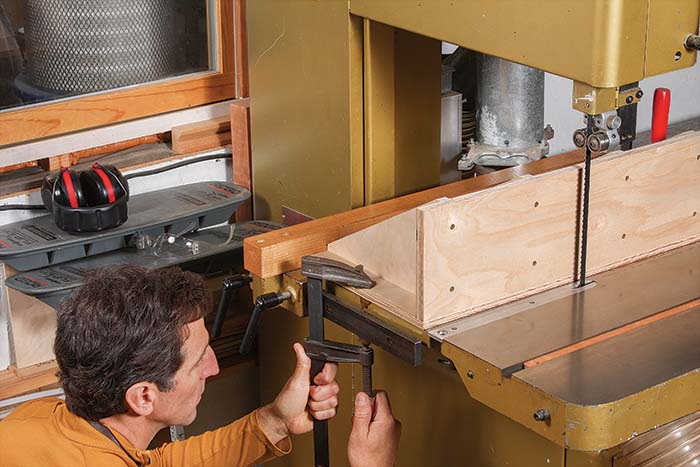 |
Use the saw’s fence to position the auxiliary fence. Keep the auxiliary fence snug against the saw’s fence as you set the width of the cut (left), then clamp it in place (right).
Resawing step by step
Resawing is the process of cutting a thicker board into thinner slices. The setup and technique are the same whether you’re resawing to get a book match for a door panel or to cut frame parts, legs, or aprons.
Make your own veneer
A beautiful or rare board goes a lot farther when sliced into sheets of veneer.
 |
 |
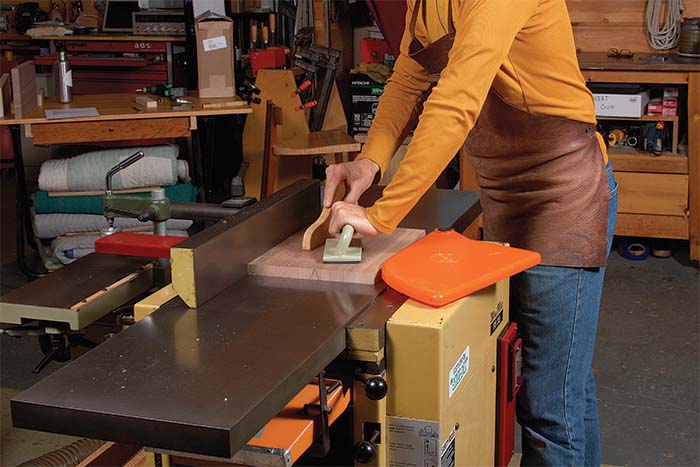
Two ways to clean it up
There’s no question that very thin pieces of wood are tough to surface. A drum sander is a great tool for the job, but here’s how to do it if you don’t have one.
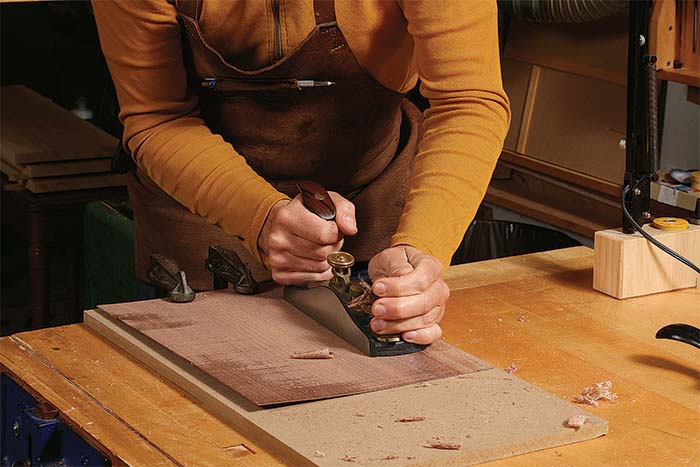 |
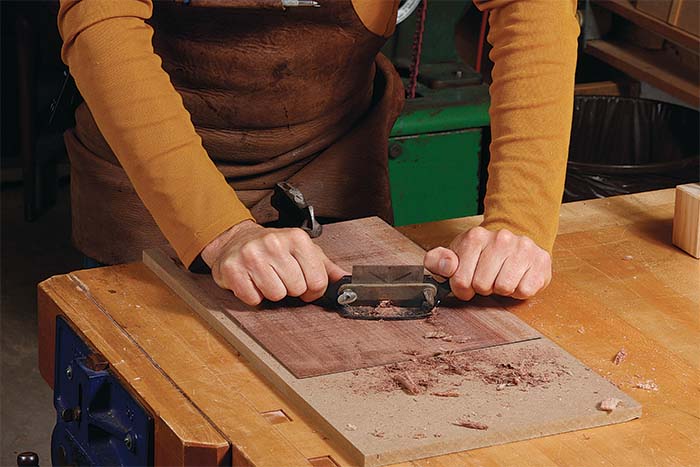 |
 |
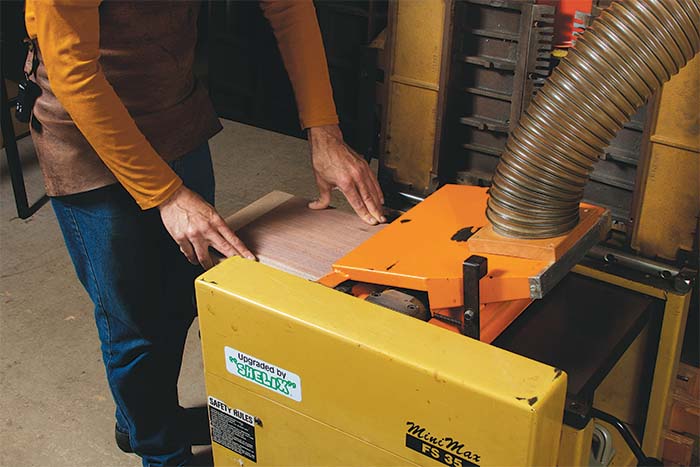 |
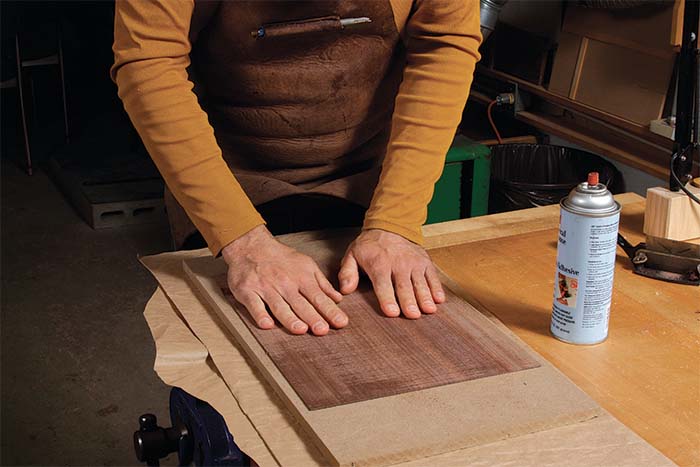
Or take advantage of new technology. Straight knives tend to mangle thin veneers, but segmented cutterheads handle them much better. Send the veneer through the planer on top of an MDF platen. Spray adhesive on the MDF creates enough tack to keep the veneer in place without permanently joining the two.
You don’t need a fancy blade
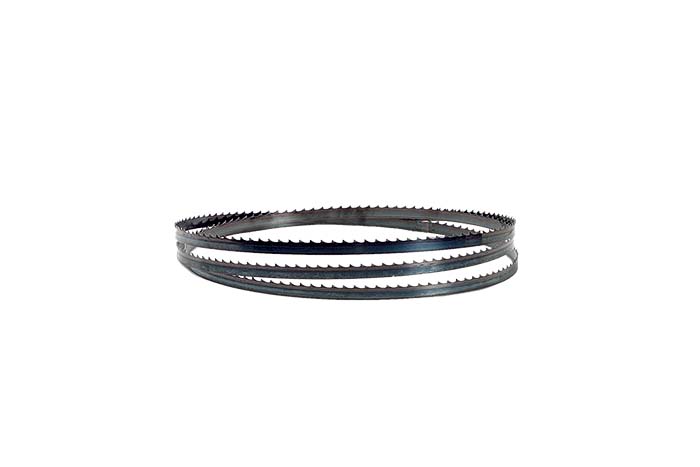
There are many blades designed for resawing—even some with carbide teeth—but it’s hard to beat a 1⁄2-in.-wide, 3-tpi, carbon steel hook-tooth blade. This blade is great for hard- and softwoods and does very well with rosewood, ebony, and other tough exotics. I prefer the hard-edge, flex-back blades from Sterling Saw (diamondsaw.com), which I buy from Mathieu Saws (mathieusaw.com).
TIP: Check for vertical alignment
Start by cutting a kerf into a scrap of wood (bottom left). Then turn off the saw, bring the scrap to the top of the fence, and try to slide the kerf into the sawblade (bottom right). If it doesn’t align, shim the bottom of the fence with blue tape (below).
 |
 |
A fence for boards that cup
Because of internal tensions and imbalances in moisture content, thick boards can cup and bow when resawn. A short fence prevents that movement from fouling the cut because it gives the wood open space to flex into. Rousseau made him from quartersawn hardwood, and it has remained flat after several years of use. It’s 10 in. tall (a few inches shorter than his saw’s resaw capacity) and extends 1 in. past the blade.
For the full article, download the PDF below:




Log in or create an account to post a comment.
Sign up Log in