Self-Centering Mortising Jig
This simple design makes on-the-mark mortises every time.
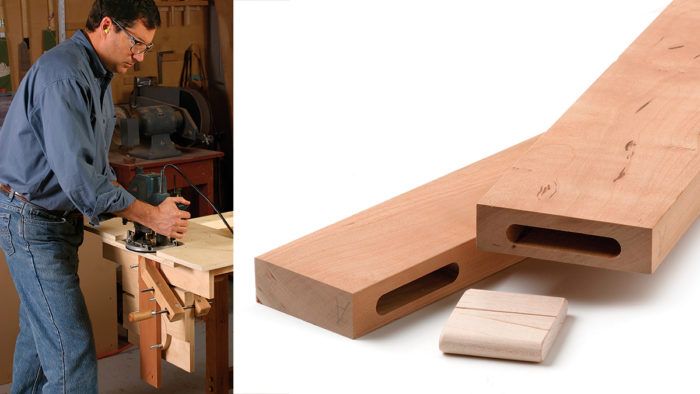
Synopsis: David Lehman’s mortising jig uses two vertically aligned, rotating circles with protruding metal bolts to center workpieces automatically and create matching mortises for use with loose tenons. It uses a simple stop-block setup to align mating pieces so that mortises will align precisely. To ensure lasting consistency, it is made of Baltic-birch plywood. Lehman explains how to build the jig and how to use spacers to vary mortise size and location so that it is possible to accurately cut narrow mortises, thick or offset pieces, and off-center mortises.
Recently, as I considered a set of bedroom furniture I was designing, I counted more than 50 mortise-and-tenon joints. I needed a way to make them as simply, precisely, and consistently as possible. To me, that meant using loose tenons; it’s much easier than with standard tenons. There are no shoulders to cut (and then fine-tune) for a perfect fit. There’s no need to add tenon length to rail length; just cut to exact shoulder-to-shoulder dimensions. And it’s easier to cut tenons separately than at the ends of rails.
All it takes is two perfectly matching mortises in mating pieces. and I decided a shopmade jig would do that job best.
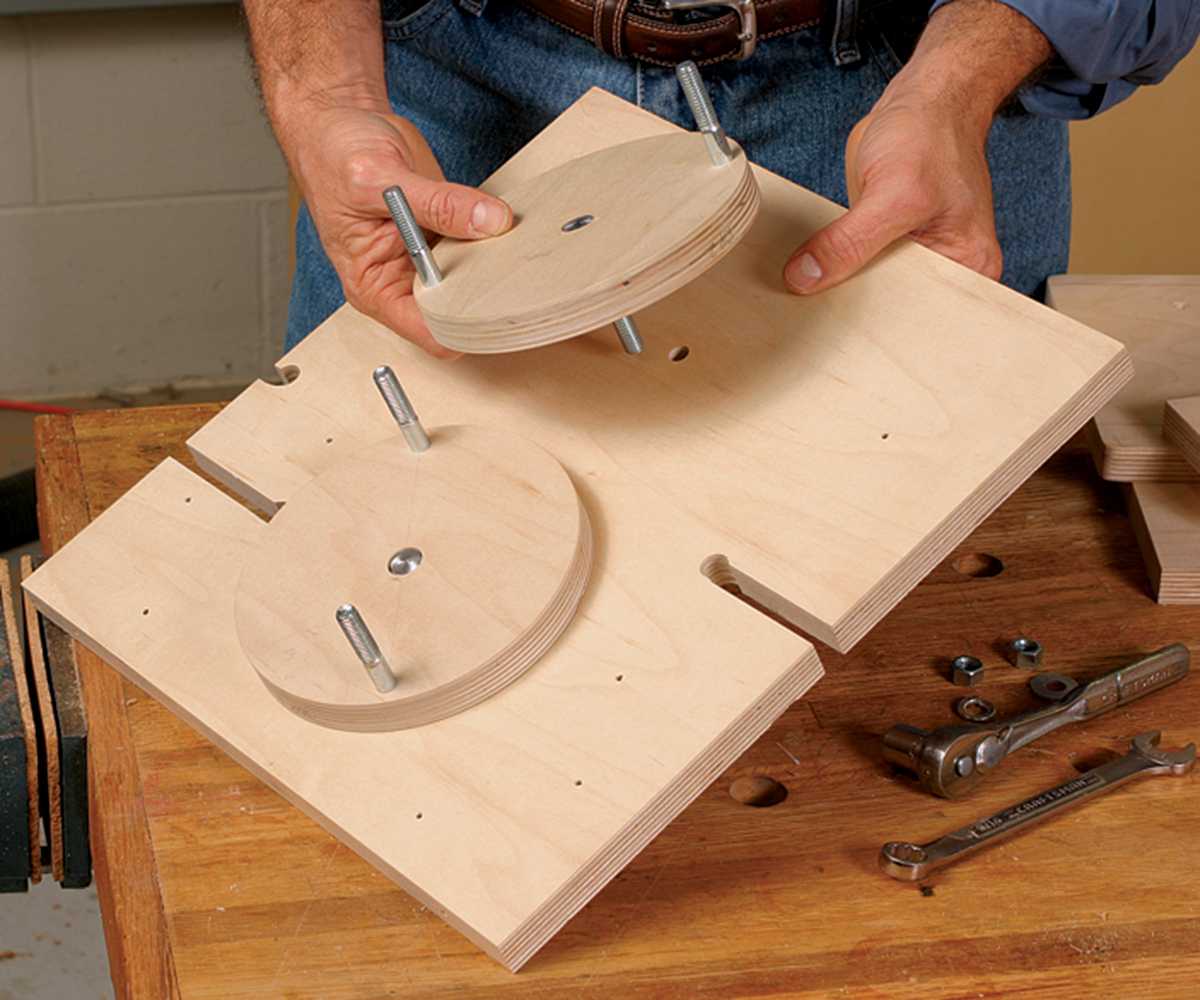
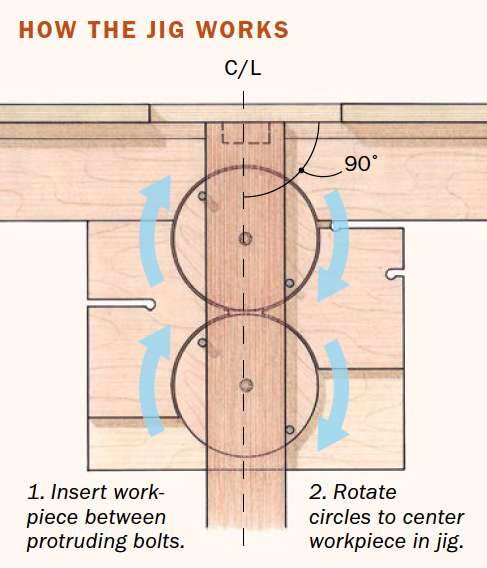
My jig uses two vertically aligned, rotating circles with protruding metal bolts to center the rails automatically for end mortising. The enough to accept the widest piece to be end-mortised between the bolts that protrude from them. My circles are a bit over 6 in. dia. and can accommodate a board up to 5 in. wide between the bolts.
Start with the circles
The jig is centered on the circles, so begin by making them. They must be large enough to accept the widest piece to be end-mortised between the bolts that protrude from them. My circles are a bit over 6 in. dia. and can accommodate a board up to 5 in. wide between the bolts.
To make each circle, start by cutting a perfectly square blank slightly larger than the circle it will become.
Mark the center point of the square. Install a 5/8-in.-dia. Forstner bit in your drillpress chuck and make a counterbore as deep as the bolt head it will receive. Then switch to a 3/8-in. brad-point bit (or a spiral bit if your brad-points cut with their outside edges first) and drill a through-hole. Put the blank aside.
Cut a simple drilling jig from 3/4-in. wood or medium-density fiberboard (MDF) long enough to span the drill-press table from left to right. On the jig face, draw two parallel lines perpendicular to the front, separated by the distance between the circle blank’s center and an outside bolt hole.
Clamp a fence to the table and place the drilling jig against it, lining up the left-hand line with the drill bit. Drill a 3/8-in. throughhole on the line. Slide the drilling jig to the left and drill a second through-hole on the right-hand line. With the drill bit still in the hole, clamp the drilling jig to the table. Then, raise the bit out of the hole.
From Fine Woodworking #191
To view the entire article, please click the View PDF button below.
Fine Woodworking Recommended Products

Marking knife: Hock Double-Bevel Violin Knife, 3/4 in.
Freud Super Dado Saw Blade Set 8" x 5/8" Bore
Hedgehog featherboards



Log in or create an account to post a comment.
Sign up Log in