Shopmade Table Saw Inserts
Get cleaner, safer cuts with every blade you use.

Synopsis: Eliminate tearout, reduce the chances of kickback, and solve the problem of a throat plate that gets jammed with little offcuts by making your own zero-clearance tablesaw inserts. It’s simple to do, and you can make a bunch of them with slots sized for all your different blades. Woodworking teacher Bob Van Dyke shows you how. The increased safety and precision you’ll get will be worth the short time spent.
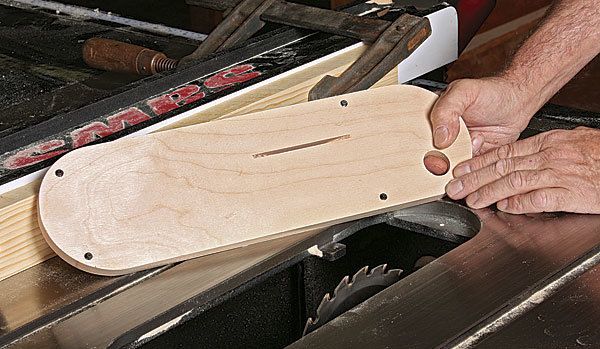
 The throat-plate insert that comes with most tablesaws can give you headaches. The main problem is that the wide opening doesn’t back up the fibers in the wood being cut, which leads to excessive tearout as the blade exits the wood. That big gap also allows small offcuts to fall into the opening and get jammed. And when ripping, thin strips of wood can jam in the gap and kick back very easily. The same can happen with a thin offcut.
The answer to these problems is simple: Use a zero-clearance insert, in which the opening is custom-sized to the blade, eliminating gaps. As a result, wood fibers don’t tear out and there is no space to trap offcuts.
While you can buy insert blanks, they can cost a lot. A better option is to make your own. It’s cheaper, and you can make one for every blade you might use (standard and thin-kerf, dadoes) and for every common angle (90°, 45°, etc.). The method I’ll show you Make a batch while you’re at it. With Van Dyke’s method you can easily make a bunch of inserts at once, enough to cover your standard blade, any common angled cuts, and for the dado set sizes you use the most. It is fast, and so easy you might as well make a dozen blanks to cover every situation. The increased safety and precision will be well worth the short time spent.
Use the stock insert as a template For the insert material, I use plywood that is a little thinner than the actual depth of the opening, typically 1⁄2 in. thick. I prefer Baltic-birch plywood because it’s more stable, stronger, and holds the threads I tap into the inserts very well. Make sure that the plywood is flat. The first insert I make is always a master blank that all subsequent inserts will be taken from.
To make the master blank, use the stock insert that came with your saw as the template. Using the tablesaw or bandsaw, cut a plywood blank about 1⁄4 in. bigger than the insert. Take the leveling screws out of the insert, and trace its profile onto the blank. Transfer the leveling screw hole locations to the blank at the same time. Use a bandsaw to rough out the shape.
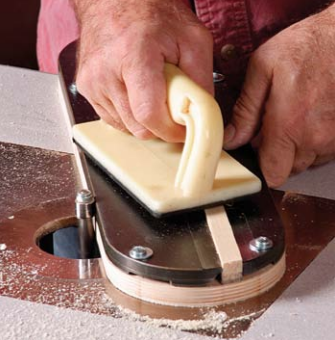
Screw the stock insert to the blank using the holes that the leveling screws were in. Use the router table and a flush-trimming bit to rout the blank flush to the insert. The stock insert has a cutout to accommodate the splitter or riving knife. Because the flush-trimming bit could jam in that cutout and kick back, I fill in the opening with a piece of pine and temporarily tape it in place.
 From Fine Woodworking #251
For the full article, download the PDF below:
Fine Woodworking Recommended Products

Olfa Knife

CrushGrind Pepper Mill Mechanism

Stanley Powerlock 16-ft. tape measure


Comments
When the slot gets torn out from many uses and sometimes abuses, fix it with epoxy. Tape over the opening on top and pour in epoxy from the bottom. Let cure and re-cut the slot for a like new zero-clearance insert.
I just made some for my tablesaw. Thanks. I have two suggestions from my experience.
1) If you also have a dado throat-plate for your saw, and I did, you can use this for your pattern without having to fill the guard slot.
2) My dado blade is not the same set as my combination blade, it seems flatter on the outside, so the regular blade was offset relative to it. So another method is to lower the leveling screws on the standard throat-plate and hold down the new wood insert on top of it to start the cut underneath with the regular blade.
Log in or create an account to post a comment.
Sign up Log in