Tapering at the jointer
Mike Pekovich demonstrates how you can accurately and consistently taper parts on the jointer.
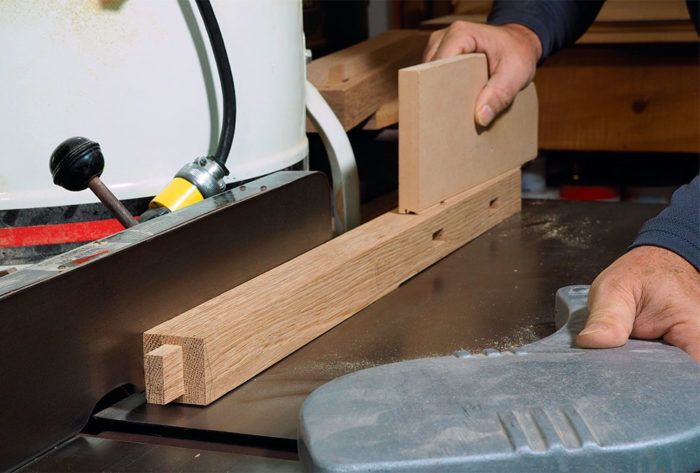
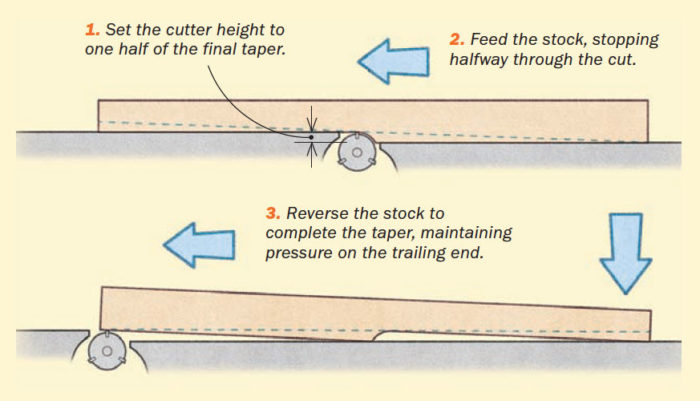
When it would be difficult to bandsaw a taper cleanly or cut it on the tablesaw without scoring or burn marks, head to the jointer. You can make a quick taper in two passes.
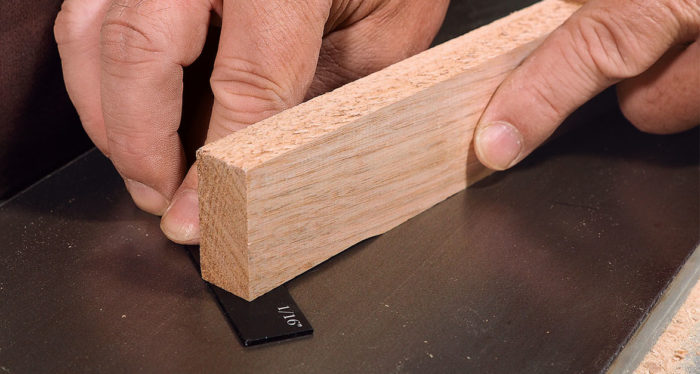
Step 1: Set the jointer to make a cut half the depth of the final taper
The overall taper is 1/8 in. from end to end, so start by setting the jointer to take a 1/16-in.- deep cut, which is half of the total taper.
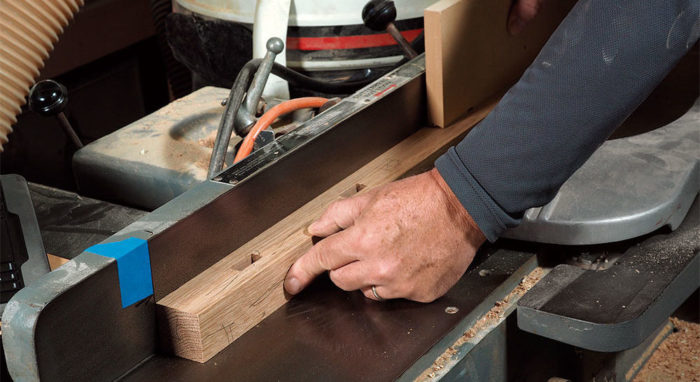
Step 2: Take a single pass stopping halfway along the leg
Then make a pass starting at the top of the leg and stopping at the halfway point. I place tape on the jointer fence so I know exactly where to stop.
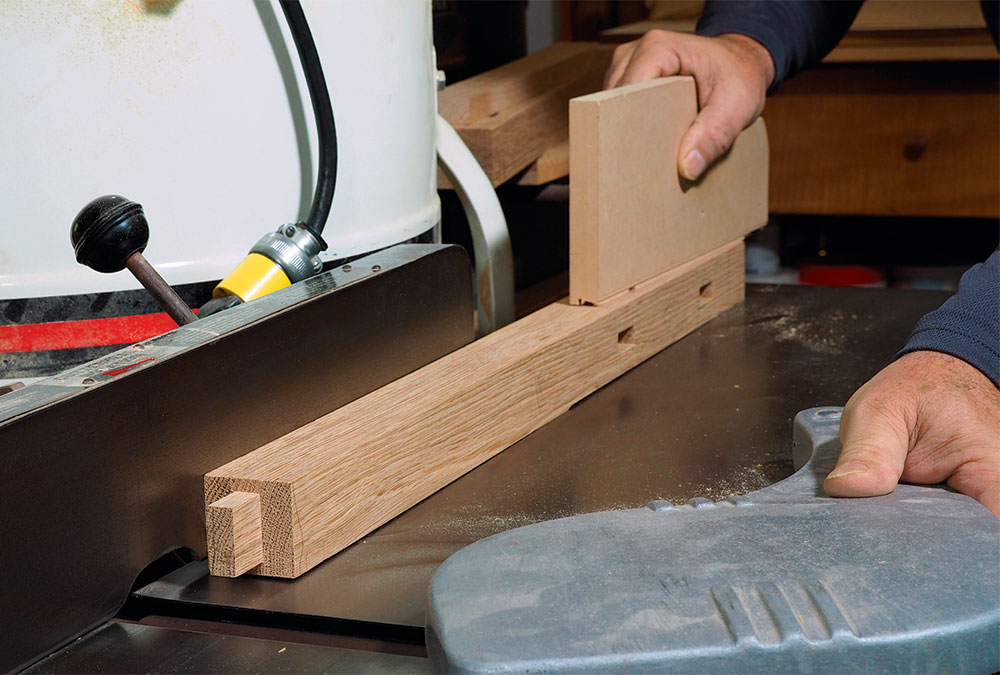
Step 3: Rotate the leg and take a full pass to complete the taper
Rotate the leg so that the bottom end is facing forward for the second pass. Put pressure on the trailing end of the leg so the front is pivoted above the jointer bed when making this pass.
This should result in a continuous taper along the length of the leg. It’s fast and kind of fun once you get the hang of it.
-This is an excerpt from Mike’s Arched Entry Table article in Fine Woodworking #280.
 |
|
 |
|
 |
Fine Woodworking Recommended Products
Ridgid EB4424 Oscillating Spindle/Belt Sander




Comments
I've been using this for several years and it gives great results. My legs usually have the taper starting just below the apron, so carefully marking the start point is critical.
Mike, thanks for this as well as a lot of other things I have learned form you.
Just curious about tearout...Given the process requires reversing the board to finish the cut, it would seem that jointing the board in one direction or the other would be against the grain and possibly cause tearout. I own a helical head jointer so tearout isn't a regular occurrence but it still happens.
-Grbmds
If your grain in fairly straight, like Mike would use on tapered leg stock, the second pass will be running "downhill" and tearout shouldn't be an issue.
This is a neat technique for making tapers. However, there
is one subtlety not mentioned by Mike: The diameter of your
jointer cutterhead plays a role. Suppose, for example, your
board is 24" long and you want to taper it by 1/4" along its
length. If your first 1/8" pass through the jointer is 12"
long as Mike suggests, the final taper after the second pass will not be
exactly 1/4" end-to-end. In fact, very slightly more than 1/4" will
have been removed from the leading end and, more importantly, a
noticeable amount of wood is also removed from the tail end.
In other words, the taper did not end precisely at the tail
end of the board. All of this is due to the diameter of the
cutterhead.
Now, this may not be important to your project, but consider this:
Suppose you want the taper to end at a precise spot, perhaps to
line up with some other feature in your design. To avoid disappointment,
you need to account for the cutterhead diameter. Regrettably, getting
it correct requires some algebra! Here's the answer:
If T is the total length of the desired taper (measured along the
original edge of the board), then the length X of the first pass
through the jointer should be X = T/2 - Y, where Y is given by
Y = square root (D*R -D*D/4). In this formula, D is the original
desired taper amount (1/4" in the above example), and R is the radius
of the jointer cutter head. For my jointer, R = 1-17/32". So, if
I want T=24" and D=1/4", then X = 11.394"; quite a bit less than half
the length of the original board!
(Note: The distance X is measured from the cutterhead top dead center.)
Jim Eisenstein
Pasadena, CA
Log in or create an account to post a comment.
Sign up Log in