Upgrade Your Router with Shop-Built Bases
Four custom bases unlock the tool's versatility.

Synopsis: Simple and versatile, the router is an invaluable woodworking tool. But it can be made even more versatile if you add shopmade sub-bases. The simple bases outlined in this article can help with a variety of tasks: They stabilize the router for otherwise risky cuts, quickly and cleanly trim furniture components flush, and make mortising easier. Using just a few scraps from your wood bin, you’ll soon be cutting better edge profiles, trimming edge-banding, dovetails, plugs, and tenons, and mortising like a champ.
A router is a very simple woodworking machine; at its most basic, it’s a device that spins a cutting tool. This simplicity is a virtue, however, and is the reason the router is so incredibly versatile.
But the router needs some help to unleash its full power. One way is with custom bases. Once you realize you can attach your own sub-base to a router, you open up many possibilities.
The simple bases in this article help with a variety of tasks: They stabilize the router for otherwise risky cuts, they quickly and cleanly trim furniture components flush, and they make mortising a snap. The cost for this added versatility is a few scraps from your wood bin, and the few minutes it takes to put each base together.
An oversize base for edge profiles
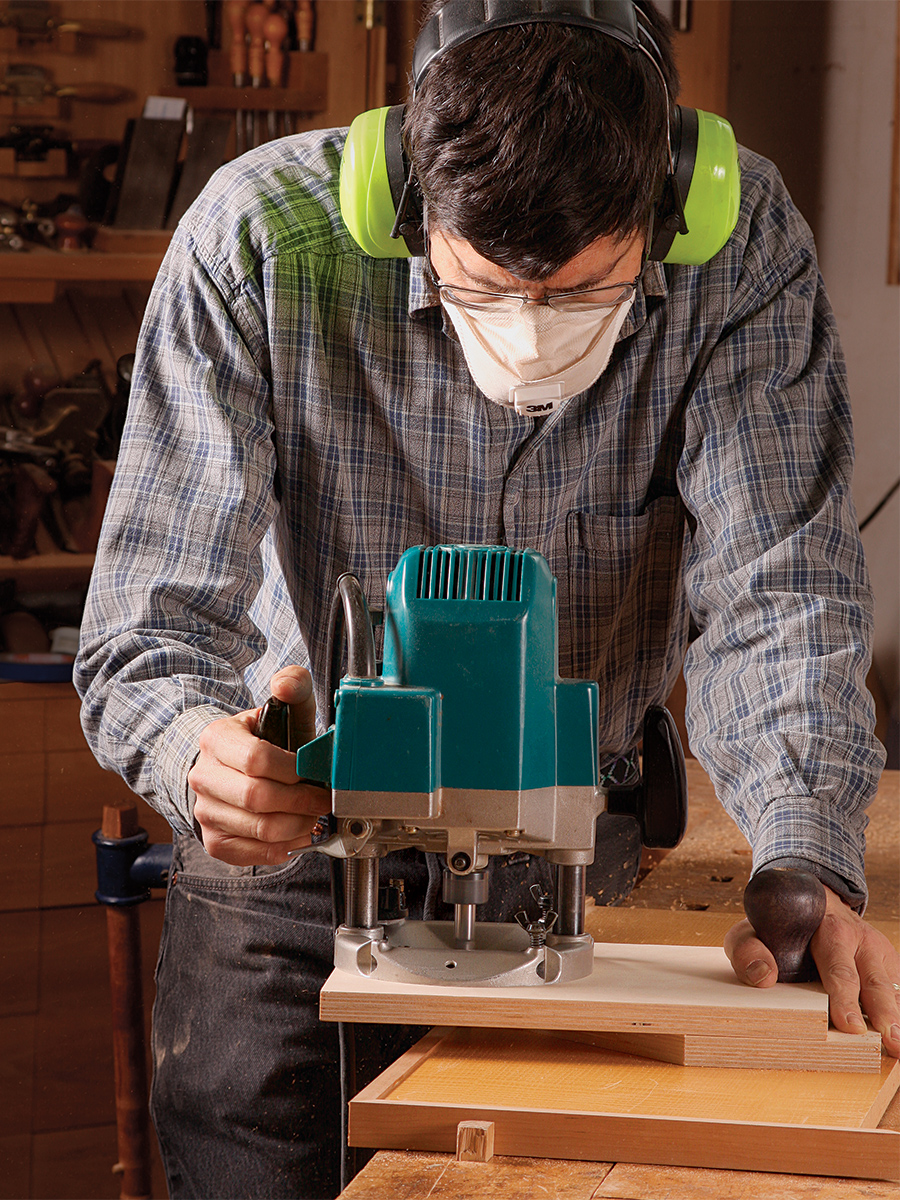
One common routing problem involves cutting edge profiles, an operation that puts more than half the router off the edge of your workpiece. This is manageable when the edge profile is small, but can be quite unstable with a larger router bit.
You gain a great deal of control over the operation with an oversize base, which helps prevent the router from tipping off the edge. This is important because even a small wobble can cause the bit to dig in and dent your perfect profile.
Start with a piece of plywood roughly 9 in. by 12 in. and drill or rout a 3 1/2-in.-dia. hole about 2 1⁄4 in. from one end. Drill and countersink holes in the plywood so you can attach it to the router, with the collet centered over the base’s opening. If you remove the router’s existing plastic sub-base, you can use the holes in it as a template for drilling holes in the plywood. You’ll need some longer screws that match the thread size on the ones that attach the existing sub-base; bring one with you to the hardware store to be sure you get the right size.
Once you’ve attached the plywood to the router, add a handle to the top side of the plywood, roughly 2 in. from the end opposite the router. I bolted on a knob from an old router, but a knob from a handplane or the like is perfect, too. Smooth and then wax the bottom of the jig, or use melamine board, or even a scrap of solid-surface countertop material (such as Corian) so the base will move easily on a surface. Rounding over the edges a bit helps, too.
Now you have a base that will give you the leverage to keep the router upright while cutting those edge profiles.

From Fine Woodworking #224
To view the entire article, please click the View PDF button below.
Fine Woodworking Recommended Products
Incra Miter 1000HD

Double Sided Tape
Woodriver Circle Cutting Jig


Log in or create an account to post a comment.
Sign up Log in