How to Install a Sliding Deadman on a Workbench
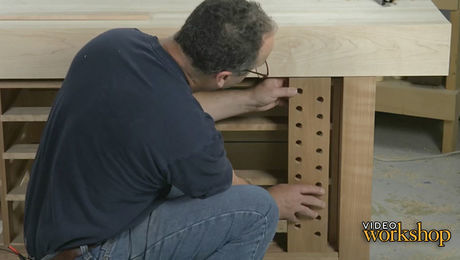
Install this versatile jig to support your workpieces, apply a finish coat of Danish oil, and your bench is complete.
Start your 14-day FREE trial to watch this video
Plus, access more than 500 video workshop episodes when you become a member
Videos in the Series
-
How to Build the Ultimate Shaker WorkbenchOctober 28, 2015
-
In Search of the Perfect WorkbenchOctober 28, 2015
-
Building the Base for the Ultimate Shaker WorkbenchOctober 28, 2015
-
Make Beaded Panels for Your WorkbenchOctober 28, 2015
-
Prepping the Base for Glue-UpOctober 28, 2015
-
How to Install the Benchtop and ViseOctober 28, 2015
-
Building a Web-Frame Drawer Box for the Base of the BenchOctober 28, 2015
-
Assembling the Bench DrawersOctober 28, 2015
-
How to Install a Sliding Deadman on a WorkbenchOctober 28, 2015



Comments
I have the plans, and have seen the videos. I plan on taking some shortcuts using 1/2 inch birch plywood for the panels and drawers, and using a dovetail jig with router. I have white oak that has been brine-soaked, milled and air dried over 12 years. It is extremely hard and will make a great top. Thanks for sharing the design and construction. Worth
Outstanding design guys - and excellent video series.
Bought the plans!!! Going to start the build after the 100+ degree days are over. I intend to stretch mine out a little bit or just go with two stacks of drawers top to bottom so I can store longer planes in dedicated slots. Are twin screws that much better than a leg clamp? I am very torn on the hardware selection I'm faced with.
You guys knocked it out of the park with this one. Makes me want to take my 7 year old Schwartz inspired Roubo and throw it in the burn pile. OK, Maybe not that much, but dang that is one sexy bench.
Won't the groove in the bottom keep getting jammed up with sawdust and chips?
Yes it will. I swapped out the groove in the bottom with an upward facing 'v' the length of the bench and an inverted 'v' in the bottom of the deadman. Elongate the tenon at the top of the deadman to enable inserting into the already constructed bench. Enjoy
This is my second time to watch this and would enjoy it again a third time. Great job! Beautiful bench
RandyG
Beautiful work there and nice traditional look, but the one thing that would drive me crazy if it was my bench is with the top overhanging the drawers and just standard wood on wood drawers you probably can only easily access 1/2 of the depth of those drawers. On my bench I use every square inch of the interior of my drawers for things like screws, so I would have used metal full extension slides - sorry, but for anything in my shop, function far outweighs style!
I am curious why the choice to not include bench dog holes? I purchased the plans and intend to follow them with the exception of using a top I already own of laminated maple 8' x 30" x 2 1/4", include the bench dog holes and install an Emmert K1 U5 pattern makers vice rather than the twin screw. Thank you in advance for your reply.
that was my question too. my guess is that they use a lot of small attachments that hook over the edges. also without an end vice, you really don't get much distance across the bench top.. I would have liked to see a few just for clamping purposes.
Impressive work guys. It would be useful to know where you sourced the hardware. That was a pretty nice twin screw vice.
It's the Lie Nielsen vice
Log in or become a member to post a comment.
Sign up Log in