Build a Simple Rack for Handplanes
Planes go in and out in seconds with this easy-to-make rack.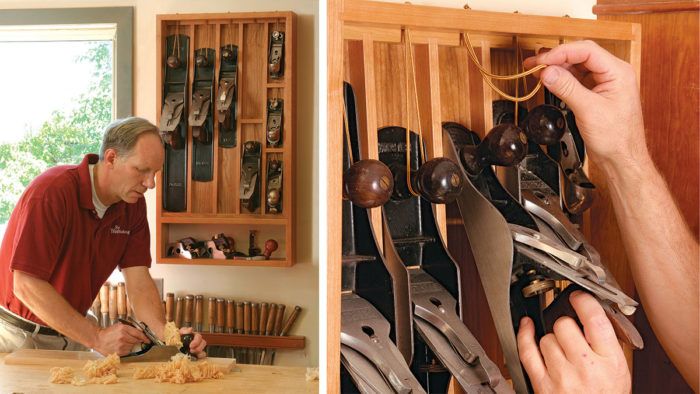
Synopsis: This plane rack stores a full set of handplanes close at hand but secure, so your investment won’t be dropped, dinged, or dulled because it happened to be sitting out on the bench. The rack holds the plane by its knobs, suspended from loops made from bootlaces. The soles rest on an angled panel. The system is strong and stable, and the bootlace hangers let you store planes easily so you’ll never leave them lying around again.
Let’s face it. Handplanes are expensive, costing as much as or more than a benchtop power tool. To keep these investments safe, many woodworkers tuck their planes inside drawers or cabinets. Though the tools are safe and sound, it’s a nuisance to keep opening a door or drawer to access the planes while they’re working. For convenience, many folks end up keeping their most-used planes on top of the bench.
That method is not so convenient, however, because the planes can get in the way, and they’re just inches from getting knocked to the floor accidentally. My plane rack solves all of those problems.
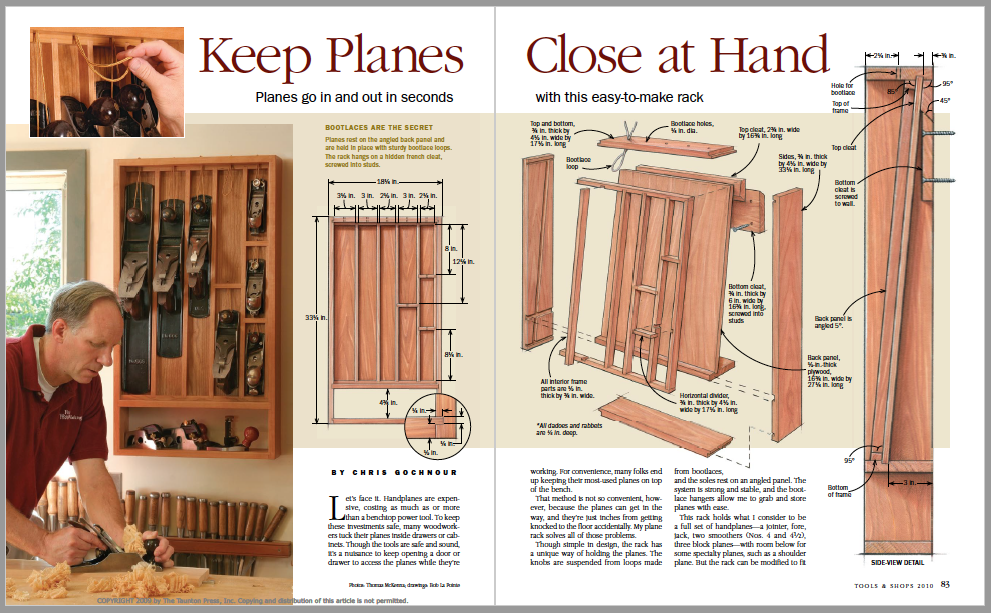
Though simple in design, the rack has a unique way of holding the planes. The knobs are suspended from loops made from bootlaces, and the soles rest on an angled panel. The system is strong and stable, and the bootlace hangers allow me to grab and store planes with ease.
This rack holds what I consider to be a full set of handplanes—a jointer, fore, jack, two smoothers (Nos. 4 and 41⁄2), three block planes—with room below for some specialty planes, such as a shoulder plane. But the rack can be modified to fit more or fewer planes, or planes of different sizes.
Joinery is straightforward
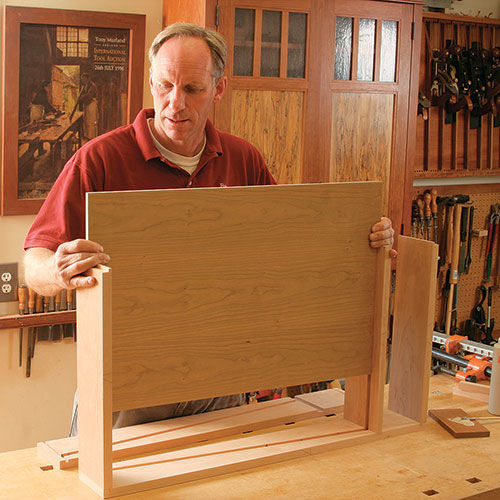
The case is assembled with simple dadoes and rabbeted dadoes. After cutting these joints, you can take on the trickiest part of the assembly: cutting the grooves for the angled back panel. Start by making the grooves in the underside of the top and in the top of the horizontal divider. These through-grooves are cut on the tablesaw using a dado set tilted to the panel angle (5°). Then, dry-assemble the case. Place a spacer, the same thickness as the back panel and about 1 in. wide by 3 in. long, into the grooves in the top and divider. Knife around the spacer to locate the grooves in the sides.
Clamp the sides together and to the benchtop and clamp a long plywood fence to one side, aligned with the groove marks. Rout the groove using a plunge router and a 1⁄2-in.-dia. pattern bit. Rout the groove in the other side piece in the same way. With all the grooves made, cut and fit the plywood back panel and glue up the case. Then make and fit the french cleat. Note how it is angled to sit flat against the back panel.
 From Fine Woodworking #209
For the full article, download the PDF below:
Fine Woodworking Recommended Products
Lie-Nielsen No. 102 Low Angle Block Plane
Veritas Wheel Marking Gauge

Veritas Precision Square







Comments
I saw this plan in FWW years ago and it has been on my to do list since. It can be difficult to find the time to improve my own shop but I’m glad I finally built this piece.
I did find a couple flaws in the drawings. If you plan to build this piece you might want to be aware.
At the bottom of page 83, in the side view detail, the 95° dimension is pointing at the wrong corner. The corner it points to is actually 90°. The 95° corner is at the bottom of the “Bottom of frame” part.
In the middle of page 83 the label “Horizontal divider” points to the wrong part.
I also found that the 27 ¼ dimension on the back pane was too long. If you build this I suggest you dry fit the sides, top, bottom, and horizontal divider and measure for the length of the back panel.
All in all a good plan. I like the piece.
Eric
Log in or create an account to post a comment.
Sign up Log in