Stow-and-Go Router Table
Build a full-featured router table that is portable, lightweight, and easy to store.
Download the Measured Drawing
Get the complete measurements, and see the table in 3D with an interactive rendering from Alibre.
CLICK TO DOWNLOAD
(2MB Adobe PDF)
A portable router table with big features
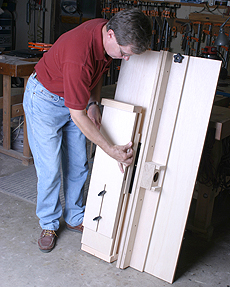
All it takes to put a compact, versatile router table in your shop is a half sheet of plywood, a small supply of solid-wood lumber, a handful of hardware, a router mounting plate, and one of the newly designed routers that feature above-the-table adjustments, such as those featured in my review in Fine Woodworking #189.
This was the criteria that I used to build this stow-and-go router table, which features built-in dust collection, a large tabletop, and the ability to be easily broken down and stored out of sight. The above video details how the table is assembled and put to use, and the attached diagrams and cutlist detail the table’s components.
Less than $100
I’ve used a router table like this in my shop for many years because they are quick to make and don’t require much in the way of materials. All of the parts are cut from a half-sheet of plywood. I do recommend purchasing a mounting plate and insert template from JessEm, Woodpecker, or any other router accessory source. Blank plates are the most economical choice, but plates with interchangeable opening rings provide more versatility. I paid about $60 for a Woodpecker plate with three rings and $12 for the insert template. Plus, it came with a template to cut the opening in the tabletop.
Rout the opening for the mounting plate. The author purchased a commerical mounting plate that sets into the table opening to make sure that the router remains accurate.
Cut the parts from a sheet of plywood
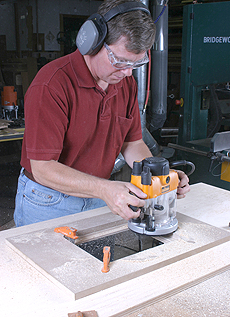
Start construction with the 24-in. deep by 48-in. wide piece of plywood for the tabletop. Draw centerlines front to back and side to side. The cutout for the mounting plate is centered front-to-back line, but shifted about 4 in. to the right of the side-to-side center line; this provides a long outfeed surface, which I find useful for many router-table tasks.
The Woodpecker mounting plate I purchased came with a template to use when cutting the rabbetted opening for the mounting plate. Use your router for this task: a top-bearing, flush-cut, 3/4-in. router bit to to produce the rabbet that supports the router mounting plate. Take light cuts and progressively work the bit back to the pattern.
With the tabletop complete, cut the solid-wood parts for the bracing on the underside of the table and install with glue and screws. These braces provide support and keep the top flat, so be sure that the edges that mate to the table are square and straight, and use 7/8 in. thick hardwood.
Assemble the fence and drill the pivot hole
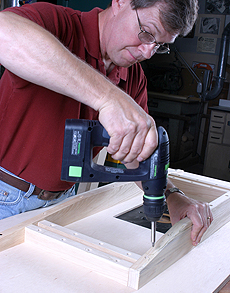
A sturdy tabletop. One-in. thick hardwood is used for the under-the-table support system to keep the tabletop flat and to mount the adjustable legs.
Next, cut the plywood parts for the fence, dust-collection box, and leg sections. Size and shape the parts with a jigsaw or bandsaw, and Forstner bits or hole saws.
Attach the fence base to the main fence with glue and screws. Be sure the fence face and base make a perfect 90-degree angle. Build the dust-collection box and screw it onto the fence assembly. Complete that assembly by screwing through the main fence to secure the sacrificial fence.
Align the front edge of the fence, including the sacrificial face, with the table center line on the tabletop. Clamp the fence in place and locate a point at the center of the left end of the fence base 1in. from the end. Drill a 5/16-in. hole through the fence base and the table top. A 5/16-in. hex bolt and knob will provide clamping power for the pivoting fence.
Legs only support part of the table
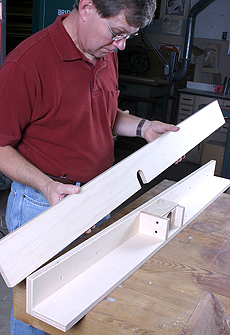
The legs on this router table are only part of the support system. The back edge of the tabletop also needs to be clamped to a heavy, stable surface such as a table saw extension or workbench. Once clamped to a worksurface, the legs are individually adjusted for added support. The benefit to this design is that it will work well on uneven floors, and provides a very sturdy footprint.
To begin using the table, attach your router to the insert (it replaces the router’s basic round base), set the fence, make sure the clamps and knobs are tight, and start cutting.
Roland Johnson is a Fine Woodworking contributing editor and woodworker in Sauk Rapids, Minnesota.


Comments
I am in the process of attempting to make this stow-and-go router table but I noticed after making all the cuts there are no diagrams of where to attach all the supports under the table, such as how far off the back or front and the sides should the braces be screwed in?
@Rcano, from the video and the PDF, it looks to me as if the braces would be centered around the opening.
@Rcano, like this: https://flic.kr/p/PPHKUt
wow I wish I made this back in 2007 when router lifts were $60. Now they're all over $200 here in 2025. Cost more than this entire build with the wood and lift combined.
Log in or create an account to post a comment.
Sign up Log in