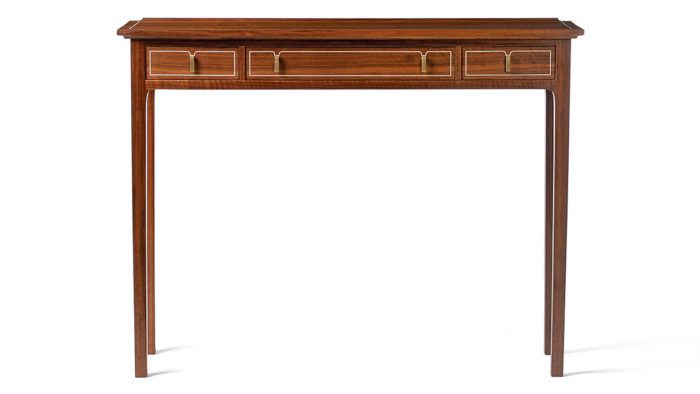
Build A Graceful Hall Table
Barnsley style combines Arts & Crafts simplicity with Federal elegance.

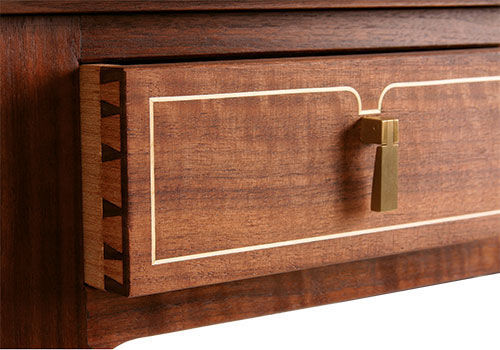
Synopsis: This Edward Barnsley-inspired table incorporates many of that designer’s trademark elements. In the course of building the table, Kevin Kauffunger demonstrates how to create these elements: the gun-stock joint, a type of haunched miter, combined with floating tenons; the pencil-roll detail, shaped on the router table; and the chamfered, mitered rails. Finally, he adds a finishing touch: holly stringing.
I was introduced to the work of Edward Barnsley while studying furniture making at the College of the Redwoods. Among the more dog-eared books in the school’s library was an out-of-print catalog from a retrospective exhibit of his work that took place in the early 1980s. I was immediately inspired.
Barnsley was a direct descendant of the English Arts and Crafts movement (his architect father and uncle were major proponents). His early pieces were typical of the style: solid wood, thick, with exposed joinery that communicated a visual and literal strength. After world war II, his work transitioned into something more refined. It still maintained the technical honesty of Arts and Crafts, but it began to reflect the spare elegance seen in the Hepplewhite or Federal styles.
This sideboard is not a direct copy of any Barnsley piece, but rather it incorporates many of his design elements. The construction process is relatively straightforward, so I’ll focus on the Barnsley elements.
Flowing Joinery

Where the legs meet the bottom rails, the lower edge of the joint flows in a continuous curve. Just joining the two members at right angles would leave weak short grain on the tip of the rail. To minimize this problem, craftsmen use a type of haunched miter called a gun-stock joint, combined with slip tenons.
Lay out the legs on a template of 1⁄8-in.-thick plywood or MdF, transcribe the pattern onto the leg blanks, and mark out the mortises. Next, mark the 45º angle at the bisection of each curve, and with your tablesaw blade at 45º, use a crosscut sled to cut the miter 1⁄4 in. deep into the legs, a total of eight cuts.
Cut the mortises in your preferred way; I use an upcutting spiral bit in a plunge router equipped with an edge guide. Mortising before shaping gives you easier surfaces to reference the router against.
From Fine Woodworking #212
For the full article, download the PDF below:
Fine Woodworking Recommended Products

Olfa Knife

Veritas Standard Wheel Marking Gauge

Suizan Japanese Pull Saw


Log in or create an account to post a comment.
Sign up Log in