A Study in Squares
Building a gridwork side table is a unique take on Arts and Crafts.
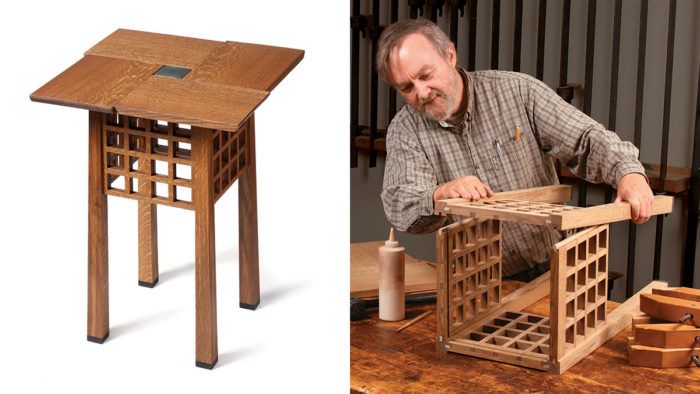
Synopsis: This simple yet strong gridwork side table has a number of interesting twists. The legs are cuffed, and have a reverse taper on the two outer faces, moving from narrower at the top to wider at the bottom. The aprons are made up of four grid structures built using a series of carefully placed half-lap joints. The pinwheel top adds a special flare, giving you the chance to use an inlaid tile or contrasting wood. All these contemporary design elements might seem complicated, but construction of this table is quite straightforward.
I came across the original version of this table while doing research for Arts & Crafts Furniture: From Classic to Contemporary (The Taunton press, 2003), the book I co-authored with Jon Binzen. Josef Hoffmann of Vienna designed that table in 1903. For my own version, I made just a few changes: to the size, the construction of the top, and the finish (fumed white oak). The biggest difference between mine and the original (which had a blackened finish) is the top. The original didn’t have a pinwheel top. Instead, it had four mitered pieces that were glued together with a contrasting center piece.
Designed over 100 years ago, this table remains quite avant-guard. It pushes design boundaries with interesting twists on the legs, aprons, and top that all work well together. It is a simple yet very strong design that is well suited to contemporary interiors and will easily adapt to most wood species. Most of your time will be spent making the grids, but the rest of the construction is straightforward.
Not Your Typical Leg
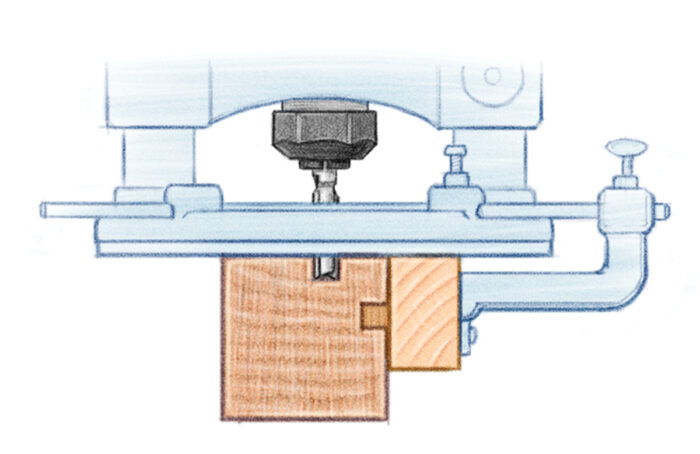
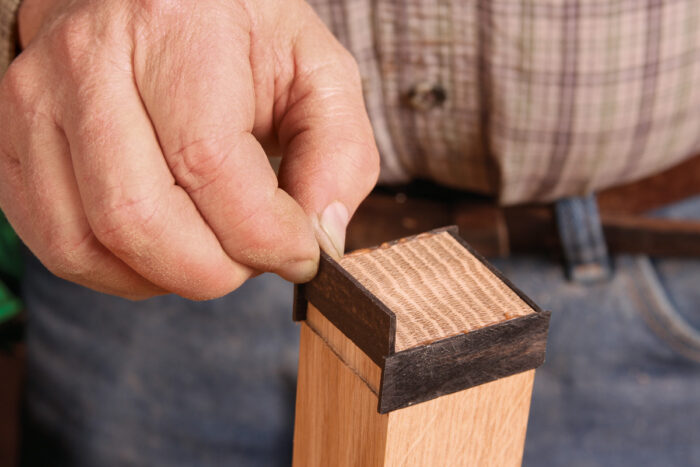
These legs have a reverse taper on the two outer faces, moving from narrower at the top to wider at the bottom. That leaves the inside edges straight and square for easy joinery. The legs also have a cuff at the bottom. And rather than a mortise and tenon, the legs and gridwork are joined with grooves and splines. Despite the odd anatomy, these legs are easy to make.
Wait to taper the legs until after you have cut the stopped grooves. You’ll cut the grooves with a plunge router and a straight bit. For the taper cuts, I use a jig on the tablesaw, and then I lay out and cut shallow rabbets at the base of the legs. Now glue the contrasting cuffs into the rabbets and trim them flush. It really is that easy.
Grilles Instead Of Standard Aprons
The four grid structures that form the apron give this design a lot of punch as well as structural integrity. The grids are light but very rigid and provide a great deal of gluing surface with the legs. The grid structure is simply a series of carefully placed half-lap joints, and there is more than one way to make them. I have found that the quickest and cleanest approach is to cut a series of dadoes across a wide piece of stock first and then rip this stock into the strips. This quickly gives you grid sticks with the half-laps in exactly the same location. What makes the joinery layout a bit tricker is the thicker piece at the top of the grid. That is designed to drop the grid down a bit below the overhang of the top, so it looks uniform to the viewer. It also provides a wider place to attach the corner blocks that reinforce the base and provide a place to attach the top.
Start with wide stock—For each of the grids, you should have two pieces of stock that you can cut into at least five narrower strips each, plus the thick piece at the top, and a test piece of the same thickness for set-ting the depth of the cuts. With a dado set in your tablesaw, use the test piece to set the depth of cut a hair less than halfway through the stock. Do-ing this allows the pieces to protrude from one another slightly and helps with clamp pressure. Also, I start with stock that is 1⁄16in. too long. This way, the intersecting pieces end up a bit proud, and then I trim all four grids to the same size.
It’s important to keep track of the five pieces of vertical grid stock and the five pieces of horizontal grid stock and keep them separated, because the layouts are slightly different and executed on the opposite faces. Lay out the dado locations on one set of the grid stock. You’ll set up everything to those lines and cut all the pieces at the same time, so you don’t need to mark dadoes on everything. You do need to mark whether they are verticals or horizontals and add a triangle to reorient them once they are cut into strips. keep in mind that the dadoes on the horizontal stock are on the inner faces and the dadoes on the vertical stock are on the outer faces.
Also note that along the top and bottom of the vertical pieces and sides of the horizontal ones there are rabbets (they are open on one side), not dadoes. cut those first, starting with the sides of the horizontals and the bottoms of the verticals because they are all the same dimension. Then cut the thicker rabbet at the top of the verticals before moving on to the dadoes.
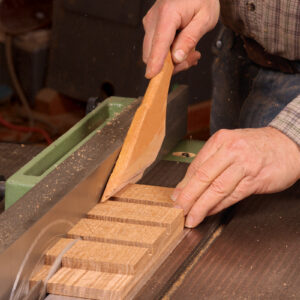
When cutting the rabbets, move the rip fence right up to the dado blade but leave a small space so as not to nick the fence. That will leave a sliver of waste at the end of the rabbet, but you can knock that off easily with another pass. When cutting the dadoes, work on all the horizontals and then all the verticals. With the fence as a stop, work to the layout lines on the first piece, and then cut all those dadoes before moving the fence to cut the next dado.
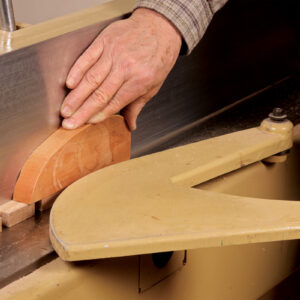
Rip and joint your way to precise fitting grid strips—When you have cut all of the dadoes, it’s time to rip the wide stock into strips. To rip the strips to the perfect width, I use the tablesaw in conjunction with the jointer. Set the jointer to make a light cleanup cut and do not change it. With a good rip blade, set the saw’s rip fence for a heavy 1⁄2-in. cut. Now, using a test piece, rip off a strip, joint the ripped edge, and test the fit in a dado. If the fit is too tight or loose, make the necessary adjustments to the rip fence. When your test piece fits snugly with hand pressure, rip all of the grid stock into strips. remember, after each ripcut, joint the edge of the grid stock be-fore ripping another strip. When all of the grid stock has been ripped, joint the ripped face of all the strips, and you’re ready to assemble the grids.
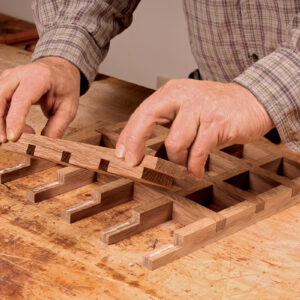
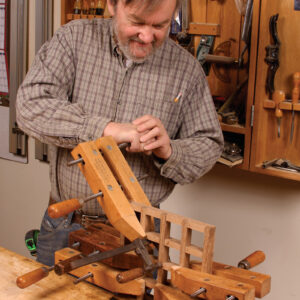
Assemble and groove the grids—be-cause each intersection needs a clamp, this glue-up can be fussy. but it’s not difficult. I always dry-fit beforehand and try not to use too much glue so I don’t have a lot of squeeze-out to clean up.
Once the grids are glued together, I pass them through a thickness sander and level the surfaces while bringing them to final thickness. I rent time on a local wide-belt sander, but a belt sander followed by a random-orbit sander could get the job done as well. Just take care to keep everything flat and on the same plane.
To clean up the edges of the grids, I joint two adjoining edges and rip the opposite sides to the final dimension.
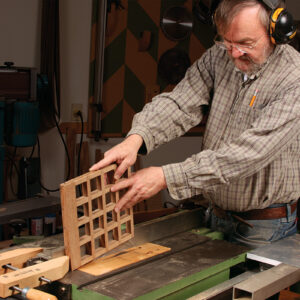
The next step on the grids is to cut a groove on the vertical edges, which cor-responds to the groove in the legs. I do this on the tablesaw with a dado blade, stopping the groove before it runs out the bottom edge of the grid.
For added strength and a place to se-cure the top, I add corner blocks to the inside of the base. The corner blocks have a tongue that sits in a notch in the top of the grid. Although I don’t add the blocks yet, I groove the top of the grid now
Attach Grids To Legs
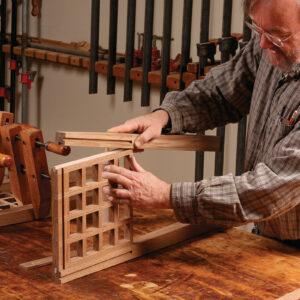
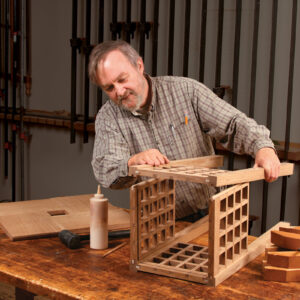
Now you can assemble the base. The legs attach to the grids with splines in the grooves. There is plenty of strength with the 101⁄2 in. of long-grain to long-grain glue surface at these joints, but the splines make the glue-up easier, keeping the grids from sliding around and guaranteeing that all alignments are the same. glue two sub-assemblies: one grid to two legs for each assembly. When they dry, glue them together with the remaining two grids.
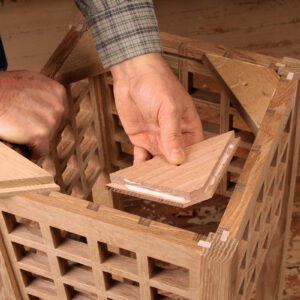
While you’re waiting for the first parts of the base assembly to dry, make up the corner blocks. First, drill the four top hold-down holes on the drill press. Next, cut the blocks from the stock and use the tablesaw to rabbet the two just-cut edges to make a tongue that fits snugly into the groove in the top edge of the grids. When the base is fully assembled, glue in the corner blocks.
A Pinwheel Top
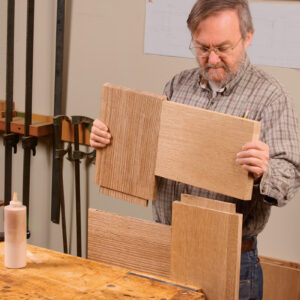
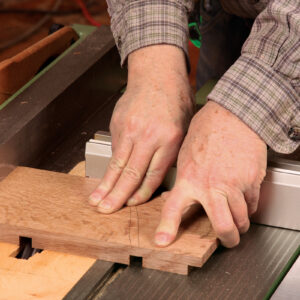
The top construction is unconventional but that’s what I like about it, and it works very well with this design. The four identical parts that make up the top should come from the same long, wide board, but if you don’t have a long board that wide you could glue up two boards. When the four parts are cut out, lay them out in a spi-ral pattern and mark the edges that get a mortise and the ends that get tenoned. Lay out and cut the mortises. I use a mortising machine, but you could use a plunge rout-er with a fence and straight bit. I cut the tenons on the tablesaw with two cuts and test-fit the joints. Then cut the 30° under- bevel on the ends opposite the tenons.
There will be some seasonal expansion and contraction across the 83⁄8 in. width of each top piece, so only apply glue to the half of the mortise closest to the center of the top. This will allow each piece of the top to move as needed around the outer edge and maintain a constant tight fit in the center. rather than gluing up all four pieces at once, it is best to do two at a time and then join them.
The last item on the top is the center block. I chose a black Motawi tile (motawi .com) to relate to the ebony cuffs, but your options are unlimited. Whether it is a tile on an insert, a leather pad, or whatever you may imagine, the center block goes in from the underside of the top and sits in a rabbet that stops it just below the surface. To cut the rabbet, I use a plunge router and bearing-guided rabbeting bit. This leaves the corners rounded, but I square them with a chisel. The depth of the rabbet is determined by the thickness of the material that you wish to display. For example, if you choose to insert a 3⁄8-in.-thick tile, be sure to leave a lip around the center opening that is about 1⁄32 in. more than 3⁄8 in. Again, the insert should sit just below the surface of the wood top.
Attaching the top to the corner blocks is a breeze. With the completed top upside down, center the
base over it. With an awl, mark through the corner blocks for the four screw locations, remove the base, and drill these pilot holes. To complete the center insert, make up a baseplate from any stock and cut it to fit the opening in the underside of the top. Drill two small screw holes in two opposite edges. Now fix the insert to the baseplate with an appropriate adhesive.
Fuming And Finishing
I recommend disassembling the top from the base and taking out the insert for finishing. before I applied three or four coats of Tried & True Varnish Oil, I fumed the parts. See my article, “Fuming with Ammonia” in FWW #126, for detailed instructions on how to darken white oak with this very simple, traditional technique.
For the full article, download the PDF below:
from Fine Woodworking #221
Fine Woodworking Recommended Products

Drafting Tools
Circle Guide




Log in or create an account to post a comment.
Sign up Log in