Build an Eye-Catching Octagonal Table
Drawing from his experience as a chairmaker, Elia Bizzarri made his one-of-a-kind table light, strong, and graceful.
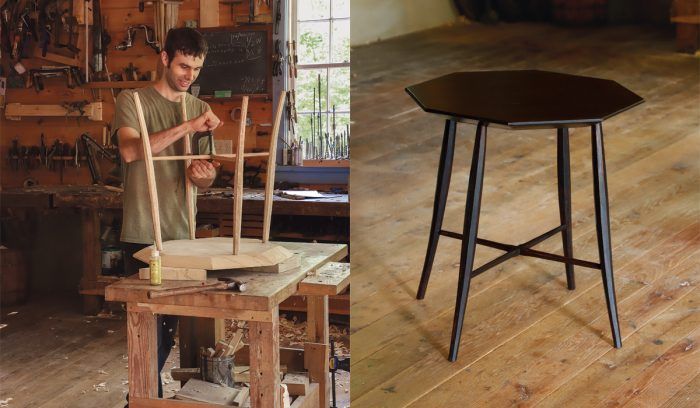
Synopsis: This elegant side table has tapered, octagonal legs that are made from green wood, boiled on a stovetop, and bent using a basic form. The octagonal top is cut on the bandsaw and shaped by hand, and the entire structure is supported by a half-lap stretcher assembly. Bizzarri shows how to make the table using mostly hand tools.
I designed this table to be very accessible to build. Its structure is borrowed from the bottom half of a Windsor chair, but while Windsor chairmaking can seem to require a forester’s access to trees, turning skills to match Richard Raffan, and a laundry list of unusual tools, this table can be made from sawn lumber, doesn’t involve a lathe, and requires only a few specialized chairmaking tools.
Riving and shaving the parts
The table’s legs and stretchers are best made from ring-porous hardwoods like oak (used here), ash, or hickory, which are prized for their strength and bendability. But many other woods will
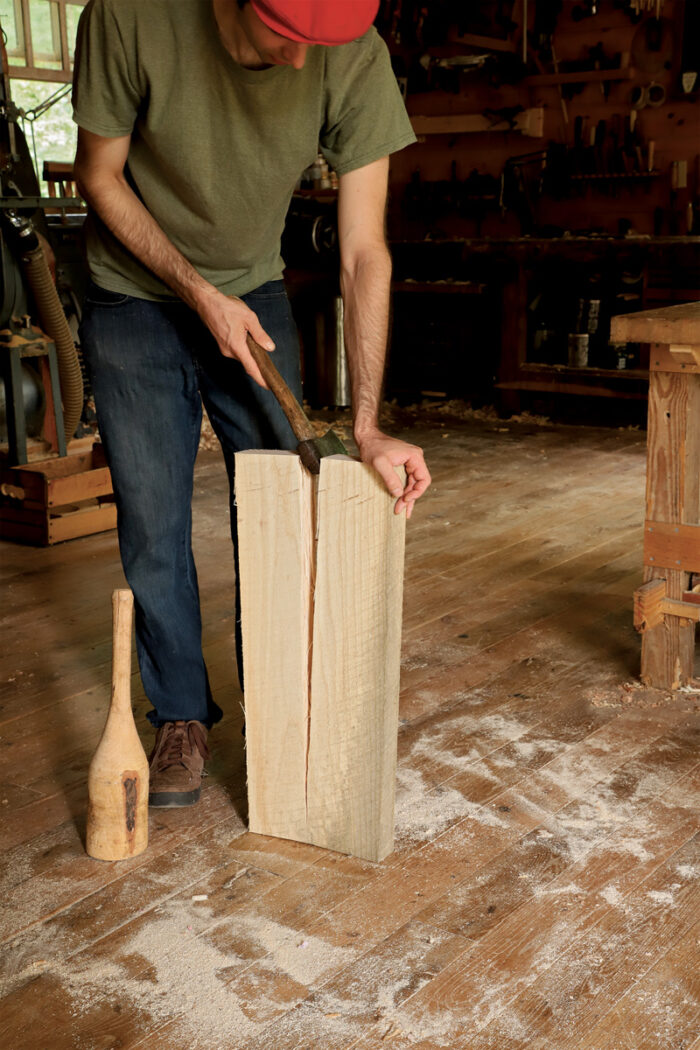
work just fine. The straighter the grain, the better the bending will go (and the easier it will be to achieve smooth surfaces with a spokeshave). Splitting the parts from a log is the most accurate way to follow the grain and get parts with continuous long fibers. Don’t have a log? You can split the parts from a board. Using green or air-dried wood will minimize breakage during bending. But the bend is shallow enough that kiln-dried lumber might work, even without a bending strap, though the shaping will take more effort.
The drawknife is my favorite shaping tool. It is fast and precise and follows the grain—and it’s fun! First, shave two adja–cent faces of a leg blank so they are per–pendicular with each other and parallel with the grain. when you can take a thin shaving in both directions on a given face and get minimal tearout, you are cutting parallel with the grain.
With the first two faces finished, scribe depth lines with a marking gauge on the other two faces, then use a drawknife to shave to the lines to create a blank with a square cross-section. Next, shave the leg’s double taper, and once the legs are tapered, shave them to an octagonal cross-section with the drawknife. You don’t need to make the surfaces perfect; you’ll use a spokeshave to clean up these facets after the legs have been bent and dried. Also, leave the leg oversize at this point so that when you do final shaping, you can cope with any shrinkage (up to 10% if the wood starts out green) and slight warping. Prepare the stretcher blanks now, too. Use a drawknife or plane to bring them to a 3⁄4-in.-square cross section, leaving some leeway for drying.
Boil, bend, and dry the legs
When bending legs like these I find that boiling is often easier than steaming. boiling serves exactly the same function as steam-ing, without the need for a bulky steambox. Only the bottom third of the leg needs to be softened for the bending, and that much will fit nicely into a stockpot filled most of the way with water. To prepare for bending, build a bending form and then boil or steam the legs for about 30 minutes. bend the legs in the form and use clamps to hold them in place.
If I’ve used green wood, I now set the legs aside in the bending form and let them air-dry for about a month. drying time will vary depending on heat, humidity, and air flow. If you’re working air-dried or kiln-dried stock, you can skip this step.
Next put the legs, still in the form, into a simple kiln with a small heat source inside. (Insulation board duct-taped together makes a good rudimentary kiln—or use a large trash can, as I did.) A few days in the kiln at around 140°F will help set the leg bend, reducing springback. once the legs fall out of the form, remove them from the kiln. After that, unless I’m working on the parts, I keep the tenons dry by inserting them through holes in the top of the kiln. The dry tenons swell after assembly, locking the joints tight.
I rough-shape the leg tenons with a spokeshave, then true them with a tenon cutter. Alternately, you can shape the tenons completely with a spokeshave and rasp, and check your progress with a tapered test hole: drill and ream a block of wood, coat the inside of the hole with pencil lead, rub the tenon in the hole, and remove high spots until the fit is right.
Time for the top
The tabletop can be made of most any kind of wood. I like light-weight tables so I use woods such as pine, tulip poplar, and bass-wood; for this table I used buckeye. once you’ve flattened the blank, lay out the octagon. but don’t saw it out yet. The corners will be useful for clamping the top to the bench while you cut the leg joinery.
On a table like this, the angled legs usually look best when the tips of the feet are roughly even with the edge of the top. If the legs were straight, determining the drilling angle would be easy.
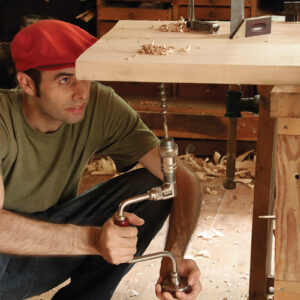
But since the legs are bent and the bends will likely vary from leg to leg, the initial angle for boring the leg mortises is an approximation. during the reaming process, you’ll correct for any variations in boring, tenoning, or bending. bore the through-holes 7° off vertical with a 11⁄16-in. bit. I use an auger bit in a bit brace, but a brad-point bit in a power drill will also work.
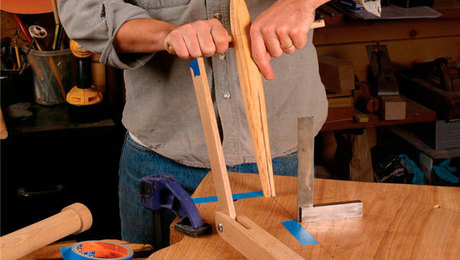
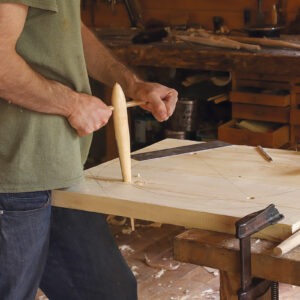
Now start reaming. when the tenon seats in the hole without wobbling, check the leg angles. Use a bevel gauge set at 98.5° to assess the interior angle and a square to check the side angle. For the interior angle you’ll need a reference line on the leg (see top photos, p. 35). Let’s say the leg needs to go to the right. remove it and continue reaming. Push the reamer straight into the hole,but put some extra pressure diagonally back and right. ream a few turns, then reinsert the leg and check the angles again. keep reaming and checking until the angles are right and about 1⁄4 in. of tenon protrudes from the top.
Stretcher mortises and shaping
Next, with the legs fitted, bore the mortises for the stretchers. Then it’s on to shaping the stretchers. To make a clean half-lap joint, the stretchers need to be straight and square. I use a block plane to straighten the faces and bring the piece to 5⁄8 in. square. Next, use a drawknife to turn the stretchers into a tapered octagon, leaving a 21⁄2-in.-long section square at the middle of each stretcher.
The stretcher tenons can be cut in a variety of ways. I usually roughly round the tenons with a spokeshave, then use a steel dowel plate with a 1⁄2-in. hole drilled in it. relieving the underside of the hole with a larger bit or a file can help reduce drag and unpleasantness. Try a test joint to make sure your dowel plate and mortise bit match. As an alternative to the dowel plate, you can carefully shape the tenons with a spokeshave, file, and sandpaper. Tenon shoulders don’t appeal to me, so once the tenons are cut, I use a spoke-shave to flush the octagonal facets to the tenon, and to transition the arrises down to the tenon as well.
Subassembly required
To lay out the half-lap that joins the stretchers, first glue each stretcher to its pair of legs. with the
tabletop upside down, dry-fit one leg assembly into its tapered mortises and then carefully insert the other assembly until its stretcher rests on the first one. rotate the assemblies a bit if need be so that the stretchers line up with the diagonal lines on the underside of the top. Then clamp the two stretchers together. Scribe two lines onto each stretcher where they cross each other, and use a marking gauge to mark half the thickness of the stretcher. Then use a square to connect the scribe lines to the marking-gauge lines.
Saw the sides of the notch, chisel out the waste, and pare the sides until they fit over the other stretcher. Chisel the bottoms of the notches until the two stretchers are al-most flush—you will plane them perfectly flush after glue-up. Now test the fit of the leg assemblies into the tabletop and mark the leg tenons for wedges oriented perpendicular to the grain of the top. Then remove the legs, cut kerfs in the tenons, and make some 8° hardwood wedges.
Glue up and finish up
Now at last you get to saw out the top. At the bandsaw I cut the octagon and then bevel the underside to make the top look thin and light. I clean up the bevels and give them a slightly pillowed surface using a drawknife and a spokeshave. when the top is ready, glue in both subassemblies and clamp the stretchers together at the half-lap. Then turn the table right side up, glue and drive the wedges, and smile a smug smile of success.
But wait—only three legs touch the ground. maybe the top is sloped, too! on a flat surface, shim the legs to get the top level left to right and front to back. Find which leg is farthest off the surface and mark all four legs at that height; use a handsaw to cut the legs to your lines. Saw the leg tenons protruding through the top, then use a gouge and plane to trim the tenons flush. while you have a plane in your hands, you can add a chamfer to the perimeter of the top. I finished the table with milk paint in a black-over-red combination often used on windsor chairs.
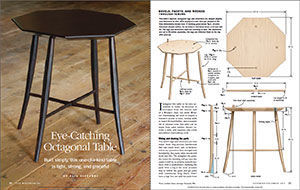
From Fine Woodworking #278
To view the entire article, please click the View PDF button below.
 |
|
 |
|
 |



Log in or create an account to post a comment.
Sign up Log in