Coffee Table Puts Joinery on Display
Harmonious details will work in tables of many sizes.
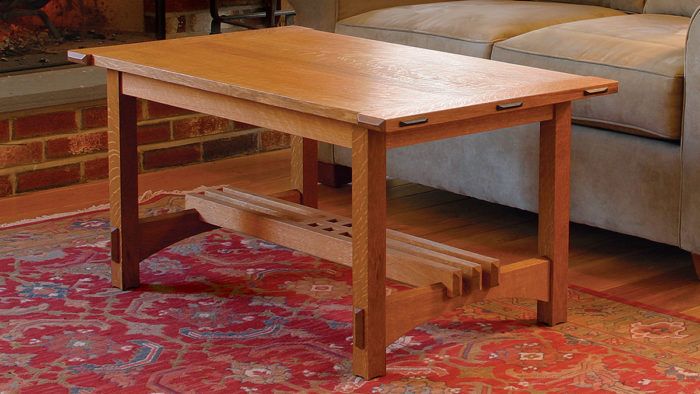
Synopsis: Arts and Craft style is noteworthy for taking joinery — the product of the craftsman’s hand — and elevating it to the level of artistic decoration. In this article, furniture maker Kevin Rodel shares design elements and technique for building a series of small tables that showcase four decorative joints: through tenons, gridwork, half-lap joints, and breadboard ends with ebony accents. Using a coffee table as an example, Rodel gives step-by-step instructions on how to incorporate these design elements in tables of almost any size.
Arts and Crafts style is noteworthy for taking joinery—the product of the craftsman’s hand—and elevating it to the level of artistic decoration. The basis of this table design is four decorative joints: through-tenons, gridwork, half-lap joints, and breadboard ends. These design elements will work beautifully together in tables of almost any size.
Although the project detailed here is a coffee table, the techniques are the same for all of the tables illustrated on p. 45. I usually build the base first. Start by milling the leg stock to the required square dimensions, and then cut it to length.
Cut mortises before tenons
A rule of thumb is to cut mortises before cutting and fitting tenons. Lay out the mortises in the legs. The aprons are joined to the upper portion of each leg with stopped mortises, which intersect inside the leg. Keep in mind that the leg and apron junction is not flush; the apron is set back from the outside face of the leg, so lay out the mortises accordingly. I recommend a 3⁄4-in. shoulder at the top of each mortise to keep the end grain from splitting, but only a 1⁄4-in. shoulder is necessary at the bottom. Make the tenon 3⁄8 in. thick. All of these apron mortises can be done with the same machine setup, whether you are using a mortising machine or a plunge router.
The through-tenons at the lower end of each leg are thicker because they also function as a decorative detail. Note that the ends of the tenons are both beveled and wedged, in that order. Make each through-tenon about half the thickness of the leg stock and, of course, centered. That means a 7⁄8-in.-thick tenon for the 13⁄4-in.- thick leg on the coffee table. There is no need for a variety of cutting bits to make large mortises for these through-tenons. I make two cuts with a 1⁄2-in.-dia. bit, referencing off opposite sides of the leg, which guarantees the mortise is centered. When cutting a through-mortise, set the stops to cut a little more than halfway through the leg, and then turn the workpiece around and finish cutting from the opposite face.
Because the tenon will receive two wedges when assembled, the mortise must be flared slightly toward its outer, visible face. To flare the mortise, simply add an extra 1⁄16 in. when laying out the upper and lower ends of the outer face. Then follow the layout lines when mortising halfway through from each side. Don’t worry about the small step created inside each end of the mortise. The tenon will be made to fit snugly into the shorter inside length of the mortise, and the wedges will flare the tenon at the top and bottom to close the gap and leave a neat-looking joint.
A final, optional design detail is the small coves I add to the bottom of each leg. They can be cut most easily on a router table, with a bearing-guided 1⁄4-in.-radius cove bit, but you also can use a laminate trimmer and a steady hand.
With the legs complete, make up the apron parts and tenon the ends. The tenons will intersect within the mortises, so cut the ends at a 45° angle.
On the arched stretchers, complete the joinery first
The most labor-intensive pieces in this design are the arched stretchers in the table base. The key is to complete the joinery before doing anything else.
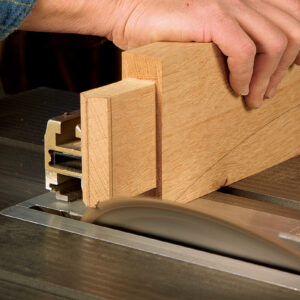
When cutting the stock to length, remember that the through-tenons will protrude 3⁄8 in. beyond the legs. It is critical that a through-tenon fits snug in the mortise—not so tight that you need to force it in with a mallet, nor so loose that the joint will fall apart from its own weight. When satisfied with the fit, dry-assemble the joint and use a sharp pencil to mark around the tenon where it protrudes through the leg. This line will help you set up the tablesaw for cutting the bevels on the tenon ends. Use a good crosscut blade and don’t cut right up to this line; leave 1⁄16 in. or so between the cut and the pencil line. Now scrape, file, or sand the exposed end of the tenon. When the base is assembled, the beveled end should appear to grow right from the surface of the leg.
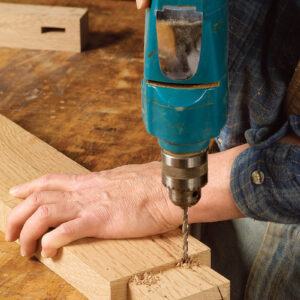
Before assembling the table base, bandsaw two kerfs in each tenon—al-most down to the shoulder—to receive the wedges. Locate these kerfs about 3⁄8 in. from the ends, and drill holes at the bottoms to keep the piece from splitting.
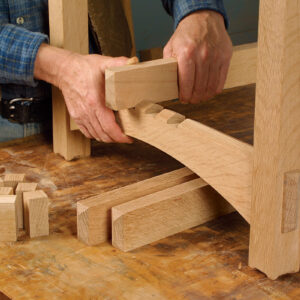
Notch the arched stretchers for the gridwork—With the through-tenons complete, notch the arched stretchers for the half-lap joints to hold the gridwork. The half laps are not going to be flush; half of the thickness of the gridwork sits atop the arched stretchers. Therefore, the depth of the notches in the arched stretchers as well as those in the underside of the gridwork should be a quarter of the thickness of the gridwork. Each member of the gridwork is 1 in. wide and spaced 1 in. apart, dimensions which determine the width and spacing of the notches.
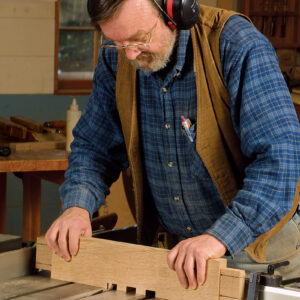
I cut the notches in a series of passes with a fine crosscut blade on the tablesaw, using a crosscut sled and working to the layout lines. In keeping with the beveled look used throughout the piece, I also bevel the top edge of the arched stretchers 30° on each side, so it comes to a point.
To make the arch, use a shopmade template of 1⁄4-in.-thick material several inches longer than the stretcher. Lay out, cut, and smooth a curve that is pleasing to your eye. Use the template to lay out the stretchers, and bandsaw them close to the line. Then attach the template to each stretcher with double-sided tape and use a bearing-guided, flush-cutting router bit to smooth the arch.
Assemble the ends of the base
At this point, finish sanding all of the parts made so far and assemble the ends of the table base. Before glue-up, make two wedges for each through-tenon. The wedges should be thick enough to fill the 1⁄16-in. gap at each end of the mortise be-fore they bottom out in the sawkerf.
When gluing the through-mortises and-tenons, I have found it best to apply glue on the tenon only. Spread the glue so that it does not get onto the exposed end and also leaves bare the inner third of the cheek, next to the shoulder. As you seat the tenon in the mortise, the glue will spread backward and cover the en-tire tenon surface, ideally without oozing out at the shoulder. Never apply glue in a through-mortise; it only will push out onto the tenon end and the leg, leaving a mess that is hard to clean up and that might interfere with the finish.
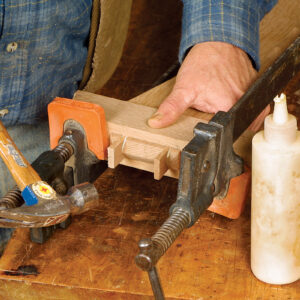
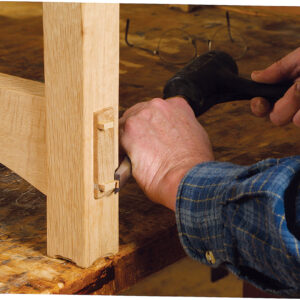
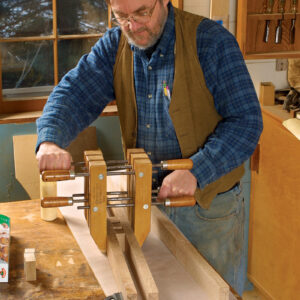
Glue-up of this subassembly should be organized and quick. As soon as the two legs, apron, and arched stretcher are in clamps and checked for square—but before the glue has set—apply a small amount of glue to the ends of the wedges and drive them into the sawkerfs with a small hammer. Do one tenon and then the other, but alternate hammer blows to the wedges of any one tenon so that both wedges go in equally. Saw off most of the excess with a dovetail saw and then pare the surface clean with a chisel.
Build and attach the gridwork
With each end of the table base complete, dry-fit the entire base using the long apron members. Be sure that the tenons in the apron don’t hit each other inside the legs.
Now it’s time to decide exactly how long to make the gridwork. It should protrude at least 1 in. beyond the arched stretchers; otherwise, the half-lap joints may be weak. Once you have settled on the length, mill three pieces of stock to the required width—1 in.—but leave them about 1⁄4 in. thicker than the final dimension and at least 3 in. longer. Test-fit these pieces in the half-lap notches you cut earlier in the arched stretchers.
From the excess length, cut off enough 1-in.-long blocks to form the grid, leaving a few extra as temporary spacers. Now cut the three long pieces to their exact length and bevel the ends on the tablesaw just as you did the ends of the through-tenons. Be sure to keep these three pieces the same length. Then, on a flat surface, clamp them together, ends square. Find the centerline and use a sharp pencil to lay out the grid.
The gridwork appears complicated but is actually built with simple butt joints be-tween the long and short pieces.
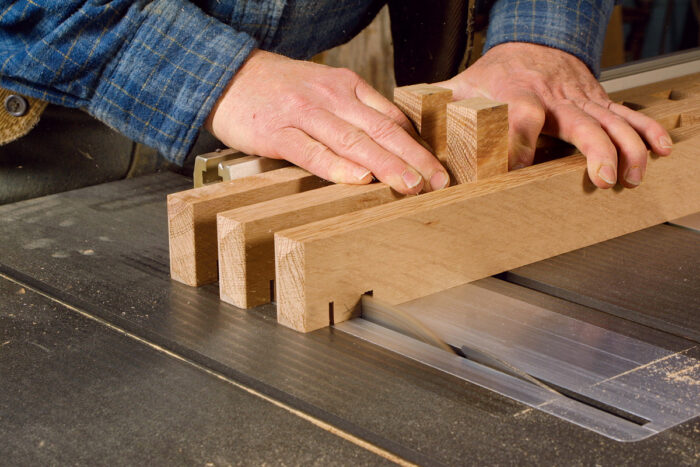
Dry-fit the gridwork to lay out its notches—When the gridwork is assembled and glue is set, send the assembly through the planer on each side, taking light cuts to bring it down to final thickness and to level out any inconsistencies in the grid. Now place the assembly on the base and fit it into the half-lap notches. With a knife, scribe the location of the half laps to be cut into the underside of the gridwork. At this point, the extra 1-in. spacer blocks come into play. Tape or hold them in place several inches away from each end to keep the parts from flexing while you cut the half-lap notches on the tablesaw.
To finish assembling the table base, first glue and clamp the end assemblies to the remaining apron members, and then attach the gridwork. Rather than trusting glue alone to secure the half-lap joints, I like the additional security of screwing these members together from below.
Make the breadboard ends
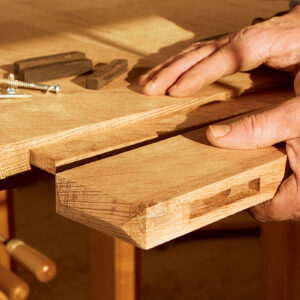
With the top panel glued up and surfaced, you are ready to make the breadboard joints. Consider the anatomy of the bread-board ends when cutting the top to length, remembering to allow for the two tongues. I make the breadboard tongues 11⁄4 in. long.
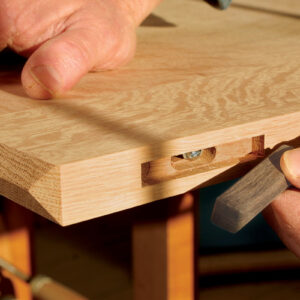
Now, scribe the shoulder line for the tongue around all sides. I attach the finished breadboard with screws driven through its edges into the end grain of the tabletop. However, a screw in end grain does not provide the strongest joint with-out some modification, so before cutting the tongue, I glue wood plugs into the end grain to give the screws some long grain to bite into. While the plugs are drying, make up the breadboards. In keeping with the overall aesthetics of the piece, I purposely make the breadboards longer than the table width and bevel their end grain to match the ends of the through-tenons in the base. Be sure that the length of the breadboards is sufficient to withstand seasonal wood movement; they should remain a little longer than the width of the tabletop, even when it expands due to humidity.
Center the long mortise in the bread-board and cut it a little deeper than the 11⁄4–in.-long tongue will be. Stop this slot about 1 in. from each end. The center of each breadboard is attached with a screw and glue, while the end screws pass through slotted holes and are used without glue. On the opposite edge of each breadboard, where the ebony plugs will be located, make 1⁄4-in.-deep slots, 3⁄8 in. wide, squaring the ends with a chisel. Use a drill press to drill clearance holes through the center of these shallow slots. Elongate the outside holes to allow for wood movement.
Now, back to the tongue. Using a plunge router and a breadboard-end jig, cut the tongue to its 3⁄8 in. thickness (this jig is described in Scott Gibson’s article on sofa tables in FWW #162, p. 78). Trim the ends of each tongue to allow for seasonal expansion, and dry-fit the breadboard to be sure of a snug fit.
Next, insert an awl through the screw holes to mark on the tongue’s end grain where the screws will enter. If you did everything right, these points will line up with the hardwood plugs in the tongue. Remove the breadboard, drill pilot holes for the screws, add glue to the center few inches of the joint only, reattach the bread-board, and drive all of the screws.
Finally, make up some ebony (or any other dark wood) plugs to cover the slots and screw heads. After finish-sanding or scraping the top, attach it to the base. If you use white oak for this project, as I have, and you wish to darken it with ammonia fumes, see my article on the process in FWW #126, pp. 46-49. I finish all of my work with Tried & True linseed-oil finishes, which have a tone that warms up the cool color of fumed white oak.
From Fine Woodworking #178
For the full article, download the PDF below:
Fine Woodworking Recommended Products

Stanley Powerlock 16-ft. tape measure

Sketchup Class

Dividers



Log in or create an account to post a comment.
Sign up Log in