Curved Stretcher Adds Grace and Legroom
Leaving the stock extra long until the last moment can compensate for unforeseen discrepancies.

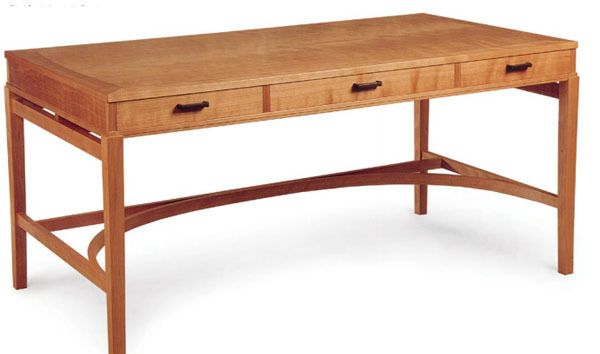
Synopsis: Furniture maker Mark Edmundson explains how to make a bent-laminated curved stretcher that can lend graceful lines as well as ample legroom to a table or desk. Step-by-step instructions detail laying out the curve, preparing the form, gluing the lamination, selecting the joinery, cutting the splice joints, and finally, gluing the stretcher to the legs.
The first time I saw bent-laminated stretchers was on furniture made by Edward Barnsley. He used this detail with success on everything from chairs to dining room tables. I admired the combination of graceful lines and the practical benefit of ample legroom. The bent-laminated stretcher struck me as a detail that would get attention, but in a subtle way. It also looked like it would be a challenge to construct.
When I finally slipped it into a design for a bench, I anticipated some frustration. However, as I built that piece and others like it, I found that the potential for inaccuracy doesn’t have to threaten the success of the project. By leaving the stretcher-assembly stock extralong until the last moment, I’ve found that I can compensate for unforeseen discrepancies.
I highly recommend using full-scale drawings when building a piece with curved parts; you’ll consult the plan view constantly for information. On the drawing, lay out the location and shape of the legs first and then the rear and side stretchers. The location of the rear stretcher is a matter of taste, but a couple of inches from the back legs is a good starting point.
The most critical areas are the splice joints between the front ends of the bent lamination and the side stretchers. Also, you must cut a flat face at the center of the lamination, where it attaches to the rear stretcher. Use the full-size drawing to determine the curve of the lamination so that it meets the stretchers and front legs as it should.
The bent lamination needn’t be a radius curve. In fact, a curve with tighter corners and a slight flattening in the middle is more graceful and provides more legroom. I lay out only half of the curve and then use a half-template to create a symmetrical, full template. Check the full curve on your drawing, then use it to make the lamination form.
Glue Up The Bent Lamination
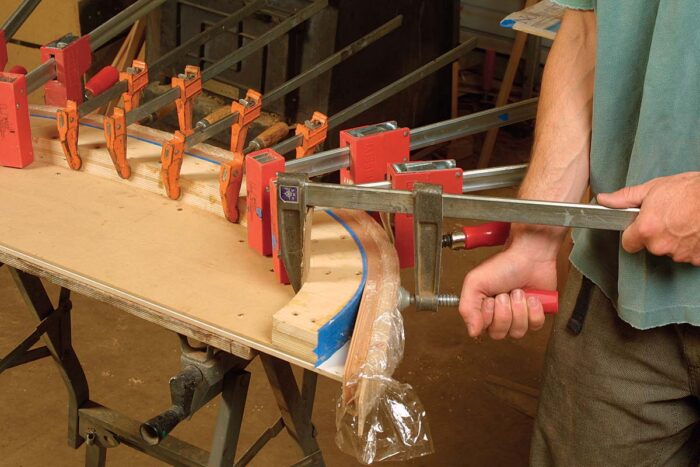
The adhesive I use for bent laminations is Unibond 800, a two-part urea resin available from Vacuum Pressing Systems (800-382-4109; www.vacupress .com). This glue creates a more rigid glueline and less springback than yellow or white glue. Still, you should make the bent lamination a couple of inches longer than the finished piece to allow adjustments for a slight amount of springback. I’ve found that 3⁄32 in. is a good thickness for the plies.
After the glue has set, remove the bent lamination from the form and clean up the top and bottom edges. Start on the jointer, and then trim the other edge on the bandsaw. Finish off that bandsawn surface by running it through a thickness planer.
Return to the plan drawing with the curve. Does it still meet the leg in the intended location?

From Fine Woodworking #176
For the full article, download the PDF below:
Fine Woodworking Recommended Products

Estwing Dead-Blow Mallet

Bessey EKH Trigger Clamps


Comments
I am assuming you are dry bending your wood? At 3/32 thickness could you estimate the minimum radius reasonably expectedly? I am building a live edge table and want to use something similar to your plans. Beautiful!
Another beautiful piece from College of the Redwoods trained artisan. Striking design and subtle accents. I'm going to try my hand with this one.
Why not cut splice joint by hand?
Log in or create an account to post a comment.
Sign up Log in