Dining Table with Two-Way Drawers
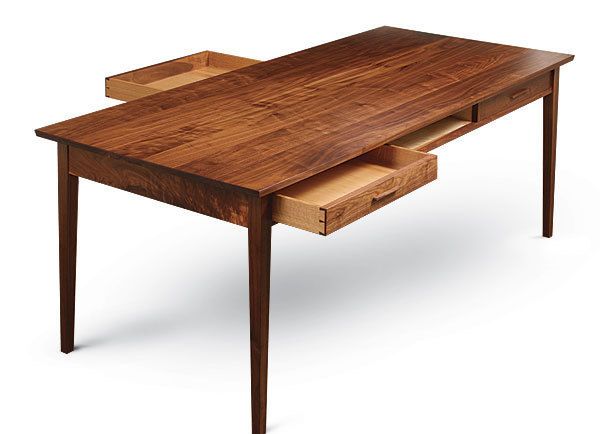
This versatile table doubles as a worktable, with double-fronted drawers accessible from either side.

Synopsis: Double-fronted drawers, accessible from either side, make this dining table a storage powerhouse. Upper and lower drawer stretchers with drawer dividers solidly mortised into them provide the support. The table has the usual parts: legs, stretchers, dividers, runners and kickers, aprons, and drawers. But because it is built like a torsion box and the drawers have double fronts, the how-to is more like a cross between a chest of drawers and a basic table. Keep track of the joinery and work in the right order, and you’ll have a versatile dining table that’s more than just a pretty face.
From Fine Woodworking #219
Many of my favorite designs began with a challenging request from a client, and that was definitely the case with this table. The client wanted a dining table that would double as a worktable with a lot of storage, so I added double-fronted drawers accessible from either side. That required a drawer with half-blind dovetails at both ends, and a support system that could handle the extra stress of deep drawers when fully loaded. So I designed a table with upper and lower drawer stretchers that have the vertical dividers mortised in solidly. In addition, I wanted a clean design that would emphasize the beauty of the wood, and in this case tie into the eclectic setting that would be its home. I chose walnut because the table would be paired with a set of walnut nakashima benches.
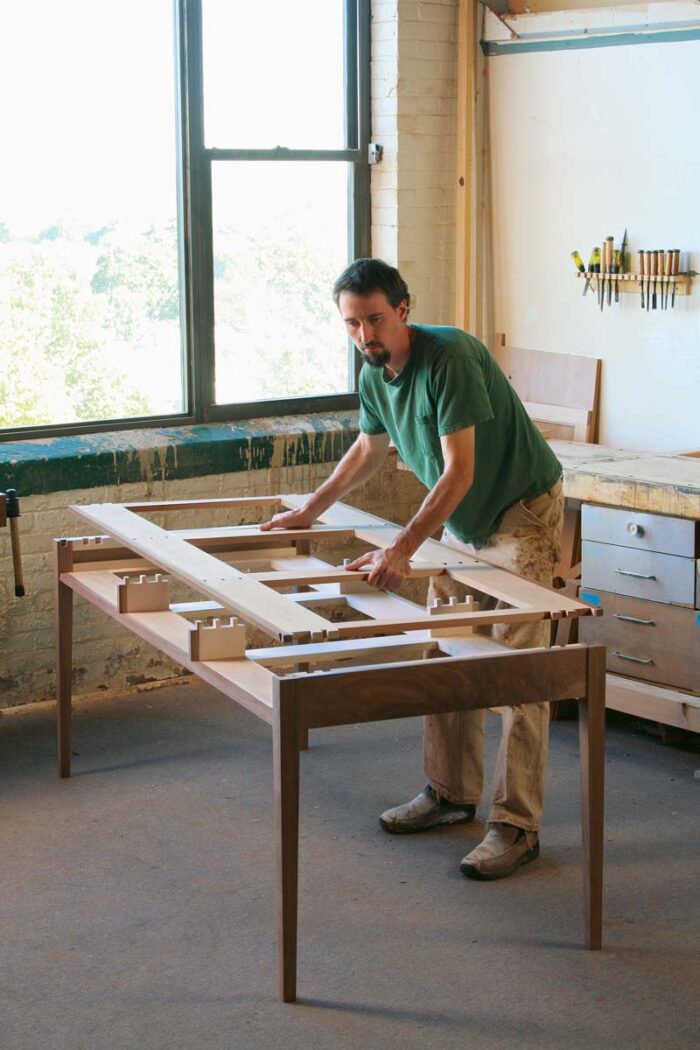
The table has the usual parts: legs, stretchers, dividers, runners and kickers, aprons, and drawers. But because it is built like a torsion box and the drawers have double fronts, the how-to is more like a cross between a chest of drawers and a basic table. Keep track of the joinery and work in the right order and you’ll have no trouble reproducing this versatile dining table.
Mortises, and lots of them, are the key to this construction To begin, I go to my hollow-chisel mortiser and mortise the legs and stretchers, about 52 mortises in all. The upper and lower stretchers are mortised through their faces for the vertical dividers that separate the drawers. Take extra care that all these mortises line up top to bottom, because their alignment is critical or the vertical dividers will be crooked. To do this, I clamp all four pieces together and, using my square as a guide, score a line across the inside edge of the stretchers. Then I transfer those lines across the faces of the stretchers to lay out the exact mortise locations.
Keep in mind that the legs are designed with a very simple double-sided taper that begins at the base of the apron. I cut the joinery before tapering the leg, so I can work on it while it is still flat and square. I cut the mortises for the lower stretcher and the haunched mortises for the side aprons. The upper stretchers connect to the legs with lap dovetails. The socket for the dovetail is cut later.
Now that the mortises are cut, it’s time to move on to the tenons on the aprons, the drawer runners and kickers, the lower stretchers, and the vertical dividers.
Download the plans for this table from the Digital Plans Library. Plus, browse 100+ other plans available for members only.
For the full article, download the PDF below:
Fine Woodworking Recommended Products

Sketchup Class

Jorgensen 6 inch Bar Clamp Set, 4 Pack

Festool DF 500 Q-Set Domino Joiner


Log in or create an account to post a comment.
Sign up Log in