End-Grain Coffee Table
Bring butcher's block out of the kitchen with these design and construction tips.
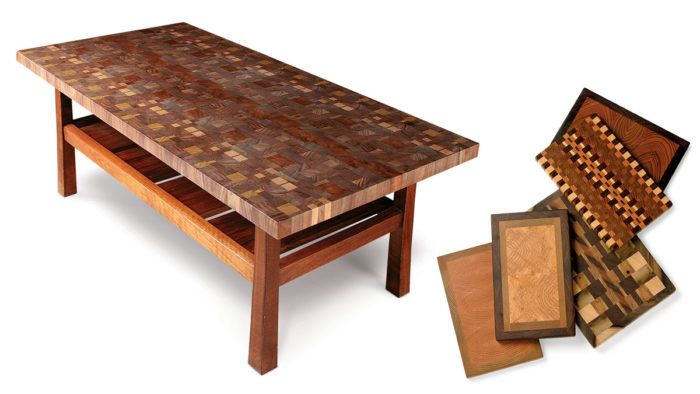
Synopsis: Mark Koons takes butcher’s block construction out of the kitchen and into the realm of fine furniture, opening up new design horizons in the process. But before you start building, read his advice. Working with end grain up takes a good deal of planning, consideration of wood movement, and repetitive steps. Koons’s process involves two big glue-ups: a long grain glue-up and then an end-grain glue-up. Basically, he glues sticks together, surfaces and crosscuts them, and then reglues them as end grain. Follow his tips for harnessing wood movement and keeping the pieces in order, and you’ll soon be building end-grain furniture with striking color, depth, and interest.
I started working with end grain because it packs an intense visual punch and gave me a use for scrap pieces that would otherwise have been discarded. End grain also allows me to use domestic woods with renewed interest because it brings out different grain features and colors than can be seen in the long grain. I also discovered that end-grain slabs allow unique furniture forms that wouldn’t be possible with long-grain construction.
End grain creates a very durable tabletop. Butcherblock countertops wear out knives before they need resurfacing, and finishes can wick deep beneath the surface of end grain, adding to its imperviousness. Of course, this quality isn’t as important in a coffee table as it is in a countertop, but is it ever a problem to have a tabletop that’s too durable?
Working with end grain up takes a good deal of planning, consideration of wood movement, and repetitive steps. But the results are worth the effort. I use end-grain construction in kitchenware, but this type of construction can be just as beautiful in high-end furniture as it is utilitarian in the kitchen. If you are intrigued by the possibilities of end grain, here’s what you need to know.
Arrangement of wood is key to success
The greatest challenge to this work is wood movement. Wood always expands or contracts with changes in humidity. The solution is balancing the construction— arranging the parts based on grain direction.
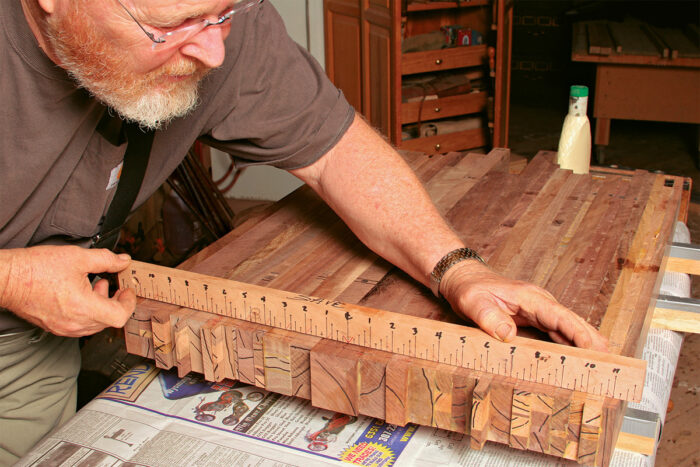
You could put the pieces together without considering their orientation, but that randomness would lead to an unstable slab. For example, instead of deliberately arranging annular rings so that they alternate in direction and restrain each other’s movement, you could end up with a row of end grain that all moves in the same direction. If you compound the problem in the adjoining row, the laminations will pull apart in about one year’s time.
Keep in mind that smaller overall slabs accumulate less internal stress than large ones. Also, thinner assemblies generate less stress than thicker ones. So the thicker or larger an end-grain construction, the greater its tendency to move and surface check if the grain isn’t arranged carefully.
Beginners also should consider that a single-species lamination, especially of some relatively stable wood like walnut, will be easier to lay out than one patterning a range of species with different expansion properties. Also, you can get plenty of contrast from the grain patterns and colors of a single species, while it’s easier to create an eyesore when mixing woods.
Different wood species have different rates of tangential (parallel to the growth rings and perpendicular to the grain) and radial (perpendicular to growth rings) shrinkage. So if you do mix woods, species that are stable should be used to restrain those that are less stable. You can research the stability of different species in R. Bruce Hoadley’s Understanding Wood (The Taunton Press, 2005) or at the Web site of the Forest Products Laboratory (www.fpl.fs.fed.us).
Butcher-block assembly made easy
Creating fields of end grain does not require fitting together hundreds of little cubes. Nor does it involve sawing off laminations like slices of salami, although some manufacturers do exactly that. My process involves two big glue-ups: a long grain glue-up and then an end-grain glue-up. Basically, I glue sticks together, surface and crosscut them, and then reglue them as end grain.
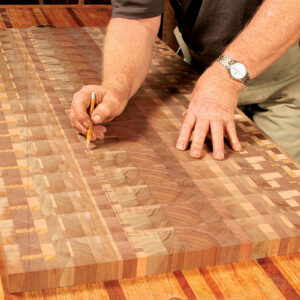
Arrange the sticks—First, I rip the sticks to width. Before any glue is spread, I arrange the components, balancing them the way I described earlier, to make good visual and structural sense in the final assembly. I pay attention to grain, widths of the sticks, species, and color. Once I settle on an arrangement, I mark the sticks with a soft pencil to keep track of the order. Throughout the process, I continually mark the pieces to keep them arranged in the correct order. In determining the length of your sticks and crosscuts, it’s important to make note of the relationship between the thickness of the first lamination (the long-grain slab), the width of the subsequent crosscuts, and the overall thickness and length of the tabletop. The thickness of the long-grain slab will determine the width of the repeating end-grain pattern on your tabletop. The width of the crosscuts of the long-grain slab will determine the thickness of the top.
As an example, if I wanted to build a tabletop 1 in. thick by 24 in. wide by 36 in. long, I could begin by making a long-grain slab that was 21⁄8 in. thick by about 243⁄16 in. wide (leaving a little extra to trim the assembly square later). For the 1-in.-thick top, I would make my crosscuts 11⁄32 in. But how long should I make the long-grain slab? If the cross-cuts are a heavy 1 in. and they get turned end grain up so the 21⁄8-in. pattern is facing the top and bot-tom, then I’ll need at least 18 in. plus the amount of 15 sawkerfs for the length of the long-grain lamination. But why cut it close? Make the lamination longer than you need, even if that means a few extra crosscuts kicking around.
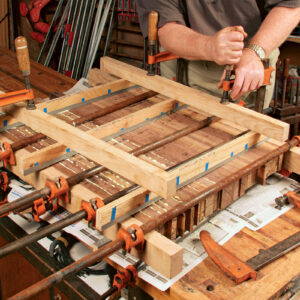
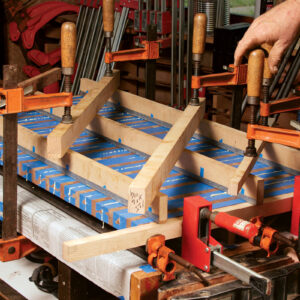
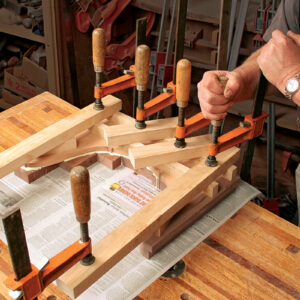
Glue and clamp the sticks—Once the assembly is arranged, it’s time to glue the sticks into one wide, long board. Some of the sticks are made from multiple layers, and some of those are made of short sticks butt-jointed and held in place when glued to the adjoining layer. Those multilayered sticks must get jointed and planed before becoming part of the larger glue-up.
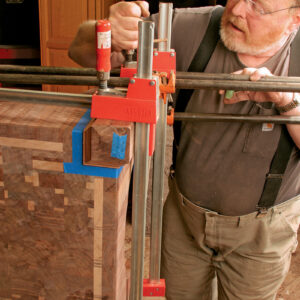
The cauls should be very straight and sturdy to prevent flexing, as they will deter-mine how level the glue-up is. The lower cauls rest between pipe clamps and hold the work up off the bench and slightly above the clamps. The upper cauls have a layer of cork on the bottom side that helps press the work flat against the lower cauls. Make sure all the cauls are stick-free by taping or waxing.
You’ll need a flexible adhesive. Yellow glue is notorious for cold-creep, the tendency for a glue to allow slow but inevitable movement over years. Here, that is an asset because it stretches when the wood expands and contracts as the wood does.
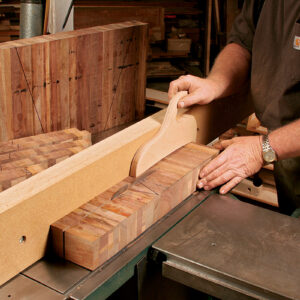
Surface then crosscut vs. crosscut then surface—Once the sticks are glued into a slab, you can make the crosscuts that establish the end-grain surface. This is a crucial place for quality machining. The more variation here, the more effort it will take to smooth the surface. You’ll need a clean, sharp blade squared to the table, a zero-clearance throat plate, and a sacrificial backup fence on your crosscut sled or miter gauge—elevated a little to keep dust from affecting the width of the crosscut. Ideally, you’ll want no burn marks or saw flutter on your cuts. every 0.001 in. error is 0.001 in. you’ll have to work off across the entire slab later.
Remove the clamps and scrape off the excess glue while it is still rubbery. If you have a planer wider than the slab, use it to surface the board before making end-grain crosscuts.
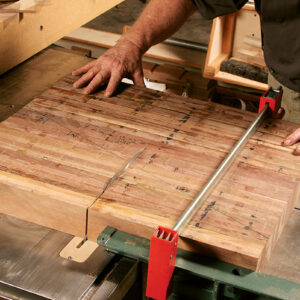
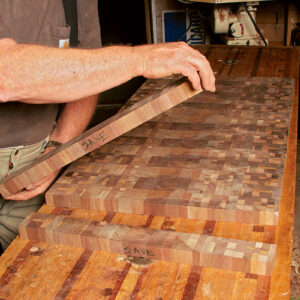
If your planer isn’t wide enough to accommodate the tabletop, you’ll have to clean up the surface with a scraper, crosscut first, and then use my tablesaw trick (see bottom right photo, p. 75) to lightly skim the surfaces of the cross-cuts before regluing them into the final end-grain lamination. Once you’ve cleaned up all the sides of the end-grain strips, arrange them back in order and witness-mark them. Now flip every other strip end for end and upside down, use a straightedge on the edges and a square on the end to square up the whole arrangement, and witness-mark them again. Align this mark in the final glue-up to keep the end-grain sticks square. Now you’re ready to glue the crosscut strips into the final slab. Use the same procedure for the final gluing that you used when you glued the long-grain sticks together; but this time, the cauls and clamps run lengthwise.
Surfacing end grain
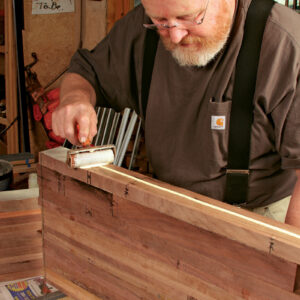
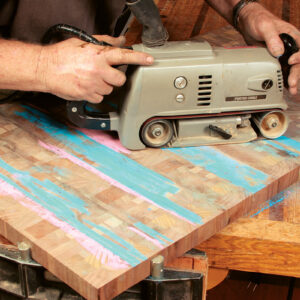
Because end grain is more durable than long grain and can be dangerous to run through jointers or planers, it takes a bit more work to surface. If you have your own wide-belt sander, then you are in luck. Renting time on a wide-belt sander is also an option, but short of that I’ve had success with a belt sander and random-orbit sander, as well as with handplanes.
If you don’t use a belt sander often, practice gliding the running sander squarely onto a test piece and backing off while slipping it sideways. On the actual workpiece, mark the high and low spots, grind away the high spots, and continually stop and check your progress with a straightedge, re-marking if necessary. Begin with 60- to 80-grit paper and move up to 220 grit on the belt sander. Clean and inspect the surface for uniform scratching before changing to a finer grit. When the defects are ground away and the surface is flat, move to the random-orbit sander, beginning with 80 or 100 grit and proceeding through 220 grit.
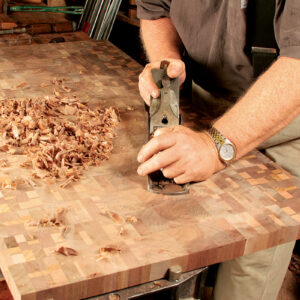
A well-planed surface is always the most beautiful. If you have a low-angle jack plane —even a low-angle No. 4 block plane will work—sharpen it well (expect to go back to your stones frequently), ease the corners of the blade, and work from the outside edges of the workpiece toward the center. In some ways it’s easier to plane end grain because you don’t have to worry about reversing grain. I’ve also had success with a standard-angle No. 7 plane equipped with a very sharp Hock iron.
A different approach to aprons and leg joinery
Long-grain tabletops are typically attached to a leg-and-apron system, and that type of assembly can be done with an end-grain tabletop as well. But end-grain work offers an alternative. Legs and aprons can be glued onto the edges of an end-grain slab. My method happens after the core tabletop is completely glued together.
At the same time as the apron, I add a border of the same width and length to my construction. It sits out-side the table core but inside the apron and creates a transition between the tabletop pattern and the outside apron.
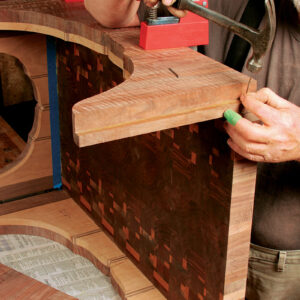
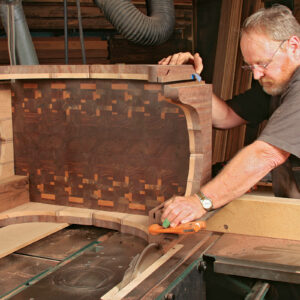
To create a border/apron combination, start by edge-gluing sticks into sections that fit the sides of the core. Keep in mind that you still have to balance the arrangement of the sticks in the border/apron construction. Once those sections are dry, laminate them to one another. Use a scrollsaw to cut the shape, and files and sanding drums to refine it. Then glue and clamp the apron assembly to the core.
Once the apron is secured on the core, I use my sliding tablesaw to cut corner notches for the legs. Don’t worry if you don’t have a slider on your tablesaw. Before I had one I used a shopmade crosscut sled to carry the tabletop assembly across the blade while notching out for the legs. Assuming a pair of miter-gauge slots and an extension to the right and behind the sawblade, make the sled out of two hardwood strips 20 in. long and two fences 21⁄4 in. by 51⁄2 in., the front one about 16 in. long and the back one about 60 in. long.
You can assemble the sled right on the saw by gluing the fences square to the guide strips and the blade, then flipping the assembly and screwing the joints before the glue is fully cured.
From Fine Woodworking #205
For the full article, download the PDF below:
Fine Woodworking Recommended Products
Drafting Tools
Circle Guide
Compass




Log in or create an account to post a comment.
Sign up Log in