Modern Desk: Final Glue-Up
Breaking down the assembly into manageable sections will reduce the stress of this multipart glue-up.
Start your 14-day FREE trial to watch this video
Plus, access more than 500 video workshop episodes when you become a member
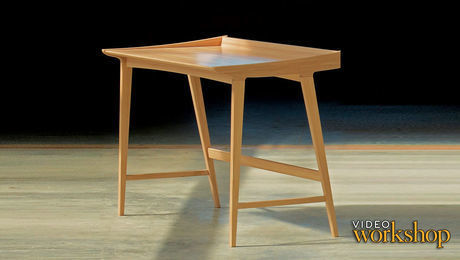
Tim Rousseau’s modern desk might look simple, but a lot goes into making such an elegant piece. While Tim tackles this project with a pro’s perspective using tools found in professional shops, he also draws parallels to tools found in most hobbyist woodshops.
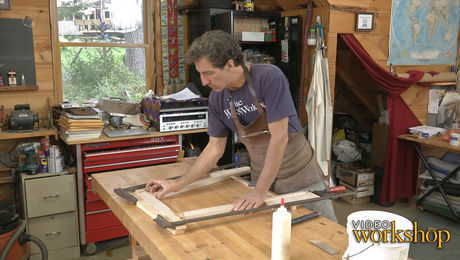
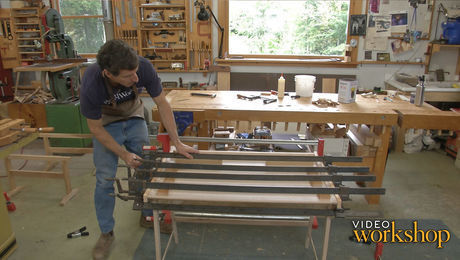
In this conclusion of the modern desk video workshop, things get a little stressful when the glue starts flowing, and the clamps come out.
Download the plans for this table from the Digital Plans Library. Plus, browse 100+ other plans available for members only.
Video shot and edited by Jeff Roos and Ben Strano
Produced by Ben Strano
Videos in the Series
-
How to Make a Danish Modern DeskJuly 9, 2019
-
Modern Desk: How to Veneer the Writing SurfaceJuly 9, 2019
-
Modern Desk: Router Templates for Curved PartsJuly 16, 2019
-
Modern Desk: Pattern-Routing Curved PartsJuly 16, 2019
-
Modern Desk: Joinery for the Desk TopJuly 16, 2019
-
Modern Desk: Angled Leg MortisesJuly 23, 2019
-
Modern Desk: Angled Tenons on the Table SawJuly 30, 2019
-
Modern Desk: Curved LegsAugust 6, 2019
-
Modern Desk: Making the StretchersAugust 13, 2019
-
Modern Desk: Making the Desk TopAugust 20, 2019
-
Modern Desk: Backsplash and Bottom ApronAugust 27, 2019
-
Modern Desk: Gluing Up the Side AssembliesSeptember 3, 2019
-
Modern Desk: Jig-Free Dowel JointSeptember 10, 2019
-
Modern Desk: Final Glue-UpSeptember 17, 2019




Comments
Hairy glue-up indeed!
Surprised you didn't just glue up one side and tops of stretchers with dry fit of the other side until the first side dries, then pop apart the second side and glue up... But then I am not a fan of excitement during my glue ups!!
Very well done and most important was the inclusion of a few types of finishes and the details of each. Something that is not always included but certainly important.
Way too complicated of a glue up using this type of glue. Surprised he was able to get the joints to close, and how did he check to see that he didn't put a twist in it given all of the hard clamping?
Could have been a disaster.
Loved the glue up portion. I've been there. You have dry fitted the whole thing and all your glue stuff is ready and then it's show time and you still find yourself running to the clamp rack. Thanks Tim. It was real helpful seeing you figure things out on the fly.
Good God that was painful to watch.
Huge fan of Sutherland Welles Polymerized Tung Oil, but usually go with Watco Danish Oil. I just love the look, ease of application and ease of refreshing with those. Great workshop!!
WoW!
Tim... just watching your glue-up has my linen bunched up! I am impressed with your cool under fire as I would have been cursing a storm moving and refitting those long clamps and trying not to ding the wood. Very exciting finish indeed! This race has convinced me to use your recommended brand of epoxy on my next glue-up. Great video series and as always, I learn from the best.
Just finished my own glue-up this AM using Tightbond III for the longer open time, where I would normally have gone with TB II Dark as it is mahogany. It went fine (not a lot os clamps) but the long spline/tenon on the desk top really grabbed in the mortise, given the very large surface area, but my cabinet clamps pulled it in nicely.
One thing to watch is that with the power of the cabinet master clamps I was easily able to put enough force on the assembly to actually slightly bow the top or the aprons or both, creating a gap between the underside of the top and the two aprons. I backed off the pressure and added a call and clamps over the center of the aprons.
I did consider using epoxy (I use a lot of it for boat building) but trying to control the squeeze out is problematic even if you wanted to tape off all the surfaces, in my experience you usually get significant seepage under the tape on unfinished wood. You could do some pre-finishing but.....
Also the two step process suggested in comment 1 above, I think would work fine for the less adventurous.
This desk is beautiful ! I thought the video was excellent. I do not own a shaper, but Tim’s was a monster. Safety training definitely a must. How can I obtain plans showing component dimensions and etc? Couple times on the table router operation, I would have shut it off for switching pieces.
Looking forward to viewing other FW videos by Tim.
Thank you, Tim.
Try: https://www.tauntonstore.com/fine-woodworking-s-writing-desk.html
Log in or become a member to post a comment.
Sign up Log in