Federal Demilune Card Table
A folding top, gate legs, and a curved apron distinguish this piece.
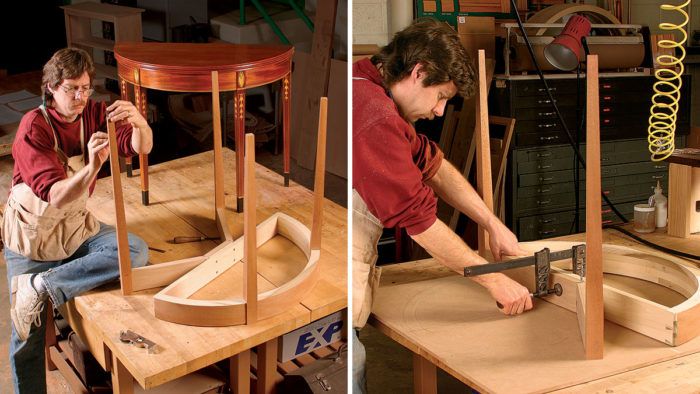
Synopsis: It takes both traditional and modern techniques to build Steve Latta’s demilune card table, a design that dates to the early years of American independence. This mahogany piece has a folding top, gate legs, and a curved, veneered apron constructed of brick laid poplar. The back legs swing on knuckle joints, and the front and rear legs are tapered. The table, based on Baltimore pieces, is stylish enough to remain unadorned, but can also be embellished with inlay.
Demilune card tables are a favorite project of mine because building them involves tools and techniques both traditional and modern. Their ancestry dates to the early years of American independence when they were popular all along the Eastern Seaboard. True to the neoclassic passion for symmetry, they often were made in pairs and positioned to balance a doorway, alcove, or dominant piece of furniture.
During an age of newfound wealth and status, the nouveau riche used the level of ornamentation on their card tables as one way to flaunt their wealth. Price books and recovered invoices of the time set individual costs for stringing, bellflowers, ornamental ovals, and the like. With the intricacy of the inlay reflecting the status of the owner, the level of embellishment on period tables varies enormously. This table, based on Baltimore pieces, is stylish enough to remain unadorned, but the Master Class on p. 102 will guide you through adding stringing and banding appropriate to your tastes and skills.
The curved apron is bricklaid poplar
After you have made a full-scale drawing (see pullout), begin by building the core of the table’s semicircular apron. This requires a full-size pattern made from 3⁄4-in.-thick medium-density fiberboard (MDF). Cut the semicircle with a router mounted on a radius jig, taking the radius from your drawing. Remember to deduct the thickness of the outside veneer. Extend the curve well beyond 180°, then mark the location of the legs, the inside edge of the apron and the location of all of the bricklaid joints.
Cut the sections for the first layer (see photos, next page), and then reinforce the joints with double splines for extra strength. Because these joints will be hidden by the front legs, irregularities showing on the outside surface are not an issue.
Before gluing, stick a piece of 2-in.-wide clear tape on the pattern underneath the two joints to prevent squeeze-out from binding the apron to the pattern. Next, dry-clamp the three sections on the pat-tern, trace along the curve, remove the sections and cut off the overhang on a bandsaw, leaving no more than 1⁄16 in. to flush-cut later with a router. Having pre-glued the end grain to avoid starving the joint, glue the pieces together and clamp them to the pattern. Drill pilot holes and screw from the bottom of the template to hold this first layer in place, making sure that the screws are positioned on the inside waste. Trim the overhang by climb-cutting with a router and a flush-trimming bit guided by the pattern.
Repeat the process with the four sections in the second layer, gluing, clamping, and then pinning them to the first layer with a nail gun or screws, making sure the fasteners are in the waste area. When dry, flush-cut the over-hang using the first layer to guide the router bit. Continue this sequence for the last two layers. When the core is dry, cut the inside edge on the bandsaw.
Veneer the apron in sections
To measure the size of the veneer pieces, place the bricklaid core onto the pattern and position the veneer splices where they will be covered by the front legs. To achieve a good color and grain match, the mahogany veneer for the apron is resawn from the same 8/4 stock used for the legs. Select the blanks to yield veneer for the two side pieces and center section, mill them to 4 in. wide, then slice a heavy 1⁄16-in. piece on the tablesaw using a zero-clearance insert and a high splitter. Set the blade height to just under halfway, cut from both sides leaving a thin tab between, and carefully twist the veneer off the blank. Remove the remains of the tab in the middle with a chisel, making sure you don’t tear any material below the face. Resurface the blanks and repeat the process several times to produce the material you need as well as some practice stock.
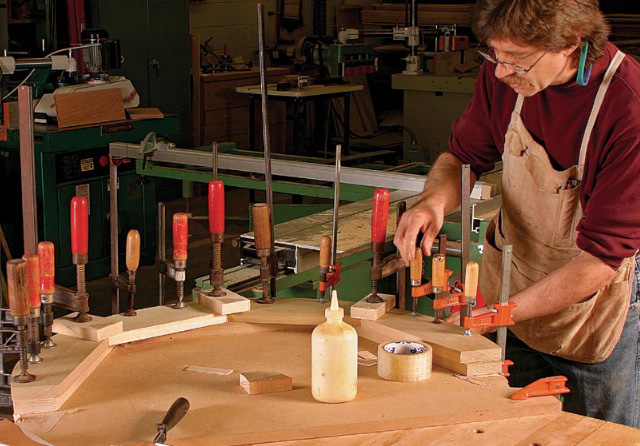
In this particular application, hammer veneering alone made me nervous: Because my veneers were sawn (and quite thick), they lacked much of the flexibility found in most sheared or sliced materials. Also, the design called for veneer with a horizontal grain rather than the vertical alignment that is common on aprons. Vertical veneers cup naturally to hug the core, and hammering them down is easy. Also, with the amount of stringing going into the surface, I worried about delamination along the edges.
To address these fears, I decided to clamp the veneer after hammering, to guarantee a really strong bond. Because the veneer was thick, I could dress its back side as well as the apron’s core with a toothing plane. A cabinet scraper with a toothing blade also would work. Apply strips of clear tape where the seam will be to pre-vent glue from spreading into the next section. After a sizing of thinned hide glue has dried on the core, apply the first section of veneer using a traditional hammering technique (see Master Class, FWW #171 pp. 100-104). Because the bottom edgewill be banded, position the material about 1⁄8 in. from the bottom and let it overhang the top by an equal amount.
When the veneer is down tight and the excess hide glue has been squeegeed away, place a foam pad on the veneer (to prevent adhesion, use a layer of clear tape on the surface that comes in contact with the wood). I used builder’s sill seal, but thin packaging foam would work just as well. Back it up with a piece of 1⁄8-in.-thick bending plywood, two curved cauls, and cross blocks, then clamp.
If you remove the clamps and padding after about a half hour, the soft surface layer of glue will come off with a few strokes of a card scraper. Reapply the clamps and let the assembly sit for a couple of hours be–fore starting the next section of veneer.
After all three pieces are down, trim the overhang at the top using a veneer saw and a block of wood to support the cut. With the veneering complete, a spokeshave and a card scraper make quick work of cleaning the bandsawn inside of the apron.
Cut the completed apron to size
Set the veneered core on top of the MDF pattern and mark the outside faces where the apron ends. Transfer those lines to the top, connect them with a long straight–edge, and cut within 1⁄8 in. on the bandsaw. Take a piece of 3⁄4-in.-thick stock that is longer than the core and about 5 in. wide, line it
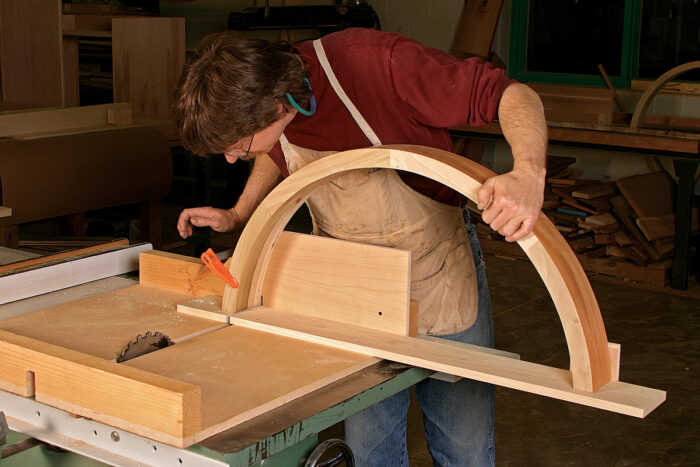
up with the marks, and screw it to the core. Clamp a right-angled auxiliary fence to the rip fence. To prevent tearout of the face veneer, score a line just in–side of the pencil line where the blade will exit. When the rear of the apron is notched to receive the leg, this mark will be removed.
Press the apron against the auxiliary fence and check that the blade is aligned with the pencil mark. Raise the blade to its full height and make a slow, controlled cut. A 10-in. saw will not reach the top, so unscrew the board, flip the apron over, reattach the board, lower the blade, and complete the cut.
After sizing the core, notch the back inside edges to receive the rear apron. Once this is cut, dovetail the rear apron into place.
The back legs swing on knuckle joints
Because of its dimensional stability, quartersawn white oak was the traditional choice for the rail at the back of the table that forms the pair of knuckle joints. If the rail twists a little, the rear legs, be–cause they are so much longer, twist a lot—enough to be very obvious.
Cutting the knuckles—Leave the back rail long and mark out both knuckle joints with the center of the inside circles spaced 61⁄2 in. apart. Mark vertical lines to establish where the undercutting that prevents the legs from opening beyond 30° will begin. To start the circles, make 45° cuts using a miter saw, then finish rounding the ends with a block plane, files, and sandpaper. For the joint to operate correctly, the end must remain perpendicular to the edges.
Set two slicing gauges—one just under 11⁄16 in. and the other just under 13⁄8 in. It will later be necessary to redefine the marks, and resetting the same gauge can lead to inaccuracies. Referencing off the outside edges, mark the five fingers of each knuckle joint, clearly indicating what stock stays and what goes. To prevent tearout, score a deep line where the knuckles end. I remove the bulk of the waste on the bandsaw, and then cut to the line using a dado head and a crosscut sled.
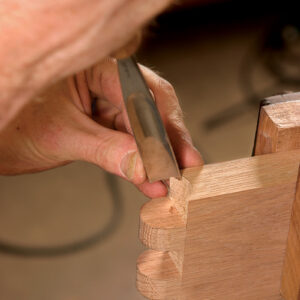
When the joints fit, undercut the spaces between the knuckles with a chisel. Be patient (this is white oak after all). A carving gouge with the right sweep makes quick work of the outside sections.
Steel pins complete the joints—The two halves of each knuckle joint pivot on a steel pin. Don’t try to drill all the way through with an extralong brad-point bit because it will drift, causing the back legs to either rise up or drop down when opened. Attach a long, 31⁄2-in.-high auxiliary fence positioned so that the bit hits the middle of the rail, and follow the steps shown in the drawings . Run a couple of waxed steel pins halfway in from both ends and make sure the joint is working. It will need a little tweaking with a chisel to control the amount of swing. Before tapping in the final 31⁄2-in. waxed steel pin, disassemble the joints and tenon each arm to receive the rear legs. After final assembly, peen the ends of the pin with a few hard taps from a hammer.
The front and rear legs are tapered
On demilune tables, the leg tapers always begin at the bottom edge of the apron, and only those faces under the aprons are tapered. In this case, although all the legs taper to 7⁄8 in., the back legs are tapered on two sides and the front legs are tapered on three. Don’t worry about this discrepancy; the eye does not catch it. Size the legs to leave 1⁄2 in. extra on top to be trimmed after the joinery is completed.
I taper the legs on the tablesaw using an adjustable carriage jig, and remove the sawmarks with a jointer plane. Flatness is critical, particularly if you plan to add inlay, as the stringing will magnify any irregularities. Because the legs are not identical, clearly mark them for inside faces and mortise locations.
The rear legs are recessed into the apron—Lay out the joinery and mortise the rear legs. Fit the rails to the legs. With the apron resting on the pattern, clamp the back legs and rail assembly to the apron together with the packer block. The pack–er reduces the size of the notch in the rear legs and provides a buffer zone in case the fly rail twists, bows, or cups.
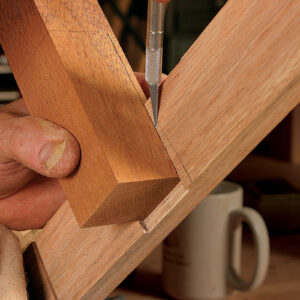
To cut the notch in the rear legs, take the measurements from the pattern and cut the recesses with a router and a chisel. The ends of the apron need a small notch as well where the legs meet. Refer to the pattern for the dimensions and score the borders of the notch with a marking knife. Remove the stock and dry-fit the rear leg assembly. Wait until the front legs are mounted and the top is attached before doing any fine-tuning. When satisfied with the fit and confident that adjustments could be made, screw the rear leg assembly to the rear rail using four No. 14 screws.
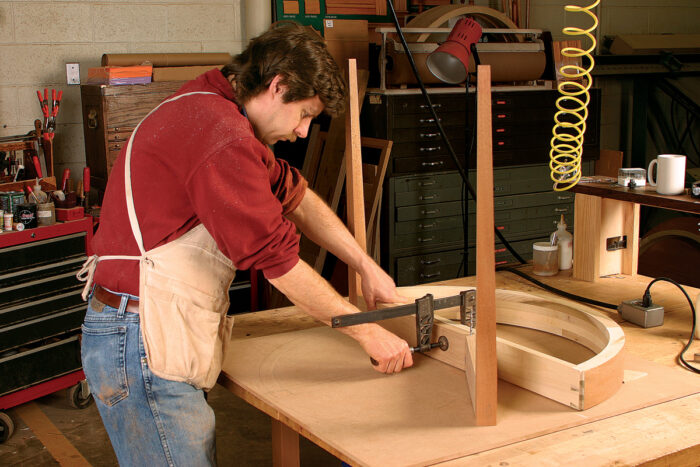
Attaching the front legs requires precision joinery—The front legs attach to the apron with a combination bridle and sliding dovetail joint. The overlap of the dovetail helps hold down the veneer on the core, and it allows for a little slop when fitting the leg because the shoulder will cover any gaps. Whenever trying a new joint, do a mock-up on scrap.
First, cut the dovetailed notch in the leg’s two side faces from the top of the leg to the bottom of the apron. To establish the dove-tail’s front edge, take a piece of scrap and cut a recess as wide as the leg and as deep as the reveal, about 5⁄32 in. Use this template to scribe a line parallel to the front edge of the leg indicating where the flat will be.
Clamp an 11° angled guide block to the leg and use a sharp chisel to cut the dovetail-like notch. The leg also has an open mortise through its top. Hollow out the center of the mortise using a tablesaw tenon jig. If the blade won’t go high enough, finish with the bandsaw and a paring chisel.
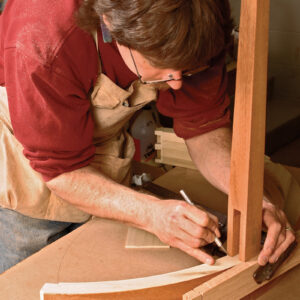
Use the pattern to mark the location of the front legs on the apron, and then take the same block you used to establish the leg’s shoulders and clamp it to the front of the apron in the leg’s location. Using this block assures an even reveal across the front of the apron. Fit the leg into the block and use a marking knife to score lines for the dovetail and the bridle joint onto the apron’s bottom edge. Extend these lines across the face and back. Reposition the notched block onto the top edge of the apron registering off the lines carried across the face. Reinsert the leg and, this time using a pencil, trace out the lines again.
If everything works out, the lines should all register, top and bottom. If they don’t, the front and rear recesses are out of alignment and the leg will bind seriously during fitting. Cut the recesses on the apron and slide the leg into place, trimming where necessary to get a fit that requires only modest hand pressure.
Complete the base before the top
To prepare for attaching the tabletop, gouge out recesses for pocket screws along the straight section of the apron, and cut four slots for buttons along the curved section to allow for seasonal movement.
Once certain that everything fits properly and the legs close tightly against the apron, disassemble the table and execute the in–lay (see Master Class, p. 102). After that has been completed, glue the base together starting with the rear dovetailed rail. Using a thin film of slow-set glue, attach the front legs, sliding them on rather than pounding them. Once they are on, clamp the front and rear faces until the glue is dry. Use a handsaw and a chisel to trim the top of the legs flush with the apron. After gluing the rear legs, screw on the rear assembly to complete the base.
Cut the profiles for the two tops—On a bandsaw, cut the two top sections to size but leave some extra along the back edges in case a piece breaks off when you profile the edges. I use a template and a router to smooth the curved edges. To avoid tearout, you need to cut “downhill” in both directions from the apex of the curve. If you have only one flush-trimming router bit, you’ll have to transfer the template from the top to the bottom of each leaf halfway through the cut. This can lead to problems. I’ve found that using a double-bearing, combination template and flush-trimming bit from Lee Valley is easier. Do the first half of the cut, flip the template over while still attached to the leaf, and cut the second half.
Detail the edge of the top—I establish the edge detail using three cutters and a beading tool, but a shopmade scratch stock would work. A router or a shaper would not achieve such a crisp line, which increases the risk of tearout. Start by scraping the central concave section, moving downhill from the apex with a cutter ground to shape the dish.
To facilitate a clean bead, first take a slicing gauge and score two lines to prevent the grain from tearing. After breaking the edges with a detail file, I use a pair of matched beading bits that I ground in re-verse to scrape in the detail. Having two cutters instead of one allows me to always work downhill, or with the grain.
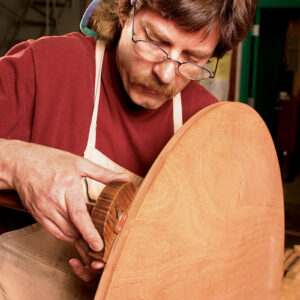
Attach the hinges and apply a finish
Once the front edge is profiled, cut the back edge to actual size and set the hinges. These are recessed into the sides of the top using a marking knife and chisels. They can be tricky, so practice on a mock-up.
Once the top is finish-sanded, keep it either open or stickered so that each half gets air on both sides and doesn’t cup.
To darken the wood, I set the table in the sun. A few weeks’ exposure oxidized the table to a much richer and deeper reddish brown. Following the advice of some furniture-restoration friends, I applied a golden stain to reduce the holly’s contrast with the mahogany. Several coats of shellac followed by a good wax gave it both protection and presence.
From Fine Woodworking #180
For the full article, download the PDF below:
Fine Woodworking Recommended Products

Sketchup Class
Compass




Comments
Absolutely beautiful table. I'm gonna build one for a friend; already ordered the plans. Thanks again, Mr. Latta, for the inspiration.
Are these plans no longer available? Not listed in Taunton Store.
Log in or create an account to post a comment.
Sign up Log in