Hall Table with Flair
Inspired by a local flower, the natural curves of this table make it a California original.
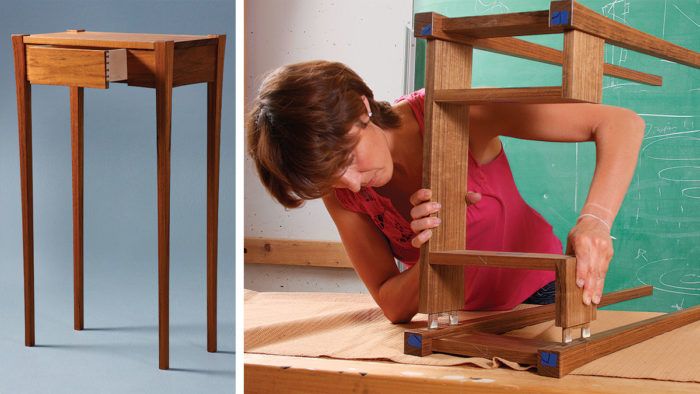
Synopsis: The legs on this table were designed with a pronounced taper to be wider at the top, echoing the shape of the calla lillies that grow wild on the California coast near where Anderson studied woodworking. The cut-away top was designed to put the legs on full display, and the aprons are shaped with an arc to echo that theme. Even the frame-and-panel that supports the drawer from underneath was designed to be decorative. There is a variety of joinery in this table, from interlocking mortise-and-tenon joints to dovetails to dowels, and Anderson finds real pleasure in shaping the legs using a combination of machine work and hand tools.
I designed this entryway table when I was a student in the Fine Woodworking program at College of the redwoods. Many of my classmates were designing furniture with legs that tapered from thick at the bottom to thin at the top, a style we called “gumby” legs. Inspired by the calla lilies that grow wild near the school on California’s north coast, I took a different approach.
To echo the flower’s shape, I gave each leg a pronounced taper, topped with a gentle curve, on both outside faces. I cut away the table’s top at each corner to put these graceful shapes on full display, and I shaped the apron faces to harmonize with the profile of the legs. I built the table from shedua, with maple for the drawer sides and bottom.
The piece is a treat to build. The design is not as complex as a carcase piece but goes beyond a simple table with drawer, adding a few wrinkles that will help you grow as a woodworker.
There’s a variety of joinery, from traditional mortise-and-tenon joints to dovetails to dowels, and real pleasure in shaping the legs and aprons. For this, I blend machine work and hand tools. Start with the joinery Cut all of the joinery while the stock is still square, but first Hall Table with Flair Inspired by a local flower, the natural curves of this table make it a California original by Jennifer Anderson beyond a simple table with drawer, adding a few wrinkles that will help you grow as a woodworker. There’s a variety of joinery, from traditional mortise-and-tenon joints to dovetails to dowels, and real pleasure in shaping the legs and aprons. For this, I blend machine work and hand tools.
Start with the joinery
Cut all of the joinery while the stock is still square, but first take a few moments to make a template for your leg shape, and use it and a bevel gauge to mark the legs and aprons for the curves and tapers you’ll cut later. To join the narrow legs and aprons, I interlocked the mortise-and-tenon joints. I routed the mortises and cut the tenons at the tablesaw.
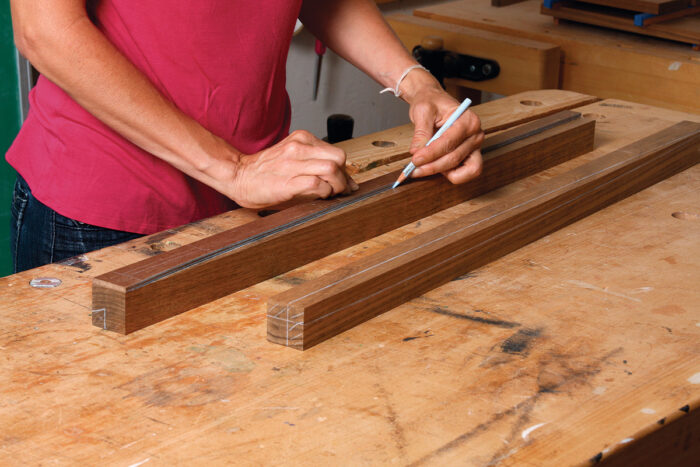
When cutting the tenons, test each setup on sample material until the machines and Join the base jigs are dialed in. Use a marking gauge to lay out the shoulders and cheeks on each piece. Clamp a stop to a crosscut sled for cutting the shoulders. Cut all the wide surfaces first, then adjust the blade to the proper height for cutting the shoulders on the apron edges. Before making this cut, put a piece of blue tape on the stop to offset the shoulder slightly. This leaves a small strip of extra material on the shoulder that can easily be pared flush.
I used a tenoning jig to cut the cheeks, then a bandsaw to remove the remaining waste at the ends and between the tenons. Clean up and fit the joints with chisels and files. I round my tenons instead of chopping the mortises square. When all the joinery is cut, saw the drawer front from and guide the drawer sides. each rail is joined by dowels to the front and rear aprons and rabbeted along the bot-tom to accommodate a framed panel. This panel closes the compartment, adds rigidity, and supports the drawer from underneath.
For smooth drawer movement, the interior rails must be parallel to one another, with dowel joints that are precisely aligned, front to back. To accurately lay out the joints on the face of the rear apron, I used the front aprons as a reference.
A jig aids doweling—I drilled my dowel holes using a shopmade jig created especially for this project (see drawing, p. 69).To drill a front apron, set the jig in place so its reference face is flush with the apron’s interior edge. Clamp the jig temporarily while you fasten it with a couple of brads. At the drill press, take a moment to set the bit depth, using the layout for your shaping as a guide. Drill through your layout marks, simultaneously completing the jig and drilling your first set of dowel holes.
After drilling the apron, carefully align the jig on the end of the corresponding rail and drill the mating holes.
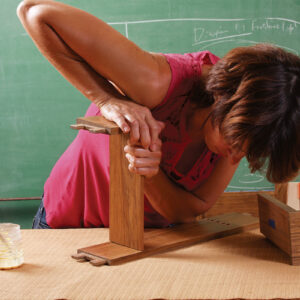
Repeat the process on all the aprons and corresponding rail ends. once all the holes are bored, test the fit. one way to simplify the test-fitting of dowel joints is to use dowels in only half the holes. It also helps to compress them by rolling them between a file and your bench. This keeps the dow–el holes from loosening during multiple dry-fits.
Build and fit the frame-and-panel bottom
The drawer pocket’s bottom is a panel set in a frame held together with bridle joints. These joints are easy to cut with a tablesaw tenoning jig, and their ample glue surface makes them very strong. Because the drawer runs directly on the frame, I oriented the frame’s joinery so the grain is uninterrupted from front to back. I made the frame slightly wide, so I could hand-plane a perfect fit later. I added 1⁄8-in.-thick edge-banding to hide the end grain on the frame’s front edge.
Although it is hidden most of the time, the panel inside the frame is more for beauty than strength. Use your primary project wood, and take care in assembling and finishing.
I cut the tongue on the panel, and the stopped grooves that hold it, on the router table with a fence and straight bit. Sand the panel before this step. Heavy sanding afterward may loosen the fit. Prefinish the panel and the inside edges of the frame. After glue-up, saw 1⁄8 in. from the front edge and add the edge-banding. Flush the edge-banding and then plane the edges for the final fit.
Shaping is the fun part
Once all joinery has been cut and fit, the shaping begins. I shaped both outside faces of each leg in a pronounced taper that ends in a graceful curve at the top of the leg. I also shaped the face of each apron to follow the taper of the legs for a consistent reveal where the two meet. Lastly, I planed a slight bevel into the edge of the top to match the rest of the piece.
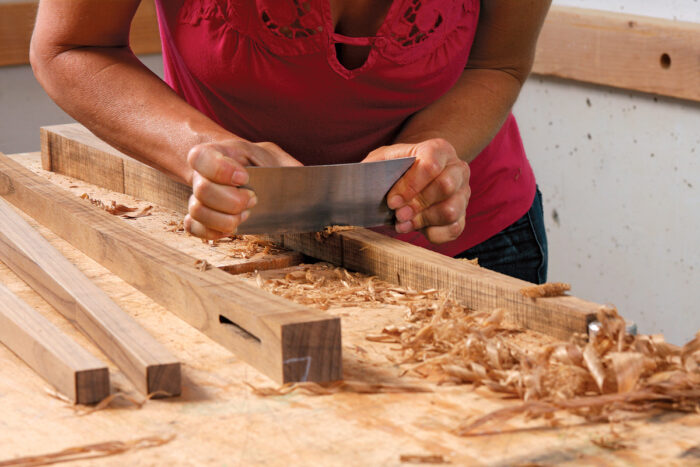
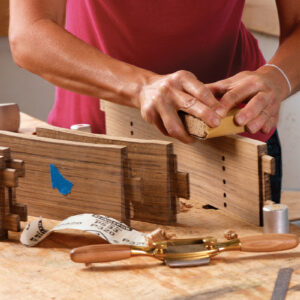
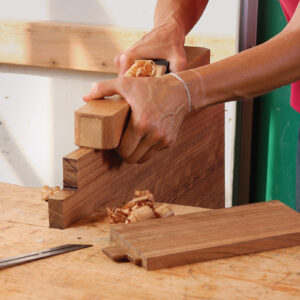
To start shaping the legs, bandsaw close to one of your template layout lines. After the first cut, lay the template on the bandsawn surface and strike a new line for cutting the adjacent face. At the bench, use a combination of block and smoothing planes, scraper, and sandpaper to fair the curves and smooth the surfaces.
The taper in the apron’s face is slight and easily planed in by hand. To lay out for the taper, dry-fit each leg-and-apron connection, measure the reveal at the top of the joint, and mark the bottom edge of the rail with this measurement. Strike a line at this mark along the bottom edge, and connect the mark with the top edge of the apron front. This pair of lines guides the planing.
I used a block plane to chamfer the top and bottom edges of each leg to prevent chipout. I also used a spoke-shave and block plane to shape a subtle curve on the bottom edge of each apron.
Dry-fit the table to make sure all the tapers and reveals are consistent. The cut-out gap around the legs should be consistent and wide enough to let the top expand and contract.
Pre-finish and glue up
I almost always prefinish a piece before glue-up. When the parts are separate, there’s no struggling to get a brush or pad into tight corners. The result is a very even finish, even one applied in multiple coats as with the shellac and wax on this piece. Prep by breaking edges and sanding parts to P400 grit, paying special attention to end grain. Tape off any surfaces that will get glue.
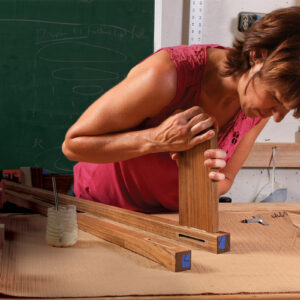
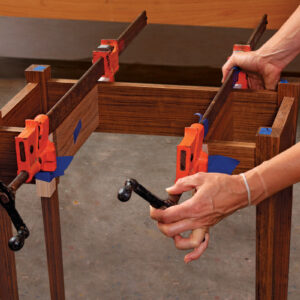
Gluing up a piece with a lot of components can become a desperate race to apply glue to all of the many surfaces and then get the joints together and clamped before parts start seizing. For greater control, I broke the process into four manageable stages.
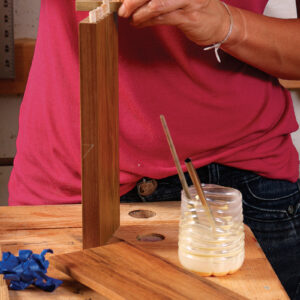
Start by gluing and clamping the two side assemblies. With those in clamps, you have time to glue the dowels into the ends of the drawer rails.
After the glue has dried, glue the drawer rails into the front and rear aprons. once this assembly is together, dry-fit it into the legs, check for square, and clamp.
When the glue is dry, unclamp and re-move the leg assemblies. Apply glue to the tenons on the front and rear aprons, seat them in their mortises, and clamp.
When this assembly comes out of clamps, the last step is to glue the frame-and-panel bottom into its rabbets.
With the base complete, finish cutting and fitting the drawer joinery. Assemble the drawer after shaping its bottom edge to match the curve on the underside of the front aprons.
Once the drawer is glued up, shape its front and its bottom edge to match the aprons. Put the drawer all the way into the drawer pocket. Use a sharp pencil to scribe the shape from the front rail to the end grain on the drawer face. Be sure to scribe both sides of the drawer face. Plane close to the lines. Sneak up on the final shape by checking it in the drawer pocket frequently as you work.
There are many ways to fasten the table-top to the base. I used handmade brass brackets, but commercially made figure-eights would work well, too. Cut the recess for the fasteners into the aprons. Pre-drill and attach the brackets to the aprons and then pre-drill and attach the top.
For the full article, download the PDF below:




Comments
Tried to read the article, but the same sentence is repeated so often that there is no logic to any paragraph. Did your proof reader fall asleep?
On the other hand, it is a beautiful table.
Agreed. This is a beautiful table!
Thanks and congratulations to Jennifer Anderson for the design and the very clear instructions.
Some amateurish shots of my attempt at making the table below
David B
Does anyone know the wood species used here? Thanks. Michael
The pics in comment #2 show the table in New Guinea Rosewood. It’s beautiful to look at, also to work, but will show tear out if blades aren’t super sharp! Finished with Danish Oil.
DavidB
Thanks much. Think I’ll give Sapele a try.
Log in or create an account to post a comment.
Sign up Log in