Light and Lively Side Table
Behind the front's flowing grain lie simple and smart building strategies.
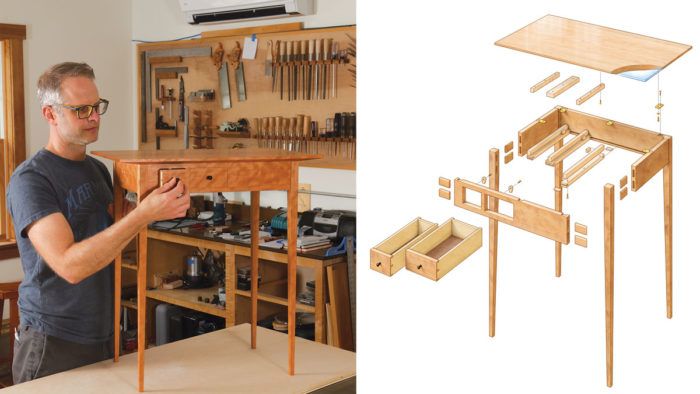
Synopsis: Using continuous grain in a piece of furniture shows intention and a respect for detail. A classic way to showcase continuous grain is on a table apron with drawers. Mike Korsak shows how to cut and sequence the apron and drawer fronts on his delicate-looking but sturdy side table.
I’m a huge fan of using continuous grain in my furniture. I think it clearly shows intention, which is something that I strive for. I want people to understand that the details in my work do not happen by chance. One common way that people use continuous grain is with drawers, where they’ll use a single board for a row of drawer fronts, making sure to cut and sequence the fronts so that the grain appears to flow from one drawer to the next, interrupted only by the vertical dividers that separate the drawers.
When I can, like on this table, I take this approach a step further and cut out virtually all interruption, wrapping the grain across the apron as well as the drawer fronts. My method for achieving this is to rip the apron blank into three strips, crosscut the middle strip to separate the drawer fronts from the rest of the apron, then reassemble the parts (minus the drawer fronts) back into a single apron. Done methodically, this technique produces an apron and drawer fronts that have consistent, closely matched grain that appears to flow from one part to the next.
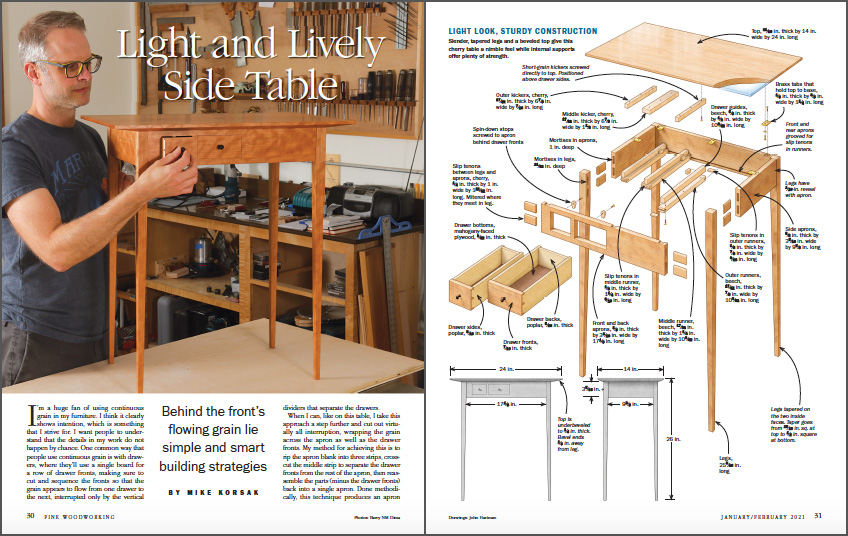
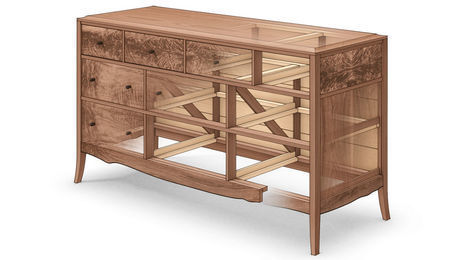
Less apparent, but equally interesting—at least for us woodworkers—is the way I construct the table’s internals. I have an uncommon way of building the kickers, runners, and guides that reduces my headaches when fitting the drawers.
Sliced And Diced Apron
I’ve made a few tables with this method, and I’ve streamlined the process. Because the vertical dividers between the drawers are short grain, I used to add long-grain splines to reinforce them. But then I realized this table and its drawers are small, and unlikely to be under much load. The splines started to look like a belt-and-suspenders step, so I omit them now.
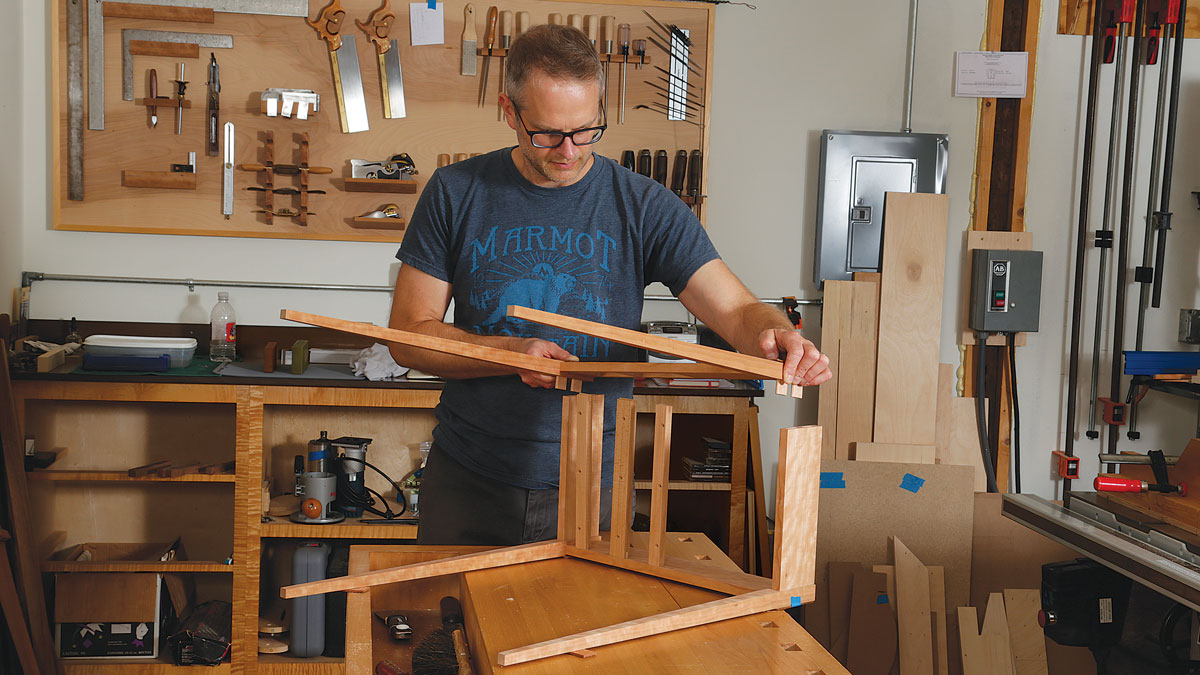
Once I select the board for the front apron, I want to remove as little material as possible when cutting it up. This is important because the more material that is removed, the harder it becomes to maintain the continuity of the grain pattern. So I used the bandsaw, with its thin kerf, instead of the tablesaw to rip out the three apron strips, and took only light passes with my jointer and handplane when jointing edges afterward.
To cut up the apron’s middle section, I used the tablesaw and a crosscut sled.
With the front apron sliced and diced, it was time to start putting it back together. To begin the reassembly, I started by planing a few shavings off the top edges of the two drawer fronts. This ensured that the drawer fronts were ever-so-slightly narrower than the three other middle apron parts. I also applied a light coat of paste wax to the edges and ends of the drawer fronts. This way, I could use them as spacers when gluing up the other parts without inadvertently gluing them in place.
While the glue dried on the apron, I tapered the legs at the bandsaw and cleaned them up by hand. I also thinned the drawer fronts to 7⁄16 in. so they visually worked better with the thin drawer sides.
 From Fine Woodworking #287
To view the entire article, please click the View PDF button below.
 |
|
 |
|
 |
Fine Woodworking Recommended Products
Dubuque Clamp Works Bar Clamps - 4 pack

Stanley Powerlock 16-ft. tape measure

Festool DF 500 Q-Set Domino Joiner


Comments
Looks like a great project. Is it possible to use Festool dominos instead of your method of slip tenons?
Domino, slip tenon, loose tenon, etc. are pretty much the same.
Perhaps I am missing it in the plan diagram - but at what pt on the leg does the taper begin ? Immediately below the apron - or is there a gap between the aprons and the beginning of the taper?
I started it 1/4 inch below the end of the apron. I have built a couple of these and that seems to work.
Log in or create an account to post a comment.
Sign up Log in