Porringer-Top Tea Table
Hand-shaped cabriole legs lend grace to a versatile period piece.

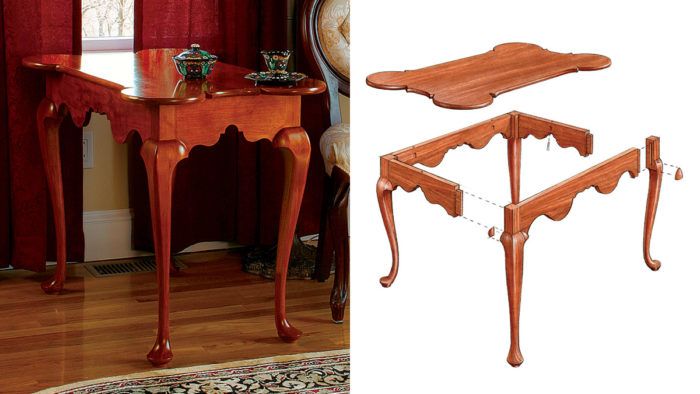
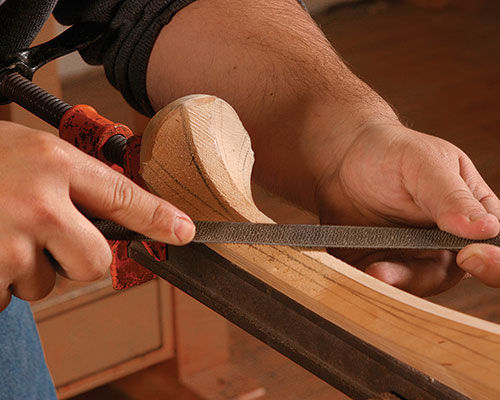
Synopsis: Tea tables, popular for afternoon tea during the mid-1800s, make great end tables or occasional tables today. With its rounded, soup-bowl-shaped corners, this piece is a classic example. Simple in design, it has challenging details in matching the grain, shaping the cabriole legs and transition blocks, and creating the uniquely shaped top. The project requires careful machine work and a delicate touch with hand tools. The cabriole legs are cut using the bandsaw and shaped with chisels, rasps, and files. The apron is cut on the bandsaw and shaped with chisels. The tabletop is cut with the bandsaw and shaped using chisels, rasps, and files.
When a client asked for a tea table recently, I built this one in the Queen Anne porringer style, named for the top’s rounded, soup-bowl-shaped corners. I found the design in an antiques catalog. The original was built in Wethersfield, Conn., sometime between 1740 and 1760.
Tea tables were most popular from the William and Mary period in the early 1700s through the Empire period in the mid-1800s. Today, even though earlier dinnertimes have put an end to daily afternoon “teas,” these tables still are useful as end tables or occasional tables.
This piece is also a great way to get started in building period reproductions. The design is simple, but there are challenging details in matching the grain, shaping the cabriole legs and transition blocks, and creating the uniquely shaped top. The project requires careful machine work and a delicate touch with hand tools. when you’re done, you’ll have a handsome, highly functional piece of furniture.
Seek Consistent Grain For A Coherent Look

Lumber selection and grain orientation are critical details for any furniture project. Using the right grain for individual parts can make the difference between a good piece and a great one. For grain consistency, I made the aprons and the slip-matched top from a single board. It might seem shameful to rip wide lumber into narrow pieces, but it pays off in the finished appearance.
Grain selection for the cabriole legs is even more important. Look for a 12/4 board with a rift-sawn end section, but be prepared to spend some time picking through the lumber to find it. most pieces that will fit the bill will be rift for only half or three-quarters of the width. You’ll rarely find a board that will yield any more than two legs side by side in the rift.
Turn The Feet Before Shaping The Legs
Start by rough-cutting the leg blanks longer than the finished leg. This leaves matching stock for two transition blocks, which you should trim off after the leg is turned and before it is shaped.
Begin by turning the pad foot on the center of the blank. Layout is done using plywood patterns derived from fullscale drawings. on the lathe, use a parting tool and a pair of calipers to set the pad’s maximum diameter and to cut the fillet on which the foot will rest. Then make a rolling cut with a spindle gouge to establish the curve between the foot’s widest point and the fillet. The last step on the lathe is to use the corner of the skew to make a shallow scribing cut that just begins the top of the foot. This will help you locate the toe later in the leg-shaping process.
From Fine Woodworking #191
For the full article, download the PDF below:


Comments
I build this table a about a year ago and learned a lot doing so - I enjoyed all the building and shaping involved - excellent project! I enjoyed it so much I convinced my brother to make one as well.
Log in or create an account to post a comment.
Sign up Log in