Federal Tilt-Top Table
This elegant project builds hand-tool and machine skills.
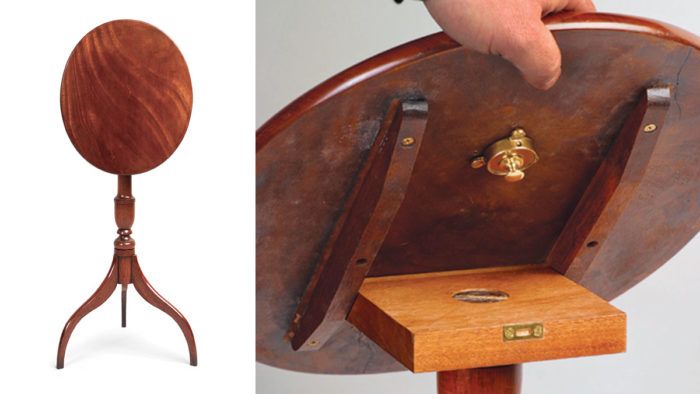
Synopsis: This mahogany Federal tilt-top table is the perfect project for intermediate-level woodworkers. It’s neat and compact with only a few parts, and the construction uses both hand- and machine-tool techniques. The table’s center column is turned on a lathe; the legs are attached to the column with sliding dovetails. The slots for the sliding dovetails are cut using a router and a jig that orients and supports the column. The tapered legs are cut on the bandsaw and shaped with a spokeshave and card scraper. The article includes complete project plans and step-by-step photos.
As a woodworking instructor, I’m always looking for interesting and challenging projects to present in my classes. This Federal tilt-top tea table satisfies all of my criteria for an intermediate-level project: It’s neat and compact with only a few parts, and the construction introduces students to both machine- and handtool techniques. The bonus is that the finished product is graceful in design and fits into almost any interior space. In the 18th century, many of these small tables were made with local hardwoods, and there are a number of period examples in maple, walnut, and cherry. My version is made of mahogany, which is available from most commercial suppliers in the required thicknesses, from 4/4 to 12/4. I find mahogany ideal for the turning required in this project, and it takes a finish beautifully.
Begin by turning the column on the lathe
The profile of the column is provided at half scale in the drawing on the facing page. The drawing can be enlarged 200% to full size on a copy machine and used as a pattern. Prepare the turning blank thick enough to accommodate a maximum diameter of roughly 23 ⁄4 in. I recommend using a solid piece, although gluing up two pieces is an option; however, you’ll be left with a seam down the center of the column.
Prior to mounting the blank on the lathe, lop off the long corners on the bandsaw by either tilting the bandsaw table to 45° or holding the workpiece at 45° in a carriage. Once it’s on the lathe, rough the blank into a cylinder with an even 23 ⁄4-in. diameter. Use a parting tool and your pattern to set up the diameters of all of the various elements on the column. Establish all of the flats first, then turn the coves and beads with a spindle gouge and a skew chisel. Finally, sand the column smooth.
Turn column ends precisely— Two critical portions of the column require careful attention. The diameter of the tenon at the top of the column, which engages the pivot block, must exactly match the 11 ⁄2-in.-dia. hole drilled through the pivot block. Because I make this table so often in my classes, I made a plywood gauge that gives me the right diameter. However, you can just as well use a set of calipers.
The other critical area is the bottom portion of the column where the legs are attached. This end doesn’t have to be turned to a precise diameter; just make sure it’s straight and uniform. Any dips or a taper will create gaps where the column receives the three dovetailed legs. A nonuniform surface also will have a detrimental effect on the fit of the legs.
Make a carriage for the sliding dovetails
The traditional and most effective method of joining the legs to the column is with sliding dovetails. Once the legs have been attached, the flair of the dovetails prevents the legs from loosening over time. The key to achieving snug and handsome joints is to cut the slots first and then make the dovetails to fit.
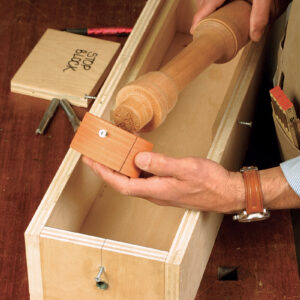
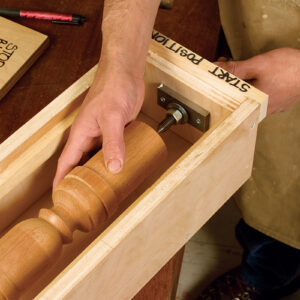
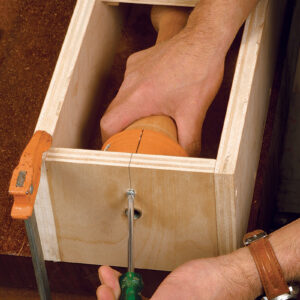
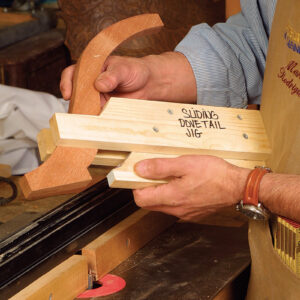
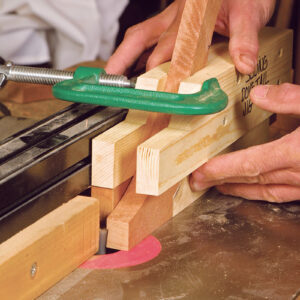
To cut the joinery, you’ll have to remove the turning from the lathe. Set up each cut carefully. I built a plywood carriage jig that sup-ports the column while I rout the dovetail slots. Each slot should be 120° apart on center, and the jig is equipped with an index block to align the column correctly for each slot. Match the120° marks on the index block to a corresponding mark on the jig. A wood screw secures it in each position for cutting.
Cut the slots with three router bits—There are three steps to cutting the dovetail slots. First, establish a flat edge on the column for the shoulder of the leg. Use a 1-in.-dia. straight router bit, and set up the cut to trim a flat surface just wide enough for the thickness of the leg. It’s better to cut this a little too wide than too narrow. A wide flat can be rounded with a file, but a narrow flat will create a gap where the leg meets the column. The stop block on the router jig should be set so the dovetail slot stops just short of the column shoulder.
After cutting a flat edge for the three legs—rotating the column in the jig for each cut—switch to a 7⁄16-in. straight bit and hog out most of the waste for each slot. This second step reduces the stress on the router and the wear on the dovetail bit. Finally, change router bits again to a dovetail bit (mine is an11° bit) and take a final pass on each slot. Set the column aside until you’re ready to cut the dovetails on the table legs.
Shape the legs on the bandsaw
The three legs are rough-cut on the band-saw and taken to their final shape with hand tools. To begin, enlarge the scale drawing to 200% to make a template with1⁄4-in.-thick plywood, and then draw the leg shape directly onto the three workpieces with the grain running lengthwise. I made the pattern about 1 in. longer than is found on period examples of the table so that it could be built for a standard 29-in. height.However, to build a more accurate reproduction, you simply can cut off the extra inch from the foot without greatly affecting the appearance of the table.
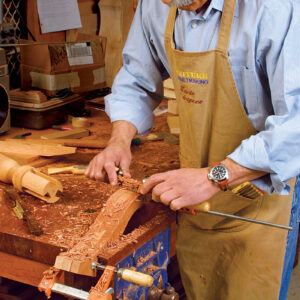
Once each leg has been rough-cut to about 1⁄16in. to the line, gang the legs together with a clamp and clean up the front and back edges with a spokeshave followed by a cabinet scraper. Clamping all three legs together makes it easier to keep the edges square, and it reduces tearout at the edges. Also, always cut in the direction of the grain with the spokeshave, even if it requires repositioning the legs in the vise.
Cut the dovetails—To cut the dovetails on the legs, set up the router table with a fence and the same dovetail bit used for the slots. Before cutting into the real legs,use a cutoff from the leg material of the ex-act same thickness and make test cuts to fine-tune the fit of the dovetail into the column base. Carefully pass the stock upright along the fence to cut one cheek of the dovetail. Flip it over to cut the other side. I made a jig using my leg template that rides along the router-table fence and holds the leg steady. If you discover that a dovetail doesn’t fit right in the column, run it back across the bit and apply more pressure against the fence. It might take off just enough to make the fit easier.
Next, make a slight roundover along the front edge of each leg one at a time. Draw a pencil line down the center of the leg as well as lines on both sides that follow the profile of the leg about 1⁄8in. from the edge.Then use a spokeshave to round over the edge to your guidelines. Finish off to a nice profile with files, a scraper, and sandpaper.
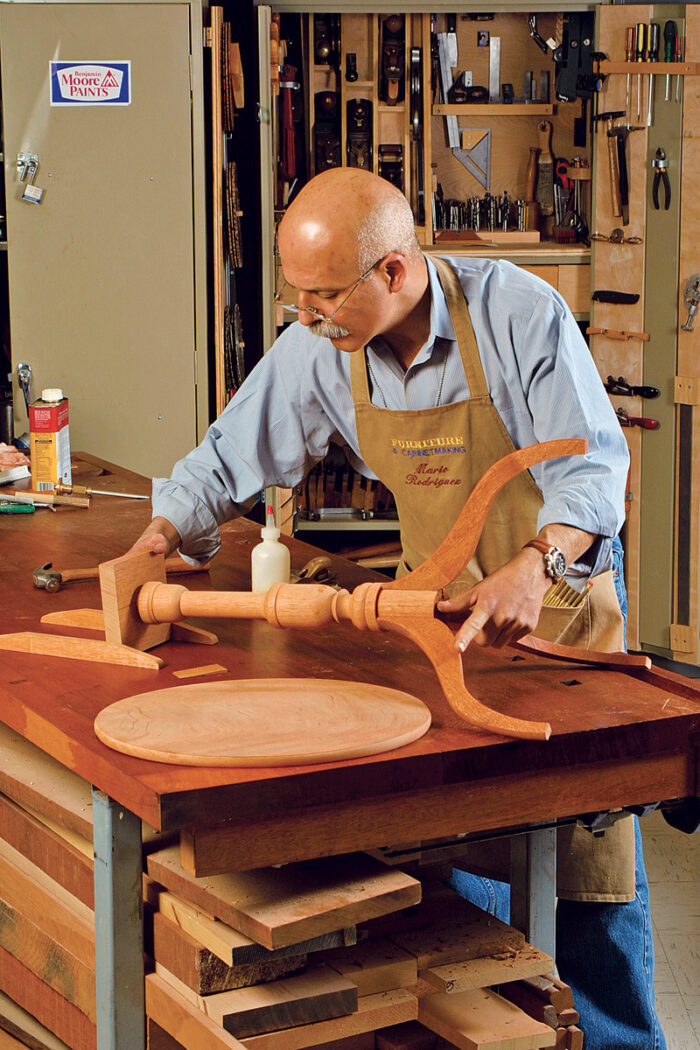
Taper the legs—The three legs taper from3⁄4in. thick at the dovetail to 1⁄2in. thick at the foot. I made a pair of sleds that help me create this taper with a thickness planer (seethe top right photos on the facing page),though careful handplaning also would work. The first sled elevates the foot of the leg 1⁄8in., creating one side of the taper when it is run through the planer. The second sled raises the foot of the leg 1⁄4in., so when you flip it over, an even taper is cut on both sides. Be careful not to plane off too much, or you will damage the dovetail.
Create the tilting mechanism
The pivot system for the tilting tabletop consists of a pivot block that fits over the column tenon
and two cleats that attach to the underside of the tabletop. Two round tenons extend off one end of the pivot block and are set into holes in the two cleats, allowing the tabletop to pivot.
Make the two cleats and then drill the holes for the round tenons, locating them as close to the top edge of each cleat as possible; I aim for about 1⁄16in. This will ensure that the tabletop lies properly against the pivot block when it is horizontal, and stands perfectly plumb when vertical.
There are two ways you can approach the pivot block. The traditional method is to cut the round tenons out of the pivot block with a single piece of wood. But the easiest method is to make a pivot block with a rabbet cut into one edge, and then glue in a separate strip sized to the dimensions of the rabbet with round tenons cut on each end. You will need to plane the pivot strip flush with the surface and the back edge of the pivot block.
Turn the round tenons on the lathe, and aim carefully for a squeaky-tight fit in the cleats. As the top is tilted, there should be some resistance on the pivot. That way,when the top is vertical, it will stay there.
Prepare the oval top
The tabletop measures about 15 in. wide by 17 in. long, so you may have to glue up two pieces to make it.
Use the scale drawing to make a 1⁄2-in.-thick birch plywood template, trace an out-line of the tabletop onto the workpiece, and cut it out on the bandsaw just outside of the line. Next, rout the oval shape on a router table with a bearing-guided bit (see FWW#170, pp. 72-75, on changing the direction of the cut to avoid tearout). The tabletop edges are slightly rounded over to match the rounded profile of the legs.
Assemble the table, apply a finish, and attach the hardware
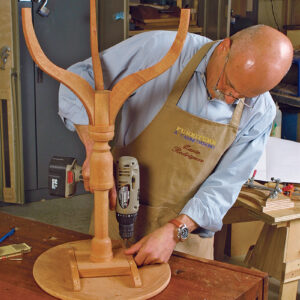
Once all of the parts have been prepared,assembly should go pretty smoothly. First,attach the legs to the column, checking for a tight fit and a clean joint between the shoulder of the legs and the column. The legs should go on without incident if you carefully cut the dovetails on the router table. Al-though not required, you can reinforce the leg joints with a metal brace called a table spider—available from Horton Brasses (800-754-9127; www.horton-brasses.com).
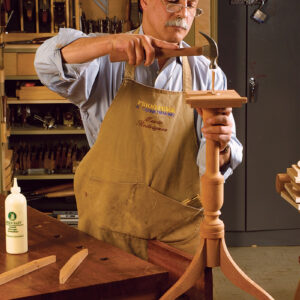
Once the legs have been glued in place,use a wedge to attach the pivot block to the top of the column. Saw down the center of the column tenon to make a kerf for the wedge. It should run perpendicular to the direction of the grain on the pivot block so the block doesn’t split when you drive home the wedge. The pivot block must be positioned so that when the tabletop is in the upright position, one leg is pointing straight back. This way the table can fit into a corner. To achieve the proper orientation, set the column onto a workbench so that two legs rest on the workbench(above). Then attach the pivot block with the round tenons flat on the workbench.
Next, screw on the tabletop. With the top upside down on your workbench and the pivot block centered on it, set the cleats onto the pivot-block tenons with a 1⁄16-in.gap between. Then drive #8 screws through the cleats and into the underside of the tabletop.
All of the parts should be sanded through to 220-grit abrasive before assembly. I stained the table with a mixture of cherry and walnut Behlen Solar-Lux stains (Garrett Wade; 800-221-2942; www.garrettwade.com). Then I brushed on several thin coats of shellac. Sand lightly after the first coat of shellac and allow each subsequent coat to dry thoroughly. Finally, rub out the finish with fine steel wool.
The last step is to apply a glaze coat. I used McCloskey glaze with raw umber Japan pigment added. Once the glaze dried, I waxed and buffed the table.
Finally, install a good reproduction catch (307-739-9478; www.whitechapel-ltd.com)to keep the top secure and level when the table is in use.
From Fine Woodworking #173
For the full article, download the PDF below:
Fine Woodworking Recommended Products

Estwing Dead-Blow Mallet
Drafting Tools




Log in or create an account to post a comment.
Sign up Log in