Triangle Side Table
Full-scale layout is the secret to success when building this distinctive small table with a curved-sided triangular top.

Synopsis: Inspired by the Art Deco and Mid-Century Modern styles, this elegant and useful side table is both distinctive in its design and straightforward to make. The curved-sided, triangular shape is easy to lay out. The turned and tapered legs complement the shape of the top. Because the aprons are fully mortised into the legs without tenons, the joinery is simplified. Drawings will come in handy when building this table, helping to ensure that the mortises are located precisely and that the legs do not splay during assembly.
After 25 years of hopscotching from state to state working for a large company that makes paper for magazines like Fine Woodworking, I recently settled in Vermont and turned my woodworking hobby into a second career. To help launch my business, I decided to produce some pieces of furniture inspired by the Art Deco and Mid-Century Modern styles. This little table was one of those pieces. I was eager to make a successful start, so of course I wanted my table to be distinctive in its design, but I also wanted it to be straightforward to make.
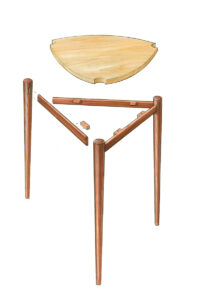
A few key decisions helped streamline the building process. When I hit on the idea of a curved-sided triangular shape for the tabletop, I found a simple way to generate the shape full size, first on paper and then on the workpiece. When it came to the legs, I thought turning and tapering them would nicely complement the shape of the top. But wouldn’t that make for challenging leg-to-apron joinery? I greatly simplified the matter by dispensing with shouldered tenons and mortising the aprons full-size right into the legs. On a small, light table like this, that would give me plenty of joint strength. To cut the mortises, I built a router jig that took the guesswork out of what might have been a tricky process.
It takes very little wood to make the table, so this could be an opportunity to use some favorite scraps kicking around your shop. I made the top of mine from a beautiful small board of curly ash I’d been saving.
Lay it out full scale
Although this is a fairly simple table, I found it beneficial to build it from full-size drawings. They made it a snap to lay out precise mortise locations, helped ensure that the legs didn’t splay during assembly, and provided a controlled method for tapering the legs, even for a novice turner like me. Two drawings are needed: a plan view and a leg profile. The good news is that the drawings are very quick to make and you’ll soon be building furniture.
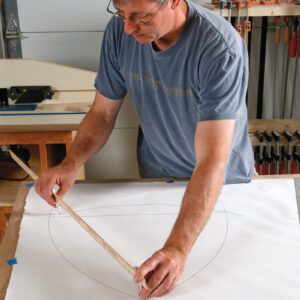
I drew the plan view on drafting paper. I used a beam compass to draw the curved outlines of the top and a straightedge to draw the equilateral triangle that represents the centerlines of the aprons. Next, with a regular compass, I drew three concentric circles at each point of the triangle. The small circle is the circumference of the leg where it meets the floor; the middle circle is the circumference of the leg at the top; and the large circle represents the edge of the table where it is cut away to allow the leg to penetrate the top.
I drew the full-scale leg profile on a scrap of 1⁄4-in. hardboard so that I could use it as a frequent reference when turning the legs to a taper. After drawing the tapered elevation, I added a series of lateral lines across the leg. While turning, I took caliper measurements at these points and transferred them to the leg.
Three legs, three stages
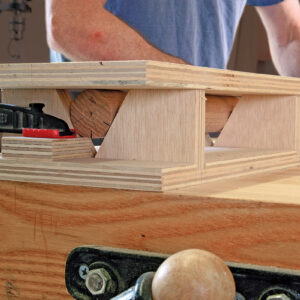
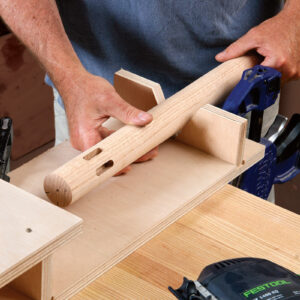
Cutting mortises in the legs after they had been tapered would have been a challenge. I simplified matters by making the legs in three steps. First, I turned the square blanks to 13⁄4-in. cylinders. Then I mortised the cylinders in the router jig. And last, I remounted the cylinders and turned them to a taper.
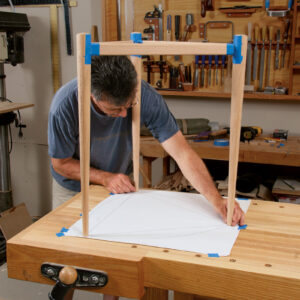
Since I had the full-scale plan-view drawing, marking the mortise locations was easy. I simply stood the cylinders in place on the drawing and transferred the apron centerlines to the leg. I carried those marks around to the top of the leg and used them to register the leg in the router jig. One important thing to note is that the mortises will be cut on the face opposite these marks—so be sure to make the registration marks on what you want to be the outside face of the leg.
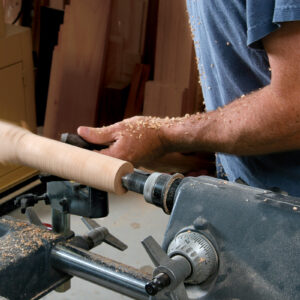
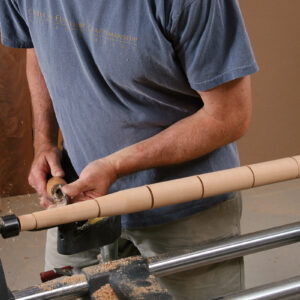
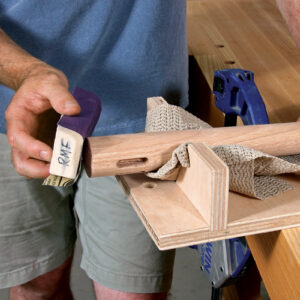
After cutting all the mortises, I put the leg cylinders back be-tween centers on the lathe and shaped the tapered profile. I don’t do much turning, so I tried to make things as foolproof as possible. I started by using a parting tool to cut a series of evenly spaced, progressively deeper grooves along the leg. I used calipers to transfer measurements from the leg profile drawing to the ap-propriate grooves. Then, using a 3⁄4-in. roughing gouge, I removed the waste wood between the grooves. I faired the leg with a long block of wood with 100-grit self-stick sandpaper adhered to it. Then I finish-sanded the legs to 400-grit while they were still on the lathe. With the sanding finished, I used the parting tool to form a slight crown at the top of the leg, paring back at a slight angle until the leg separated from the drive center.
The base comes together
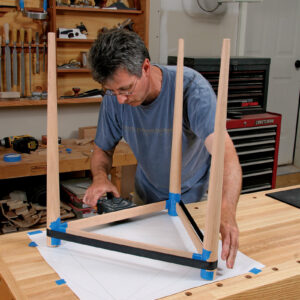
After thicknessing and ripping the apron stock to size, I rounded over all four long edges with a quarter-round bit on the router table. I used a test piece of apron stock and a test mortise to sneak up on a snug fit. After applying glue and getting the pieces knocked together, I stood the base up on the drawing and tweaked the stance until the tips of the legs stood precisely in the small circles. Then I cinched the band clamp, rechecked the stance, and let the glue cure.
Top it off
The full-scale drawing came in handy again when it was time to lay out the tabletop. I taped the drawing to the tabletop blank and used an awl to mark the centerpoints of the three legs. Then I
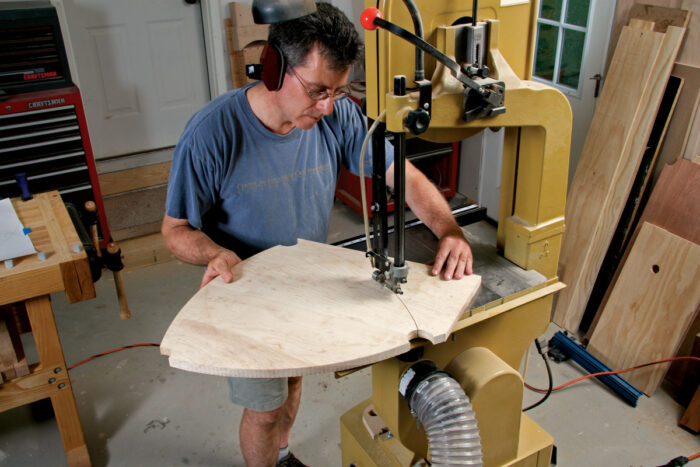
removed the drawing and used the beam compass—with its pin in the holes made by the awl—to draw the curved sides of the top. I used the regular compass, its pin in the same awl holes, to draw a 2-in.-dia. circle at each point.
I bandsawed out the long arcs of the top, but before I did so I used a Forstner bit at the drill press to create the tightly curved cutouts for the legs. To get a clean cut, it’s a good idea, especially in wood with difficult grain, to make the blank large enough to allow full contact of the Forstner bit. I cleaned up the bandsawn arcs with rasps and files.
Different finishes for top and base
To showcase the spectacular grain pattern of the curly ash, I applied multiple coats of Waterlox Original, wet-sanding it in with 600-grit wet-or-dry paper. I wanted a sharp contrast between the light-colored top and the white-oak base, so I darkened the base with a recipe from Teri Masaschi that produces a look reminiscent of lightly fumed white oak—without the ammonia fumes. I let the finish cure for a week, then lightly wet-sanded the top and base with a 2,000-grit Abralon pad and a 50/50 blend of mineral spirits and paraffin oil, and gave it a light coat of paste wax.
Download the plans for this table from the Digital Plans Library. Plus, browse 100+ other plans available for members only.
From Fine Woodworking #232
For the full article, download the PDF below.




Log in or create an account to post a comment.
Sign up Log in