Tavern Style Trestle Table
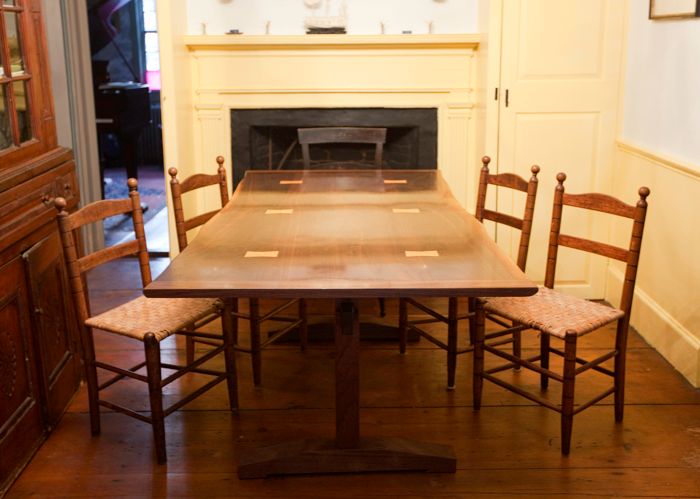
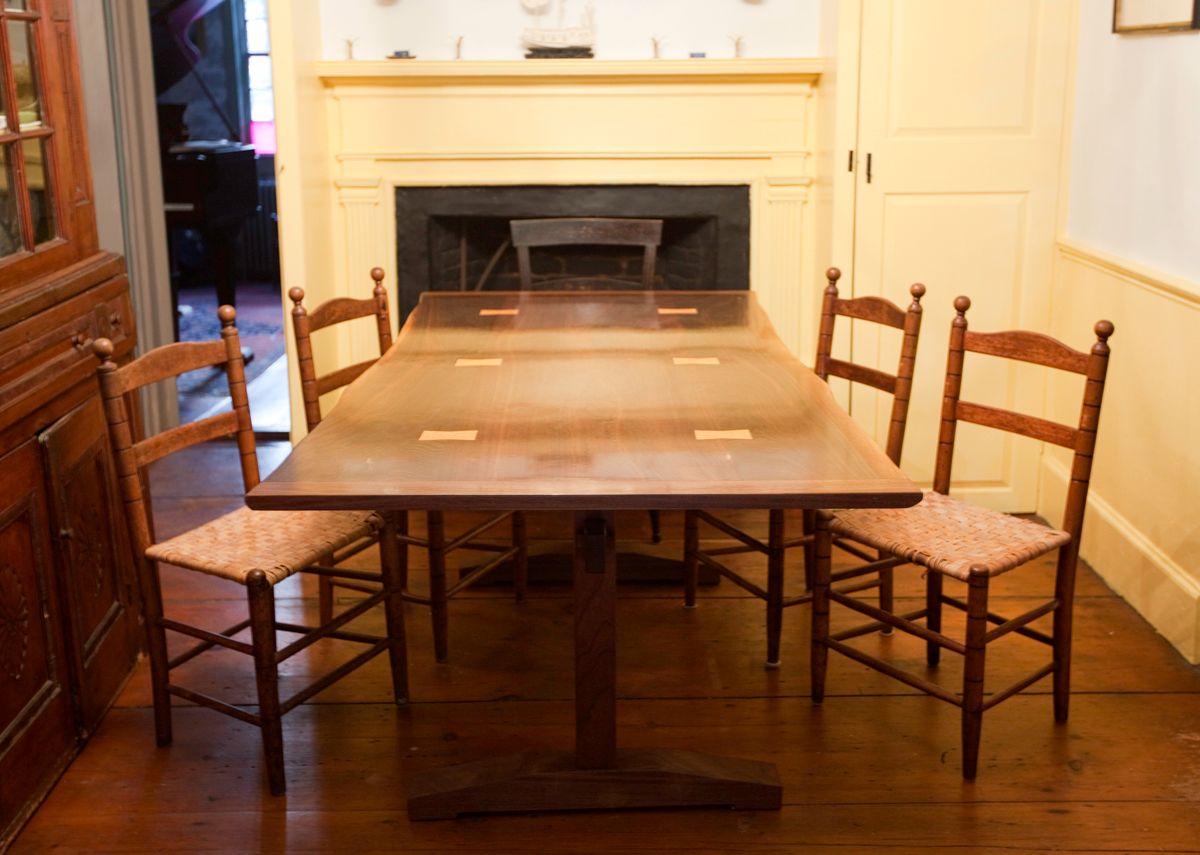
In a Federal Period Dining Room
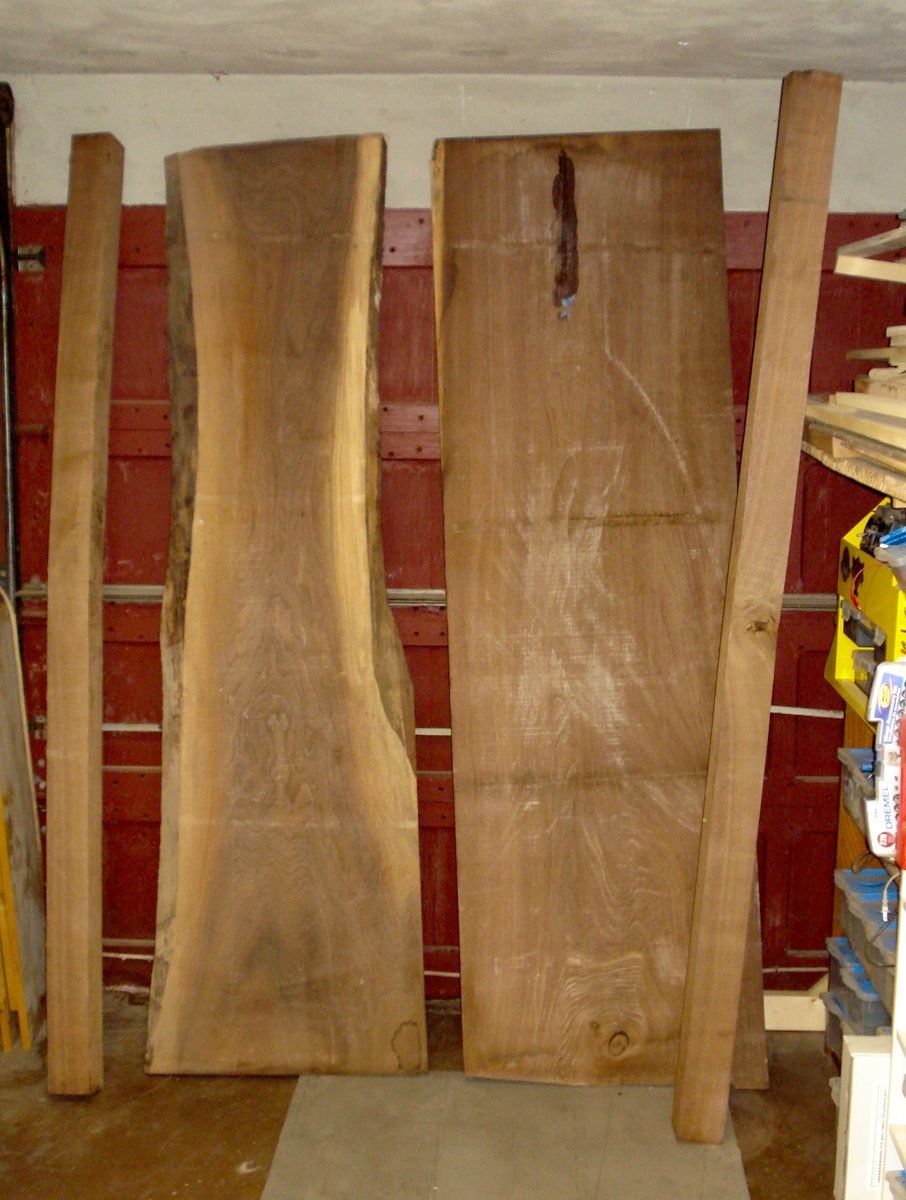
I had called at Dwyer Hardwood – my local specialist hardwood supplier to pick up a small piece of red elm. I knew he still had some of the original fitch I had got material from before and I needed a match. He had just taken delivery of a walnut tree that had spent 5 years air drying in the woods. He was standing some of the boards up to look at. They were magnificent – beautiful accents of greens and purples that kiln drying normally would sweat out the wood were still apparent. The absolute best slice sold on the spot to another person. I looked the rest over, made my grab for two, made the call home about the new dining room table I had in mind and negotiated for the 16/4 walnut posts that he was VERY reluctant to let me have as I didn’t have a firm plan. At that point I had no more than a hazy idea of the final table – but the timber was lovely.
I epoxied a small shake that was developing to arrest it and carefully stickered the boards in my pile – and they sat another two years while I sketched and Sketch-Up’d. At one point they were a Queen Ann style with ball and claw – but that wouldn’t work in the colonial house. A rough hewn look was another possibility after looking at Mediaeval monastery tables in the Burrell Collection in Glasgow on a visit to Scotland.
Then one night I caught a fraction of a second fleeting glimpse of something on the Antiques Roadshow. I mean a FRACTION of a second and five minutes later I had the table down on the back of an envelope – literally. Looking back I now realize what I had seen on TV was a George Nakashima piece. Philistine that I was – I had no idea at the time who he was. I’m certainly NOT claiming that this is to the standard of George’s work – but the piece has caught comments from people as being in his style. However in my mind the robust trestle is more in keeping with the colonial / federal house. The top is what the top is and is a result of the way the grain and the timber worked.
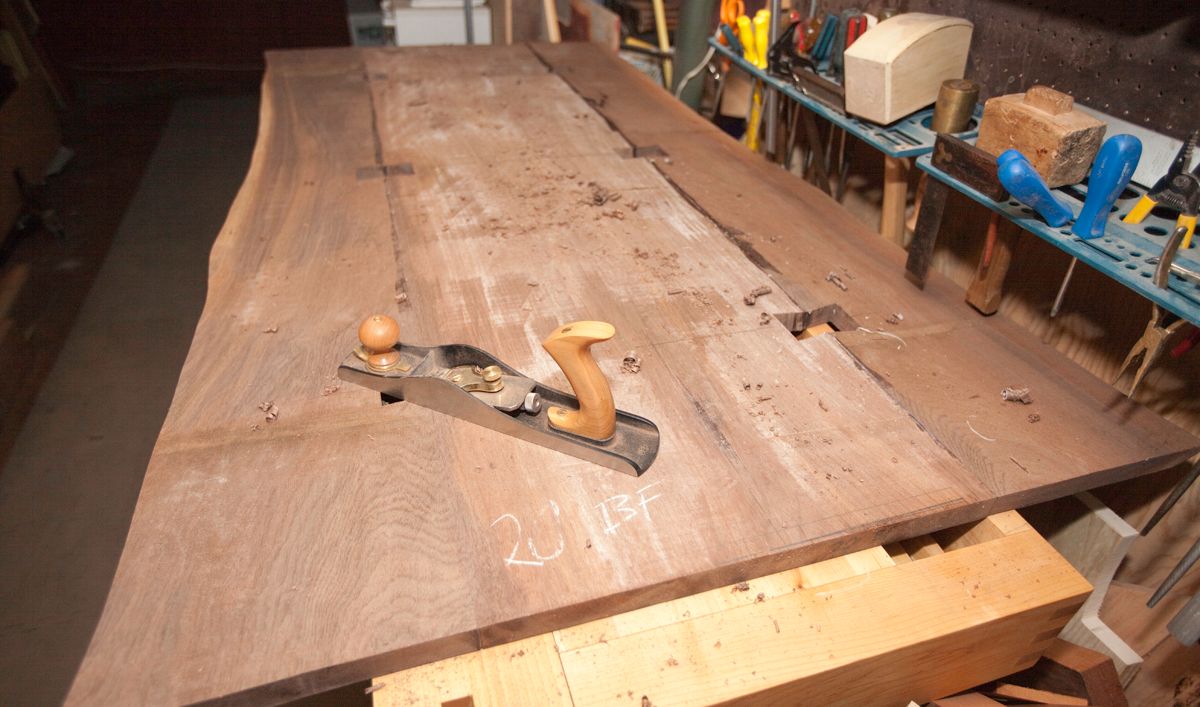
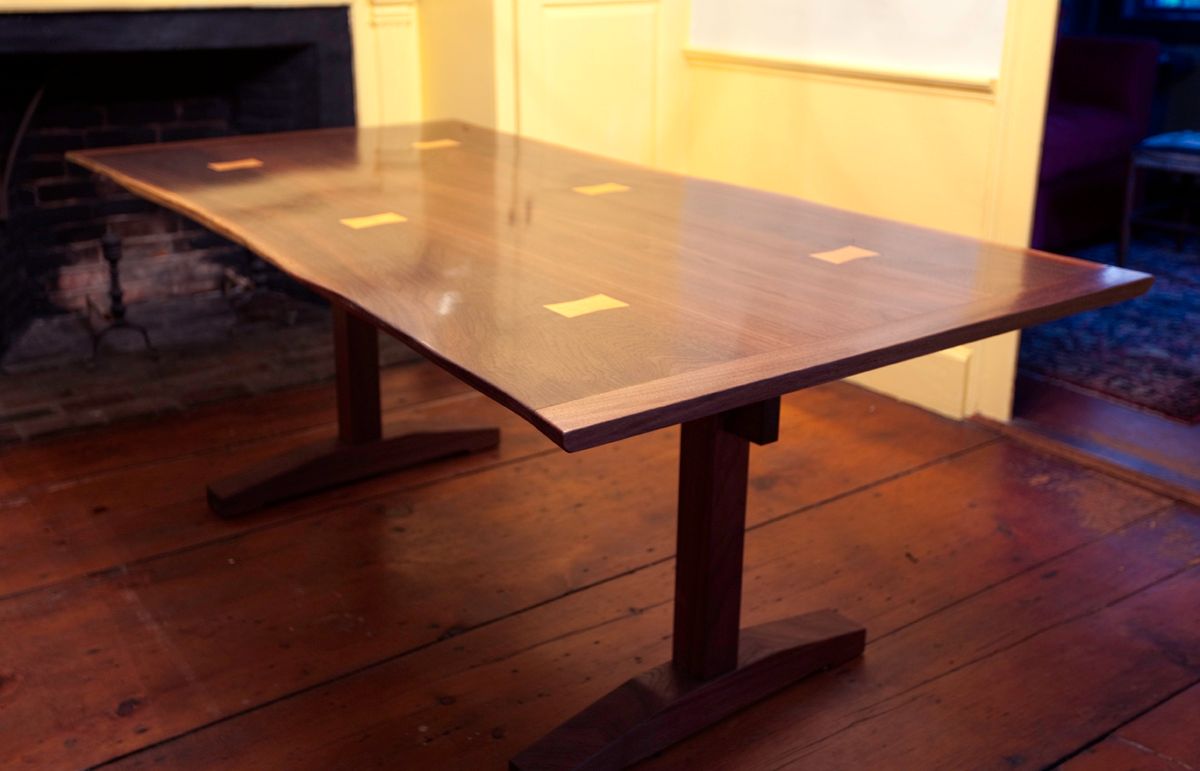
For the live edge board I simply split it down the center of the board and worked a matching “live edge” with the spokeshave on the end you see bottom right on the left board in the picture. On the large center board I averaged the centers of all the grain pattern to find the visual center line of the board and that skewed the board 7 degrees. I then trimmed the sides relative to that line to narrow the board to get the final width for the table once the split board was attached on either side. To offset the narrowing at one end of the live edge board – I trimmed the center board slightly “fatter” at one end. Not enough to be visible or even completely eliminate the narrowing. A rule will tell you that the center board is actually 1½” wider at one end than the other – but the grain draws the eye and no one notices. At this point the boards were still rough. I hand planed the edges with my big joiner plane till the only true part of the boards was their edges. I then measured for the bowties and rough cut them out before the boards were glued up. Boards were then biscuit glued with epoxy.
I then hand planed the board with Chris Schwarz’s Coarse, Medium Fine technique till I was close to the final thickness and finish. After two days of sweat I was close to where I wanted to be and I was beginning to understand where the “interesting” grain was encountered. Now the boards were fair enough to mark up and work on – I made and pressed in the cherry bowties in wet epoxy. The bowties were predetermined before board glue up and define the place settings on the table when set for 6.
The ends are breadboards – made from the best straight grain offcuts from the center board. They are closed end and ride on a long blind tenon stiffened with epoxy – especially by way of elongated slots worked into the tenon. Final fixing is by driving hand made half blind straight grained mahogany dowels into the breadboards from underneath and through the elongated slots in the table tenon. The dowels are slightly offset to force the breadboard firmly onto the table end and hopefully the slots – stiffened and strengthened with epoxy – will take the strain and allow the table to move against the breadboards as the season changes while holding the breadboards tight to the edge. The center dowel is the only one that is not elongated to keep the center of the breadboard in the center of the table. The table was made about half way through our seasonal humidity cycle so the breadboards were finished to closely match the table edges.
For two more days a mixture of fine set low angle plane, scraper plane and card scraper according to how the grain was working in different places finished the top. A final sand in 80 and then 120 grit got the table ready for the Murdock’s Hard Sealer (tung oil in citrus solvent) which I brushed in day after day till the top was completely filled. After it had hardened it was flattened with 320 grit and final coated with Murdock’s Table Top sealer. This took a couple of goes as on the day I got the best finish a fly died in the middle of it as the oil set up! 0000 wire wool and paste wax to finish.
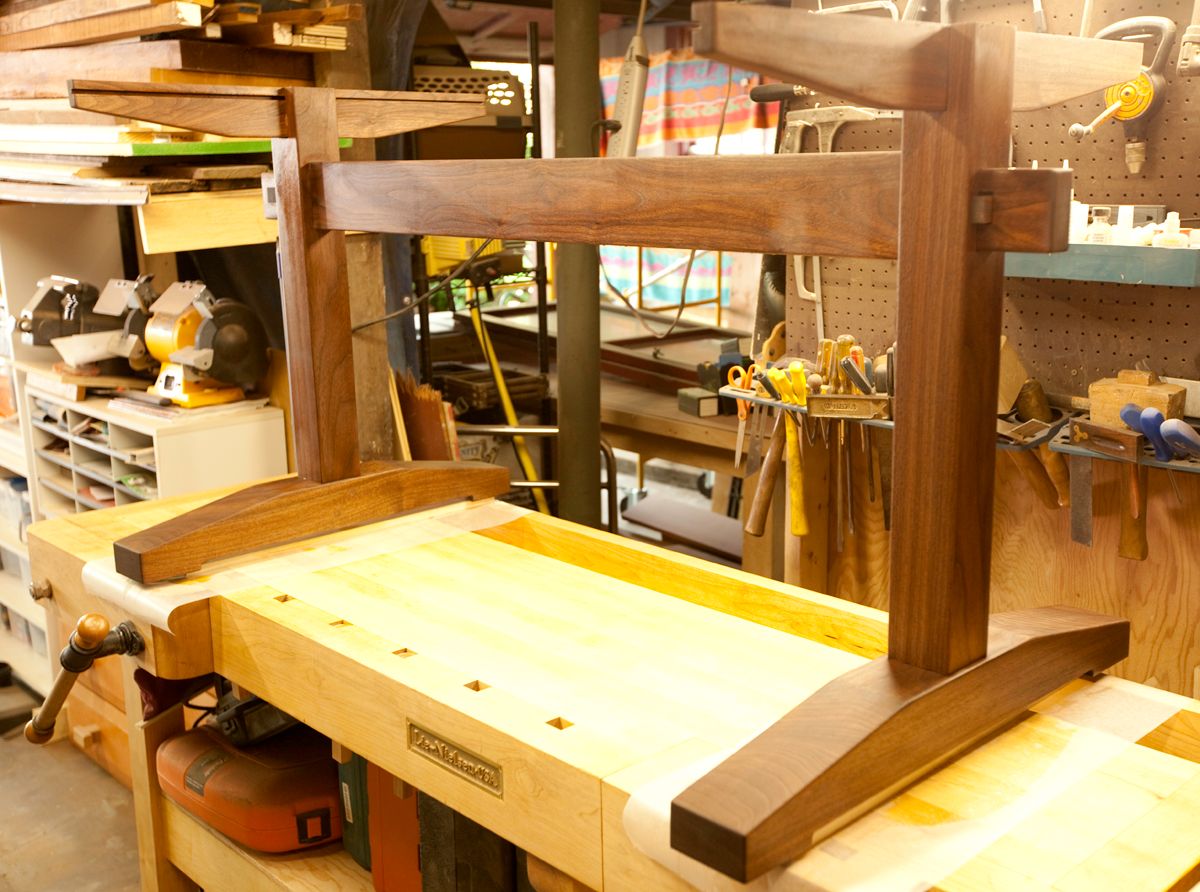
The trestle is pretty conventional mortise and tenon and was milled and made up in a weekend. Mortises were chopped out by hand. The tenons were set in polyurethane glue on final fit and wood screws were driven in from the inside to hold everything square. The 8 holes were plugged with grain matched walnut and are almost invisible – especially as they are on the insides of the trestle ends. The trestle was finished with Murdock’s hard sealer using a wipe on and wipe off technique to give a hand rubbed look.
The top is fixed to the trestle using wood cams that ride in the grooves on the trestle top to allow for wood movement.
Final dimensions to fit the available dining room – 74.5″L x 40″W (average) x 29″H Top – 1¼” thick
Seats 6 VERY comfortably as defined by the bow ties and 8 if you are friendly.
In the picture with chairs – the 4 side chairs are dated approx 1860 and come from a chair shop in upper NY state. I’m thinking of replicating two with arms to make the carvers.


Log in or create an account to post a comment.
Sign up Log in