Bubinga Sideboard – Comtemporary Design
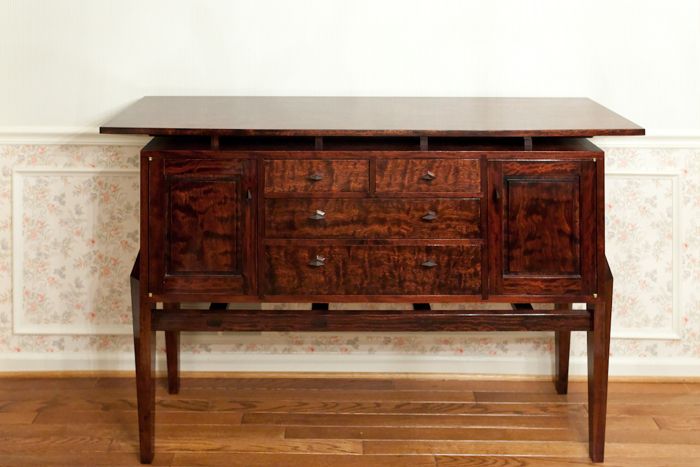
The bubinga case is contemporary in design with oriental influences. The finish is a Lockwood dye (Rosewood) and tung oil. The drawer and door fronts are french polished.
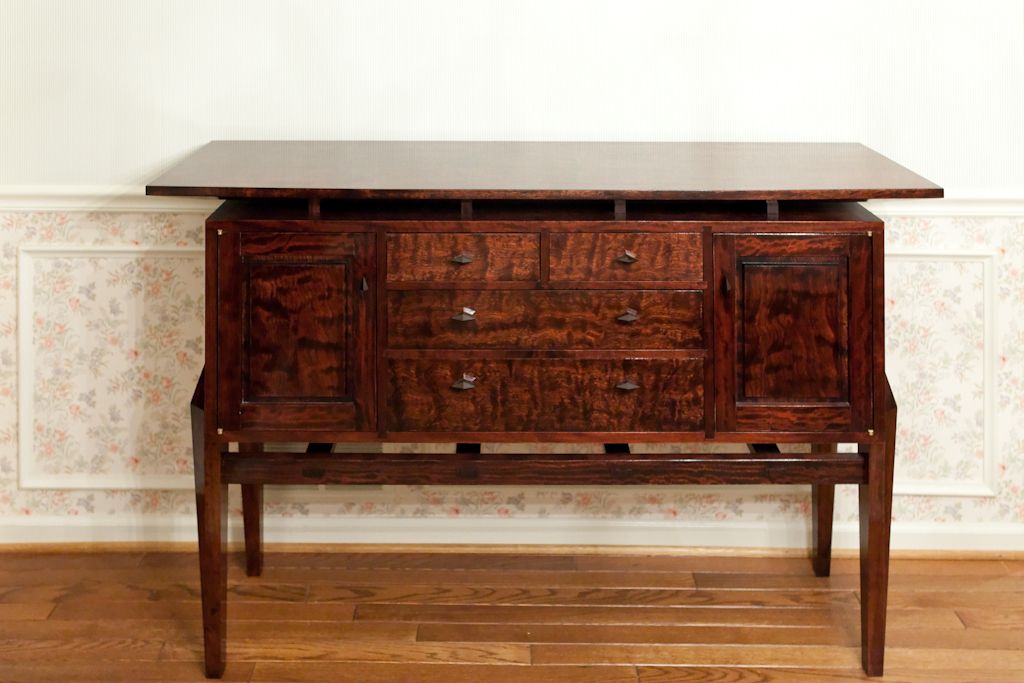
This sideboard is my own design. The design is contemporary with an oriental influence. The sideboard is 38″ tall, 60″ wide and 18″ deep.
I took construction inspiration and advice from several Fine Woodworking articles including Garrett Hack’s “The Versatile Huntboard” and Will Neptune’s “Sideboard Strategies” and techniques from many articles on dovetailing and joinery including Steve Latta’s “Two Ways to Make Sturdy Cabinet Doors”.
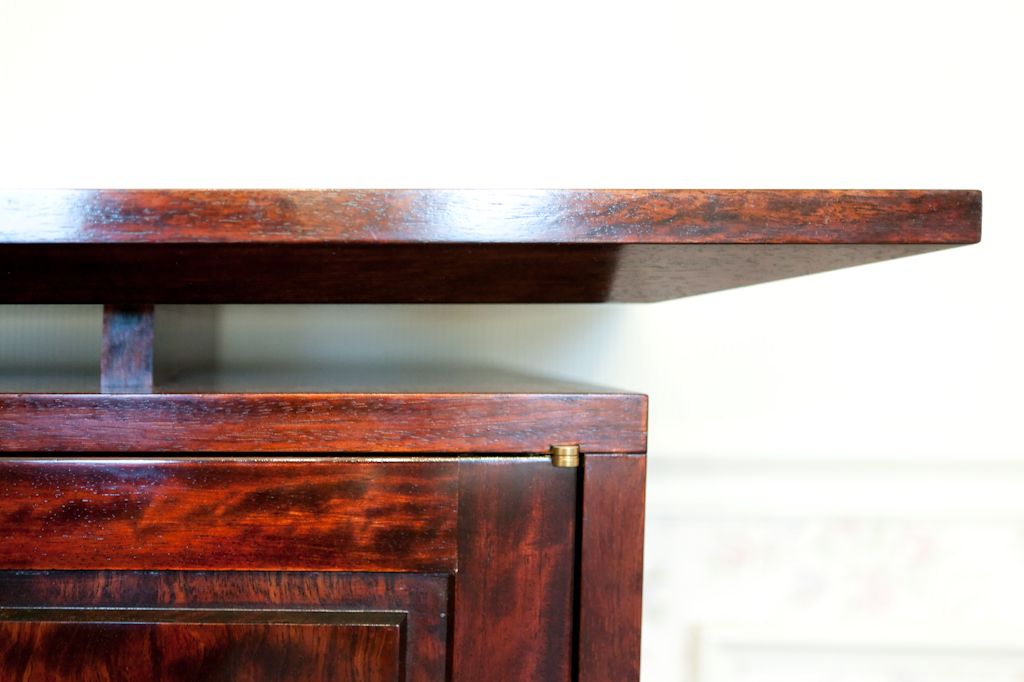
The top is made from a single slab of 6/4 bubinga. The slab is undercut to give it a lighter appearance with the front and side edges showing at 3/4″. The front edge is eased back on either side beginning at the case partitions. The top is elevated 1 1/2″ above the case by four cleats that are set-back from the front to give it an appearance of floating above the case.
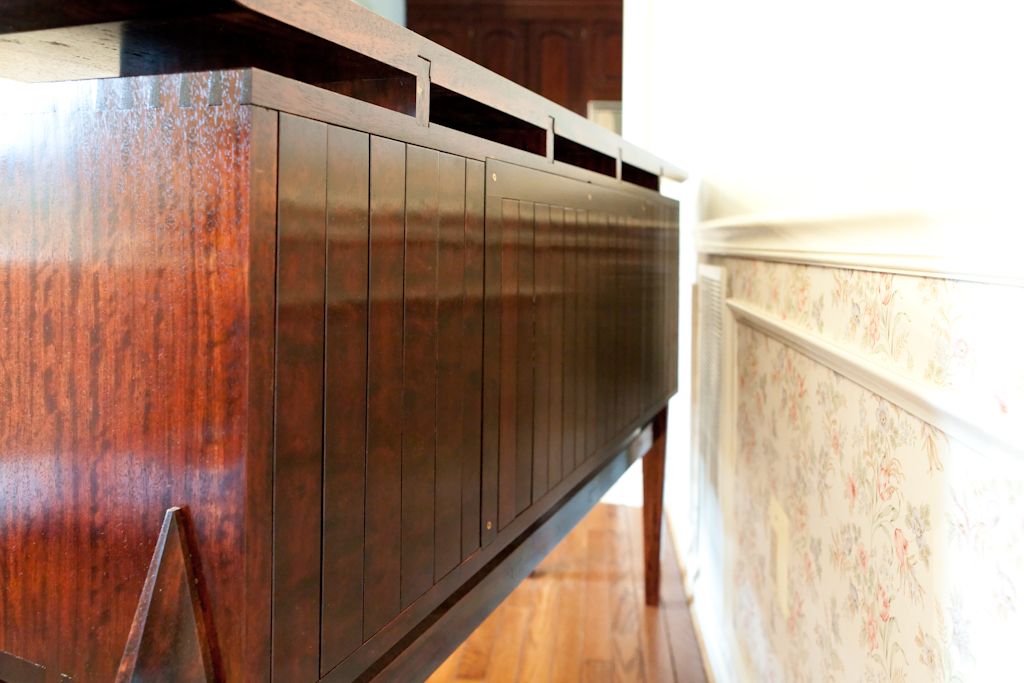
The cleats are attached to the top using a sliding dovetail entering from the back. On the case side the cleats are attached using wedged through tenons. I’ll note that the orientation of the grain on the top, cleats and casework is in the same direction so that all wood movement is in the same direction.
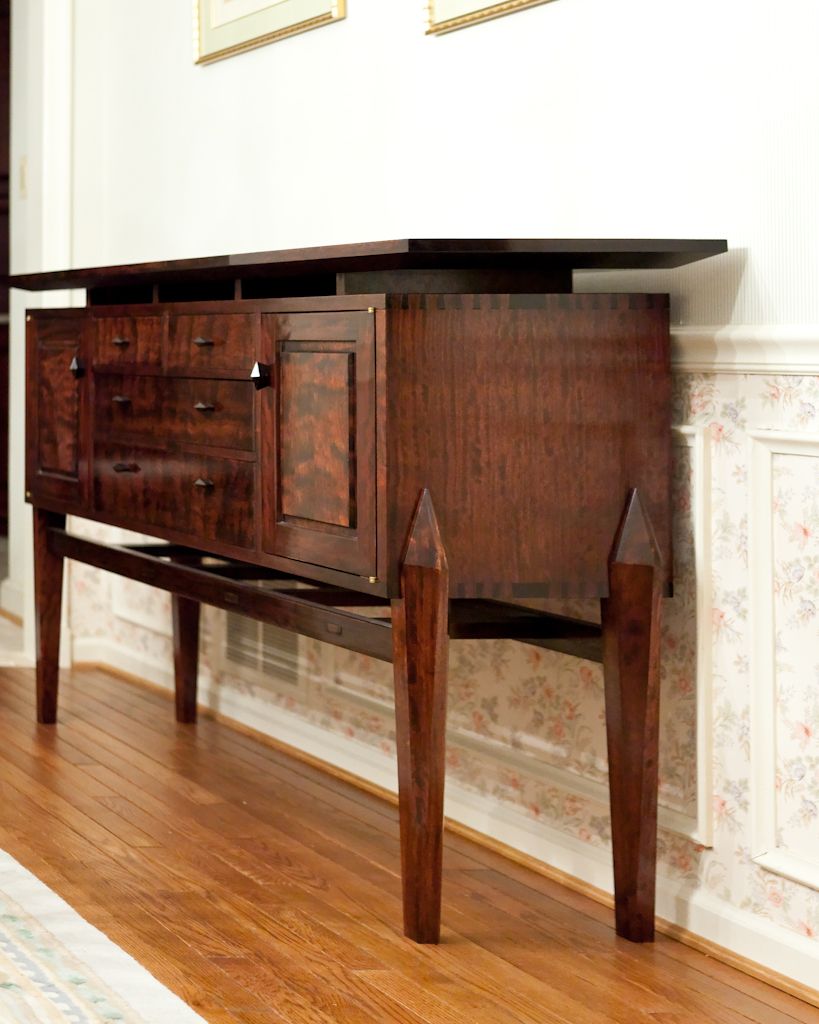
The case is built from solid quartersawn bubinga. I was unable to find single boards wide enough for the case but was able to find two sequential flitch-cut boards and the glue line is invisible. The boards for the case are cut in series so the grain wraps continuously around the case. The sides are joined using hand-cut dovetails with the tails on the sides which is a bit tricky for the glue-up but I wanted the verticle joint strength and the like the tails showing.
The partitions have two sections each: a rear section that is joined to the case top and bottom using wedged through tenons and a front section that is joined to the case top and bottom using sliding dovetails. The two sections are glued together during construction to give the appearance of a panel made of a single piece of wood. The rear section is the tricky part during the case glue-up because the partitions have to be installed before the case sides are attached.
The partitions separate cabinets on either end of the case from the drawer stack in the middle. The left cabinet has a fixed half-shelf and the right cabinet is open. The cabinet door frames are made from quartersawn bubinga and the panel is made from a highly figured bubinga board that I happened to find at Exotic Lumber in Annapolis which is my source for all of the wood used in this project. The door panel is raised in a shaker style mainly because I wanted the panel raised but didn’t want an ornate or rounded edge. The door frame uses full mortise and tenon construction with a mitered edge.
The drawer stack is graduated with the top of the stack divided into two smaller drawers. The drawer frames, like the case partitions, have a front section attached using sliding dovetails. The tenoned sides of each frame are installed in dadoes from the rear and glued into mortises in the front of the case. The sides join to the rear section using mortises that are not glued (allowing for movement) and the rear section mirrors the front by joining to the case using sliding dovetails.
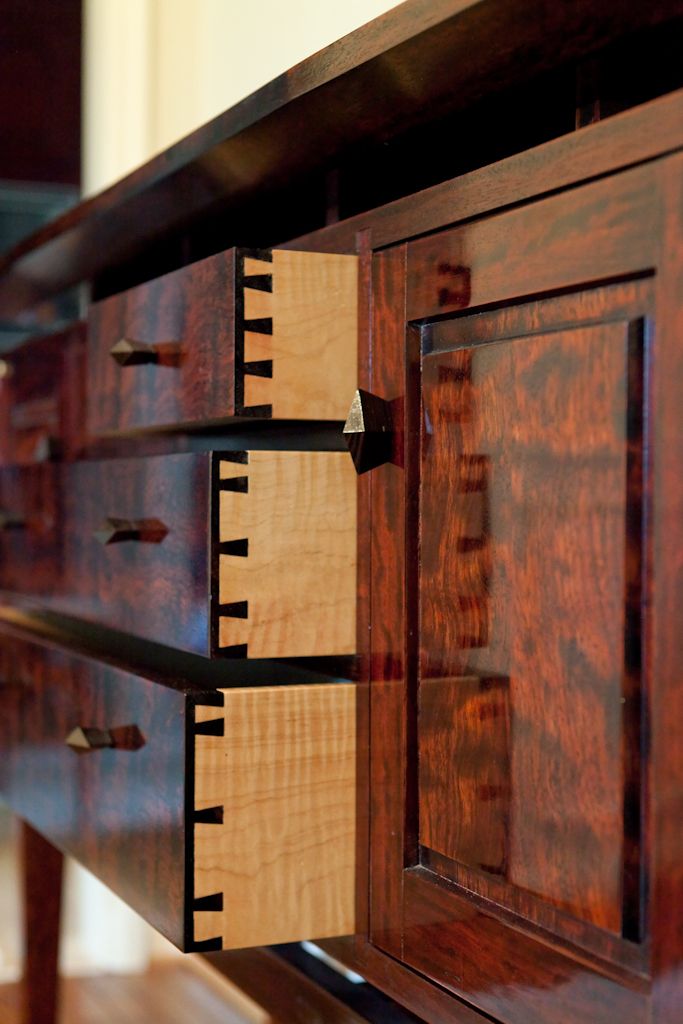
The drawer fronts are made from the same figured bubinga board as the cabinet door panels. The drawer sides, back and bottom are made from curly maple with some spalting on the drawer bottoms. The drawer components are joined using hand-cut dovetails.
The drawer and cabinet pulls are hand-made from macassar ebony. The orientation of the pulls is important so they are attached to the fronts using a 1/4″ square stem that is dovetailed into the back of the pull and will either be glued or wedged into the fronts (I haven’t decided yet and the fit is tight without glue or wedges).
The slatted back is made from shiplapped 3/8 bubinga boards floating in a 3/16 groove in the top and bottom of the case. The top groove is open behind the drawer stack allowing the slats to be inserted. A U-shaped cleat holds the slatted back in place behind the drawer stack.
I took a design risk with the legs. I wanted the case to have the appearance of a chest sitting on a platform so the legs do not extend to the top of the sideboard as is more usual. They attach to the case using a 4″ sliding dovetail. To bear the weight, the dovetail is set-back in each leg to create a 1″ platform on which the bottom of the case rests. I wanted the leg platform to be strong enough to support the case without attachment to avoid stressing the case side. The stretchers are joined into each leg using a deep mortise and tenon joint and are stabilized ladder-style front to back using wedged through tenons.
The bubinga components are stained with a water-based Lockwood dye (Rosewood). The top and case exterior are finished using tung oil. The drawer and door fronts are finished using a french-polish blonde shellac over tung oil. The case interior and drawer components are finished using blonde shellac.
This is my first furniture project. The design was done using Google Sketch-up. The design (minus drawer and door details) is shared in the Google 3D Warehouse as the Sideboard model under Michael Lauer.


Comments
Excellent work, i really admire your hand cut dovetails, most people don't appreciate the skill it takes to accomplish this. The gamble on the legs i think payed off. Overall fantastic!!!
Beautiful work. I am not a big fan of contemporary, but this piece of furniture is worderful to look at. I also agree that the legs worked out great. The floating top really adds to the whole piece. Great job.
This is your first furniture project?!
You need to design more furniture. Wow! You've pulled off the impossible. You've done the whole piece in highly figured wood without making it garish. Thank you for opening my eyes.
Nice piece. The legs struck me as Emile Jacques Ruhlman style legs. Are they laminated? I like your courage to try something different. Bubinga is a gorgeous wood but I find it tricky to finish. Overall, well done!
Thank you for your kind comments. To answer a couple of questions:
The legs are cut from solid bubinga on a table saw with a slide table. Lots of jigs to get the angles just right and repeatable.
This is my first piece of furniture. I've done some previous woodworking including some elaborate mahagony/cedar stairs for a deck and a previous cabinetry project (radiator covers in wood) but this is my first furniture piece. I may post pictures later. I did spend a lot of time in research, design, and practice with FWW being a prime source. An experienced woodworker would likely find a laugh in the time investment but most was learning before doing so I'm happy with the time I spent.
The casework is very traditional and Hack inspired. The top isn't usual but I've seen some similar pieces. The legs are not traditional and I haven't seen this type of joinery used before. It's likely not anything new but I couldn't find an example anywhere. So it was new to me.
I found the bubinga a bit tricky to finish too, at least to get the look I wanted. I applied the water-based Lockwood dye (allowing time for thorough drying) and a first coat of tung oil and then lightly sanded the wet tung oil to remove some of the dye to reveal the grain. The sanding was by hand with constant visual inspection and was repeated as necessary on subsequent coats. I have had some training in watercolor painting and removing excess color is an established technique in painting that I migrated to this project.
Log in or create an account to post a comment.
Sign up Log in