China Hutch
CHINA HUTCH
-THE PIECE
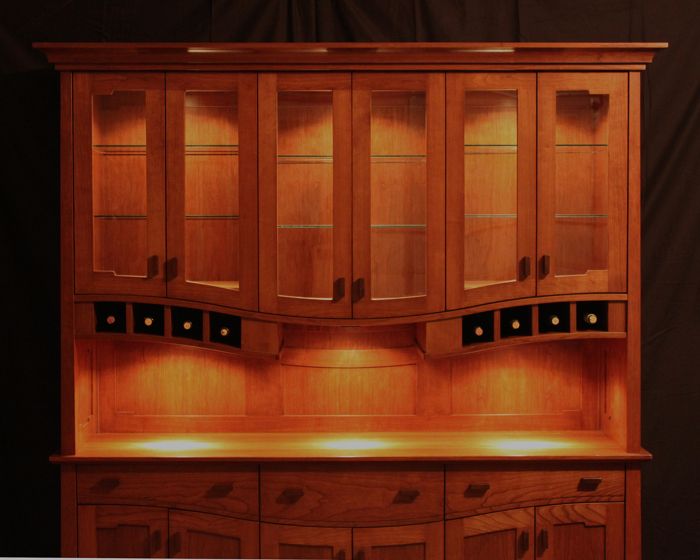
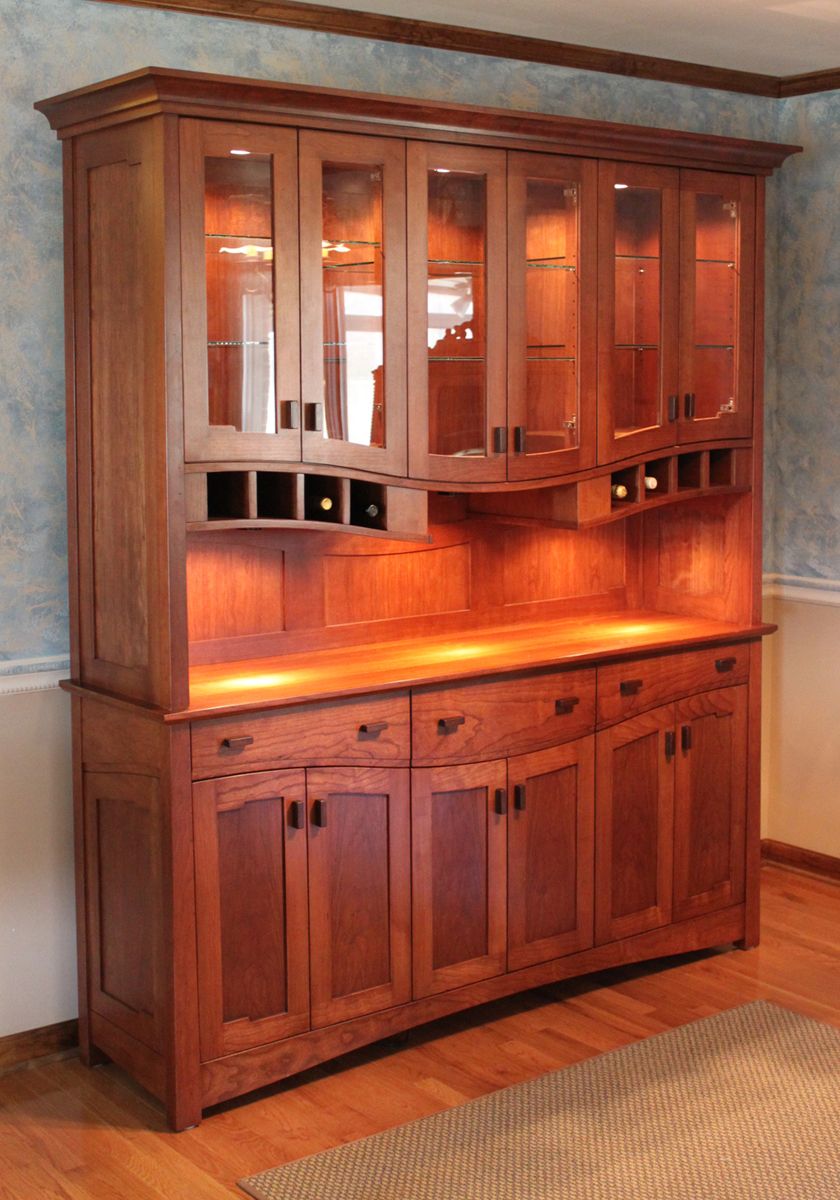
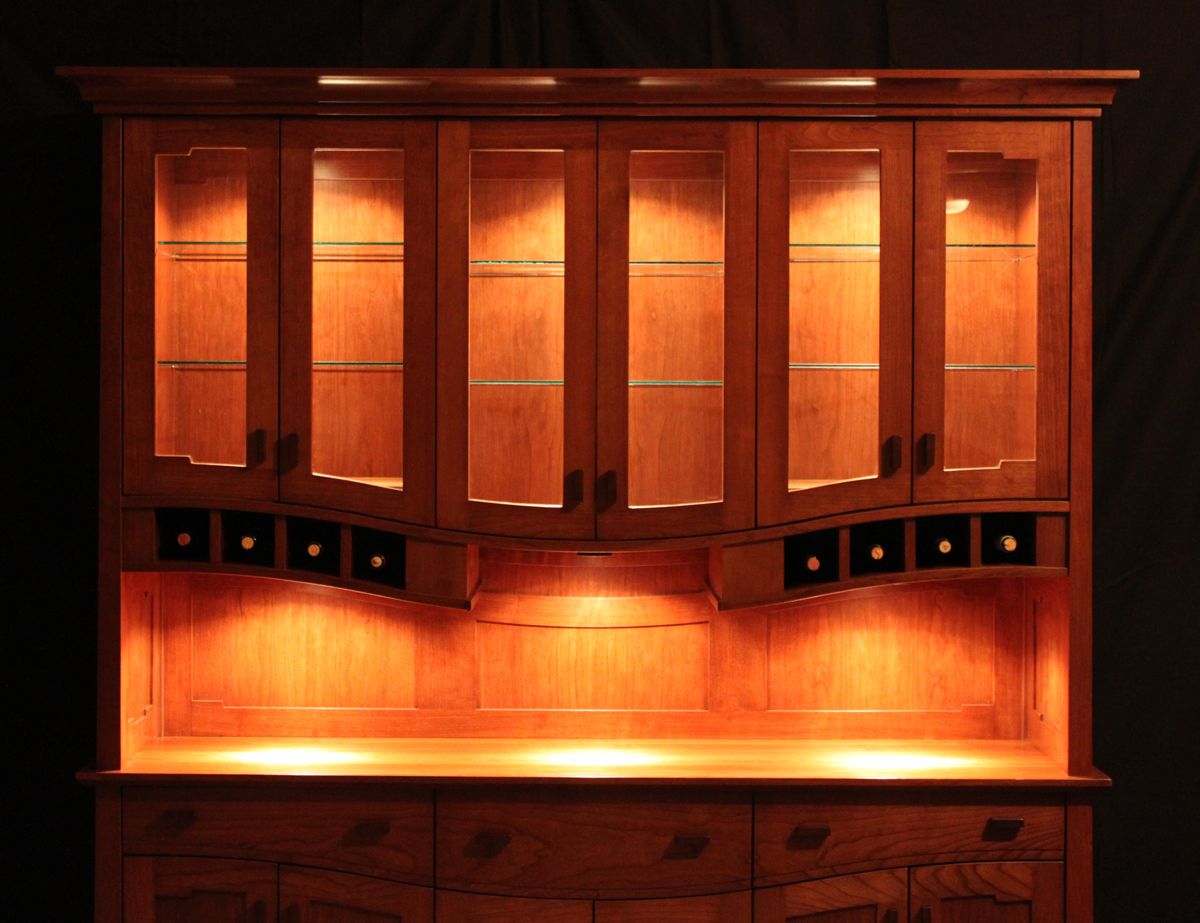
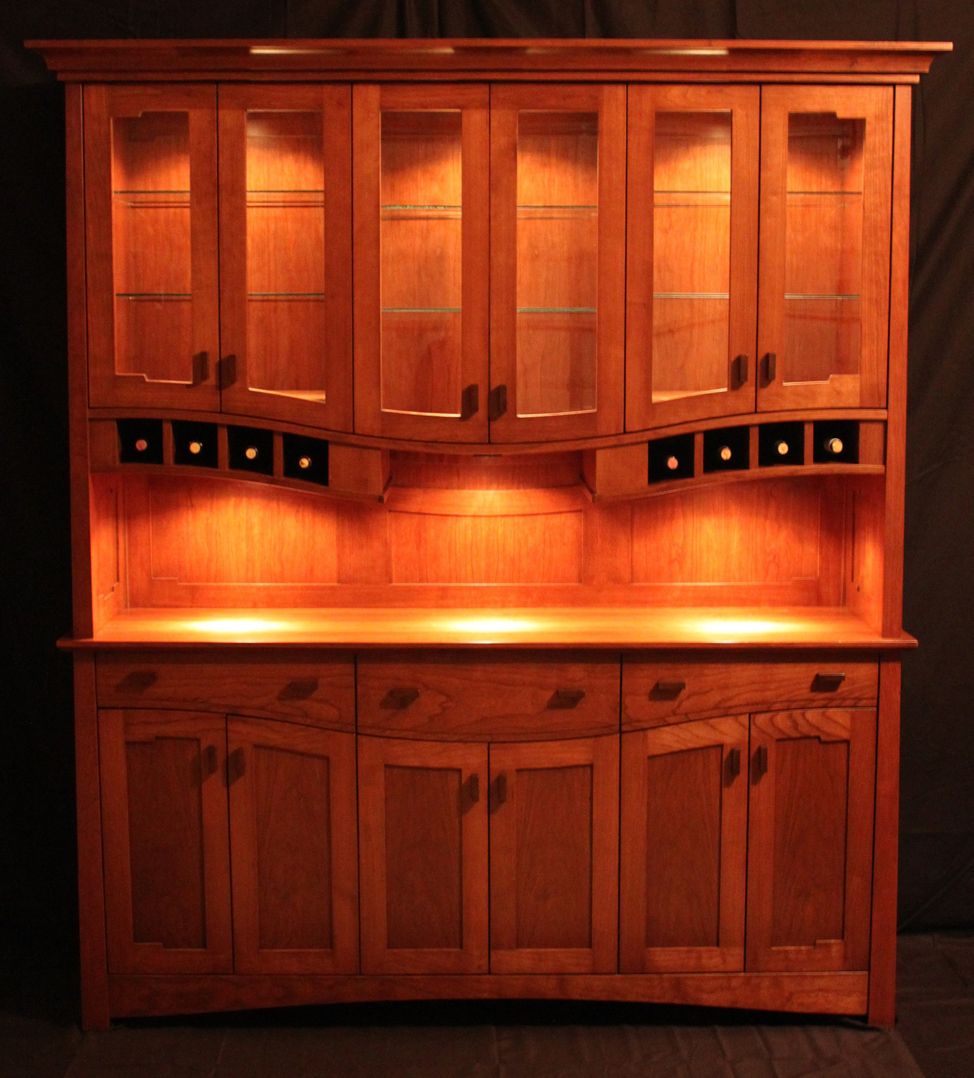
This piece was originally designed to be two separate pieces. The base was designed as a buffet that could be used as a serving area, while the top was designed to be mounted separately as a wall cabinet. The two were to flow together and complement each other using the open space between them as a design element. However, relatively the same effect could be achieved if the two were combined and attached as one piece. So, I altered the design to include the paneled center section which ties the two pieces together making it one free standing piece. This also makes it easier to move, in case the client ever needed to move it.
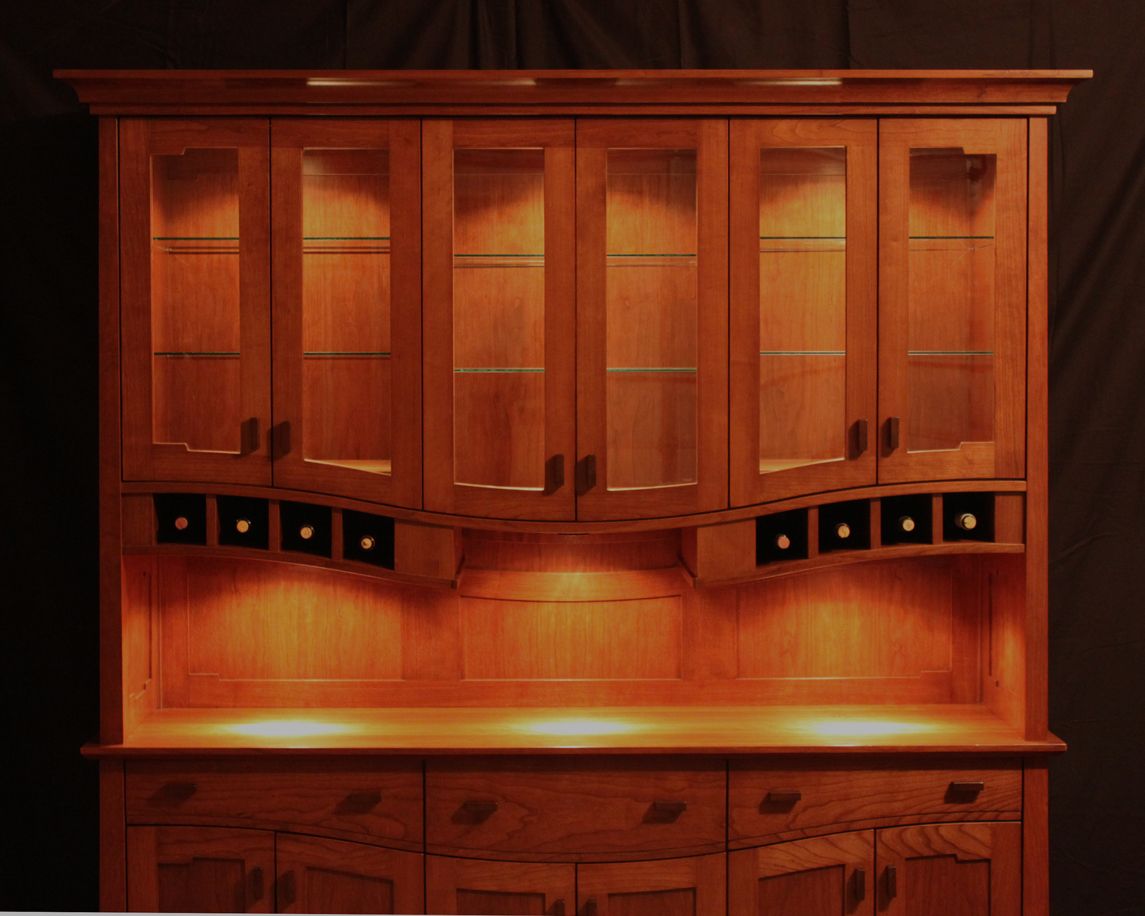
I designed the piece mainly around the swooping shape that encompasses the wine cubbies, and then drops down to the bottom of the drawer fronts. This shape had been playing around in my head since I used it as a design feature in the top of a tool cabinet I made. Usually the “swoop” faces up in the center of a piece, not down. But it worked very well in that piece, so I thought I would use it again on a larger scale.
I also wanted to make a piece designed around the wood’s grain patterns.
I hope you like it.
-GRAIN
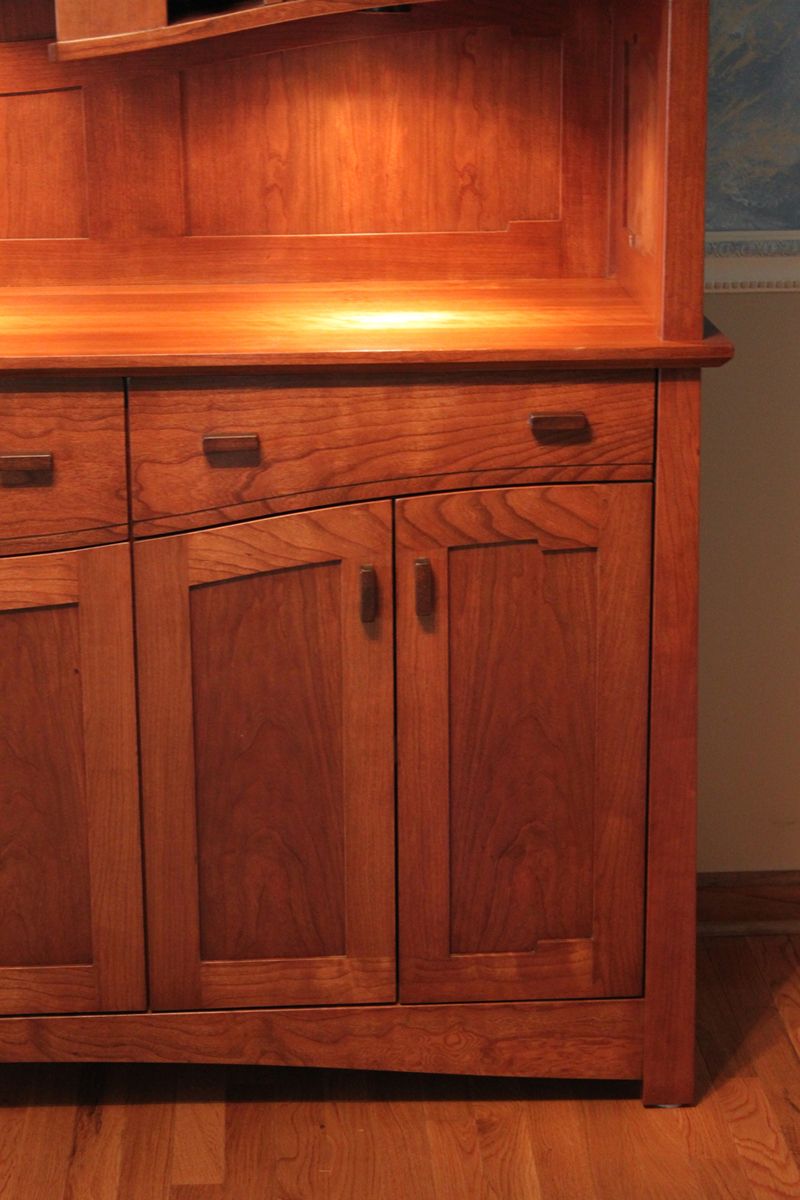
I took a lot of time lining up, matching, and working with the grain in this piece. Most everything had to be drawn out on the boards beforehand, and labeled clearly all the way through production. I used plain sliced cherry for everything except for the door styles. For those I used quarter sawn cherry in order to give the piece a cleaner look. I wanted any figured grain in this piece to run only horizontally. I didn’t want the grain to run all over the place making the piece look too busy.
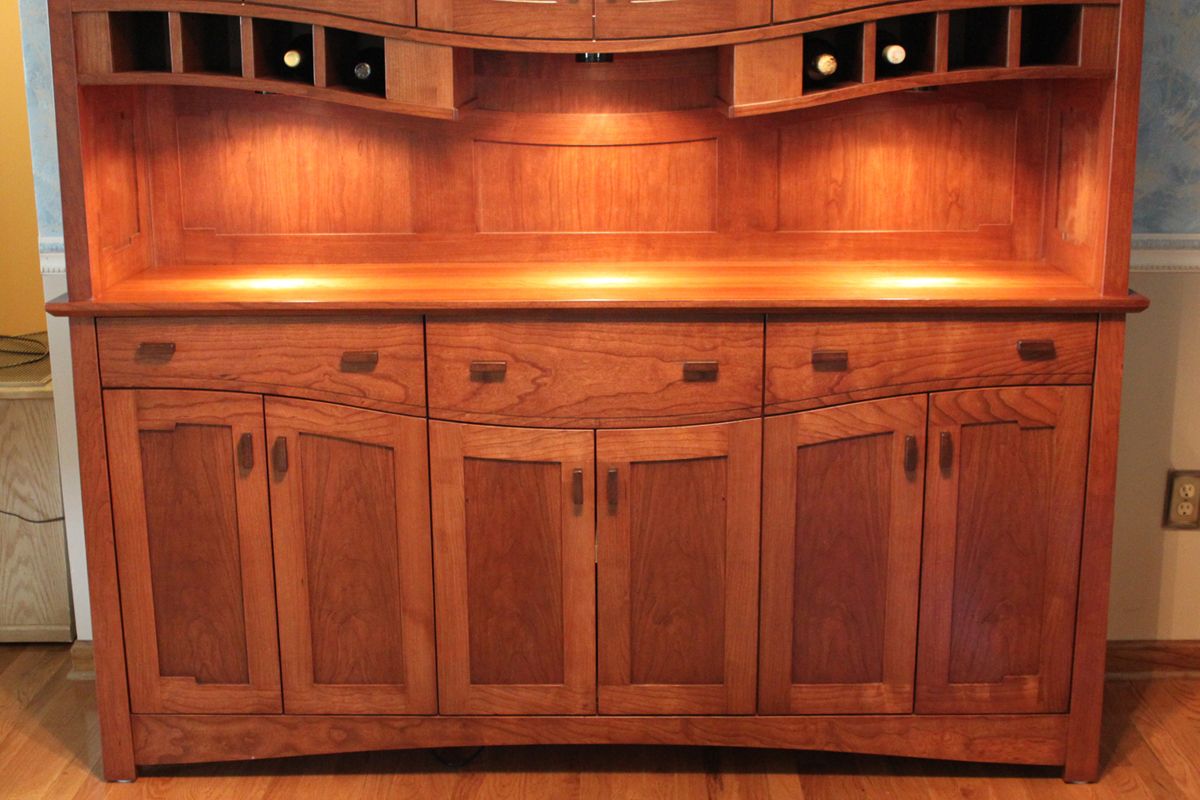
All the door panels came out of the same flitch so that the grain pattern is consistent across the piece. In all the other panels, (sides and midsection), the grain in the panel is centered and book matched. The same goes for the back of each upper cabinet.
-DOORS
For each set of doors, I ran the door rails all the way across the set, making the inner style, (the one with the handle) of each door, a sort of vertical rail instead of a style. This was done as to not break up the grain run between each set of doors.
-DRAWER FRONTS
I made the drawer fronts and the top rails of the base doors, out of the same board. I wanted everything to feel like it ran together. This was another reason why I ran the top rail, of each set of doors, all the way through. I also did this for the bottom base rails and the base board as well as the hutch doors.
-DRAWERS
The drawers are made out of solid maple with rabbeted cherry dowel joints.
-OUTER DOOR ACCENTS
On the four outside doors, the far left and far right of the base and upper hutch, I incorporated a small step in the door rails. As a whole this design detail helps to draw the eye back into the piece as opposed to following the door line straight off the piece completely.
-HANDLES
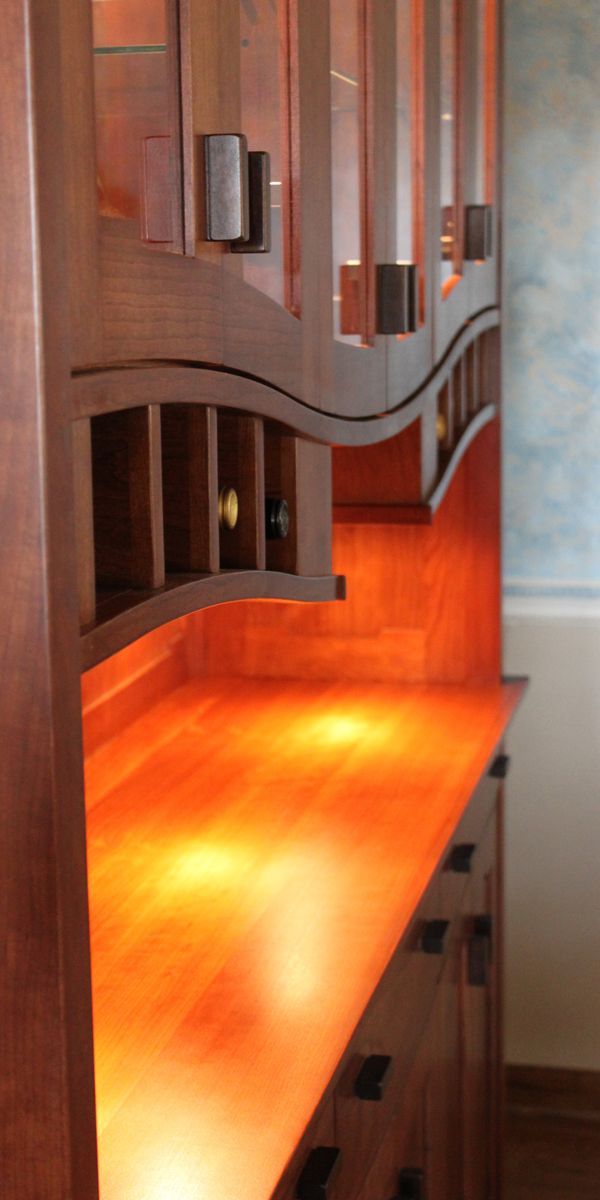
The handles were designed to help compliment the piece without creating a distraction. I made them with a very simple and low profile design. However, I didn’t want them to blend into the piece like a swamp, so I stained them darker to help accent them a little. When I mounted them to the doors and drawer fronts, I decided to follow the shapes of the door and drawer fronts instead of mounting them straight across on an even plane.
-WINE RACK
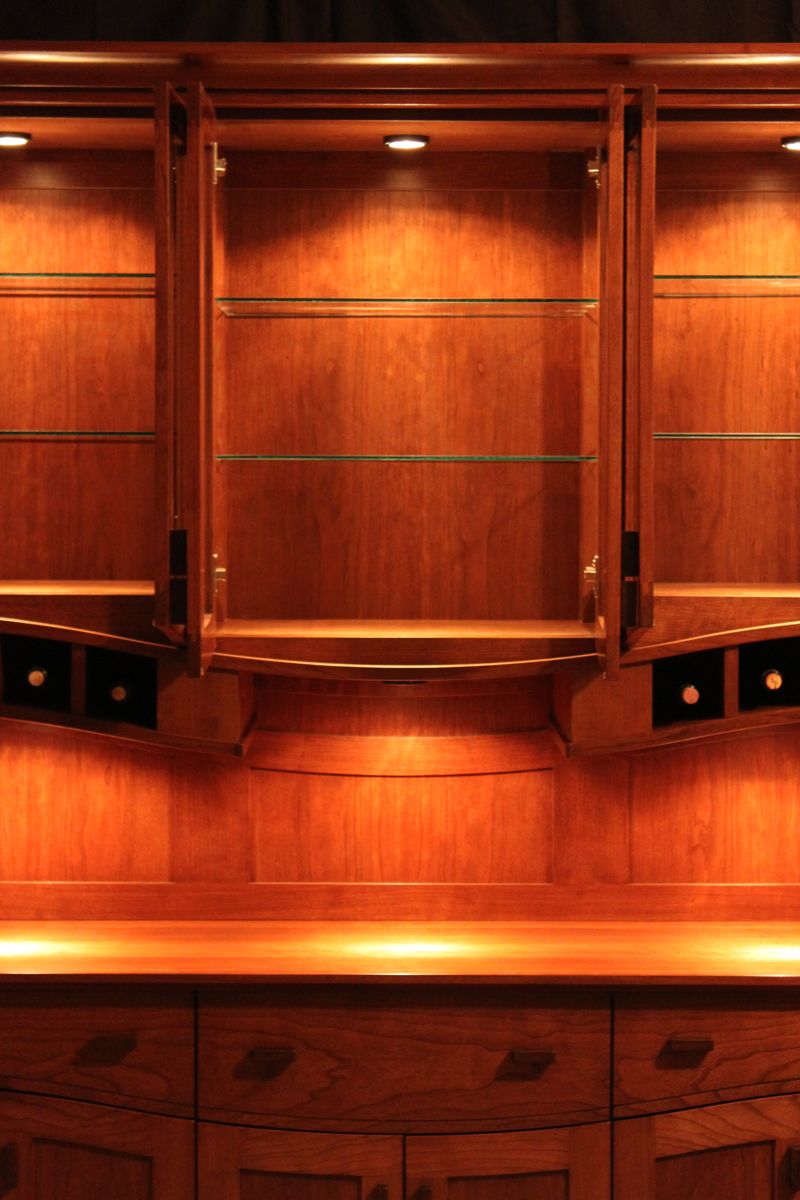
The wine rack is one of the most unique design elements of the piece. The two center cubby dividers (left and right sides) line up directly centered under the outer sets of doors. The swooping design runs parallel with the swoop across the base unit.
-LIGHTS
I have six lights mounted in the piece. Since the large cavity, for lack of a better word, across the center was designed to be a functional space, I wanted it to be illuminated adequately. The lights here also help to draw attention to the book matched grain panels in the back. The other three display lights are in the top cabinets, one in each. All six of the lights are recessed.
-THE BOTTOM OF THE UPPER CABINET / WINE CUBBY SWOOP
Once the upper cabinet was together, I made plywood ribs in the swoop shape and attached them to the underside of the upper cabinet. I then took three layers of ¼” cherry veneered ply wood and kerfed all the backs. I then glue them together to the shaped ribs forming a solid 3 layer lamination. Once I determined the layout of the individual wine cubbies, from a full scale drawing, I cut the dividers on the different appropriate angles which kept them all plumb. At this point everything had to be finished prior to putting it together. Once everything had the finish on it, I then secured the cubby dividers and started the next set of laminations for the very bottom of the cubbies. After two layers were together, I glued and screwed it to the bottom of the cubby dividers. Then I applied the final ¼” thick layer, covering the screws and finishing it off. Once this was together, I applied the hardwood faces to the ¾” thick laminated swoops. These pieces were shaped out of the same board as the bottom door rails keeping the grain consistent.





Comments
Stunning! That should be one happy customer.
Very, very nice. Really!!
That "swoop" might well have been inspired by the jaws dropping on woodworkers viewing this beauty.
Beautiful design. Beautiful combination of wood, glass, and light. Great workmanship. Very inspiring. This is why I look at reader galleries - to see the best of what people are doing.
very well thought out design, inspiring.....
Well done - absolutely beautiful; not overdone, its just right. Congrats!
excellent design and finish
Any chance you have a scale drawing, I would love to build this piece, great job truly one of a kind!
Kev!
Chad could you drop me an email at stikk@rogers.com, your gmail account does not seem to work!
Thanks Kev!
This is truly a work of art. I have been looking for plans for just a server and not the top. Would you have a drawn plan for the lower section. I did read the text, but being more of a visual person when I work, I need a plans. Thanks
Hello, I am a high school student that's considering making a china hutch based off of your design. I was wondering if you could email me some more pictures and maybe a list of some dimensions. please e-mail me at loreilly32@gmail.com. Thank you!
Log in or create an account to post a comment.
Sign up Log in