Greene and Greene inspired coffee table
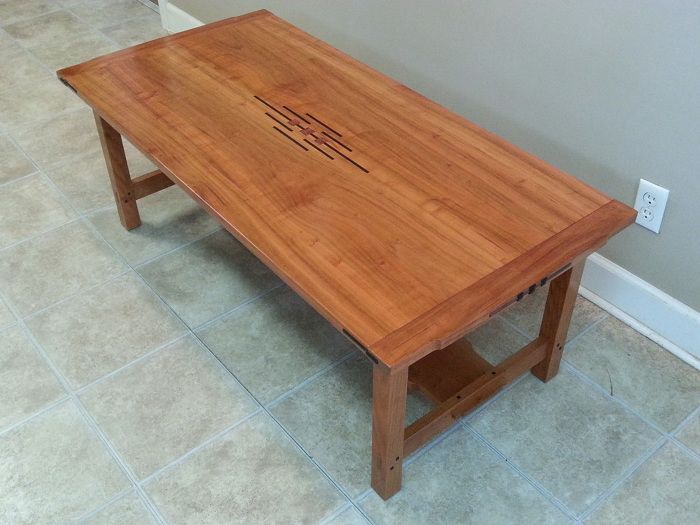
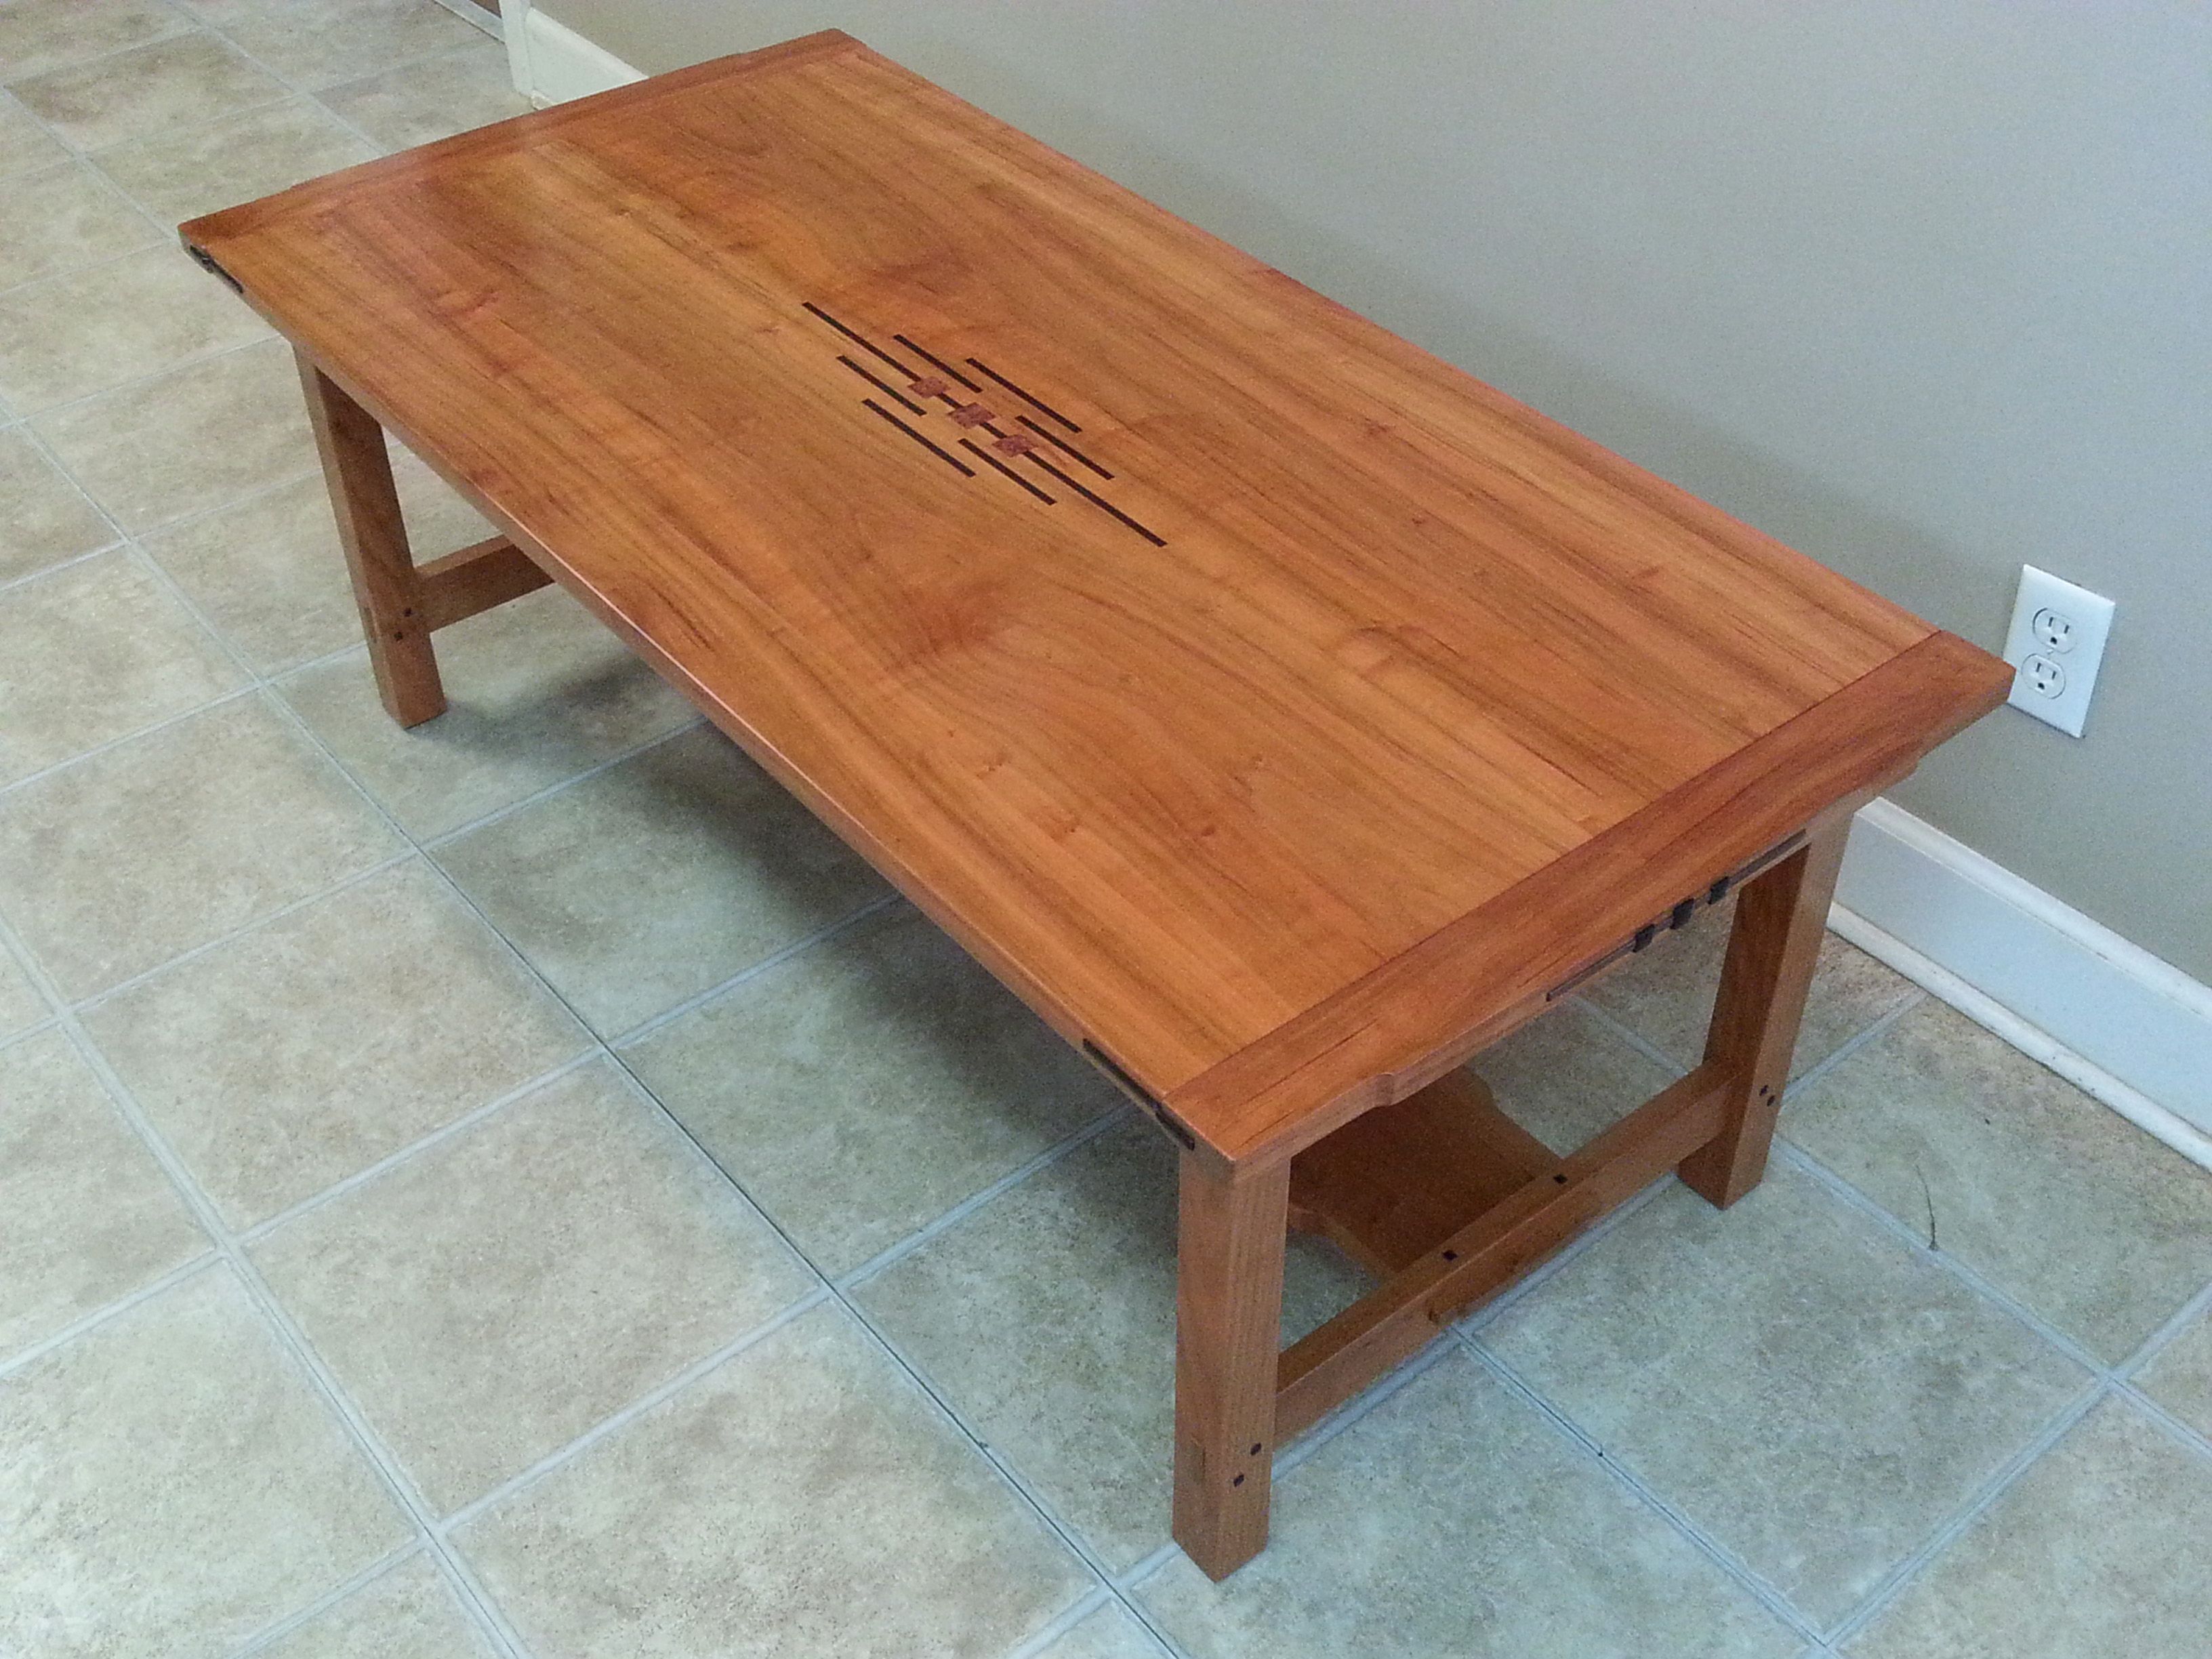
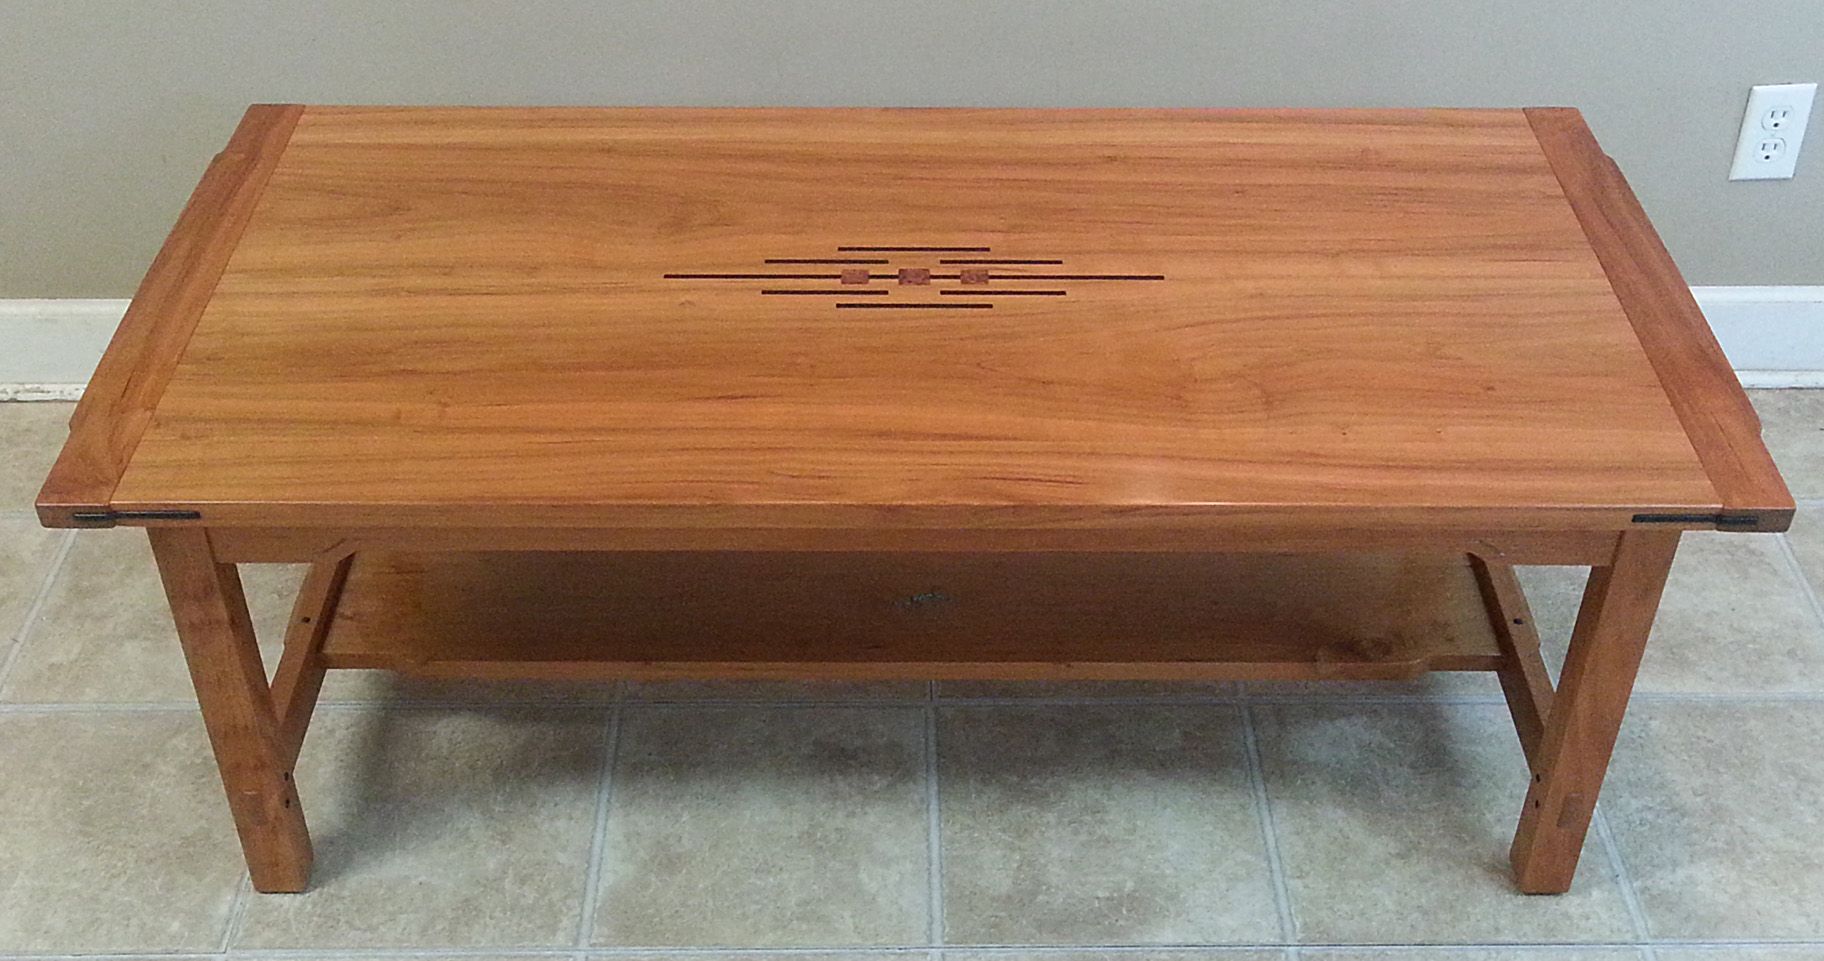
This Greene and Greene styled coffee table is made primarily of cherry with walnut and ebony accents. It is approximately 24″ x 50″ x 18.5″
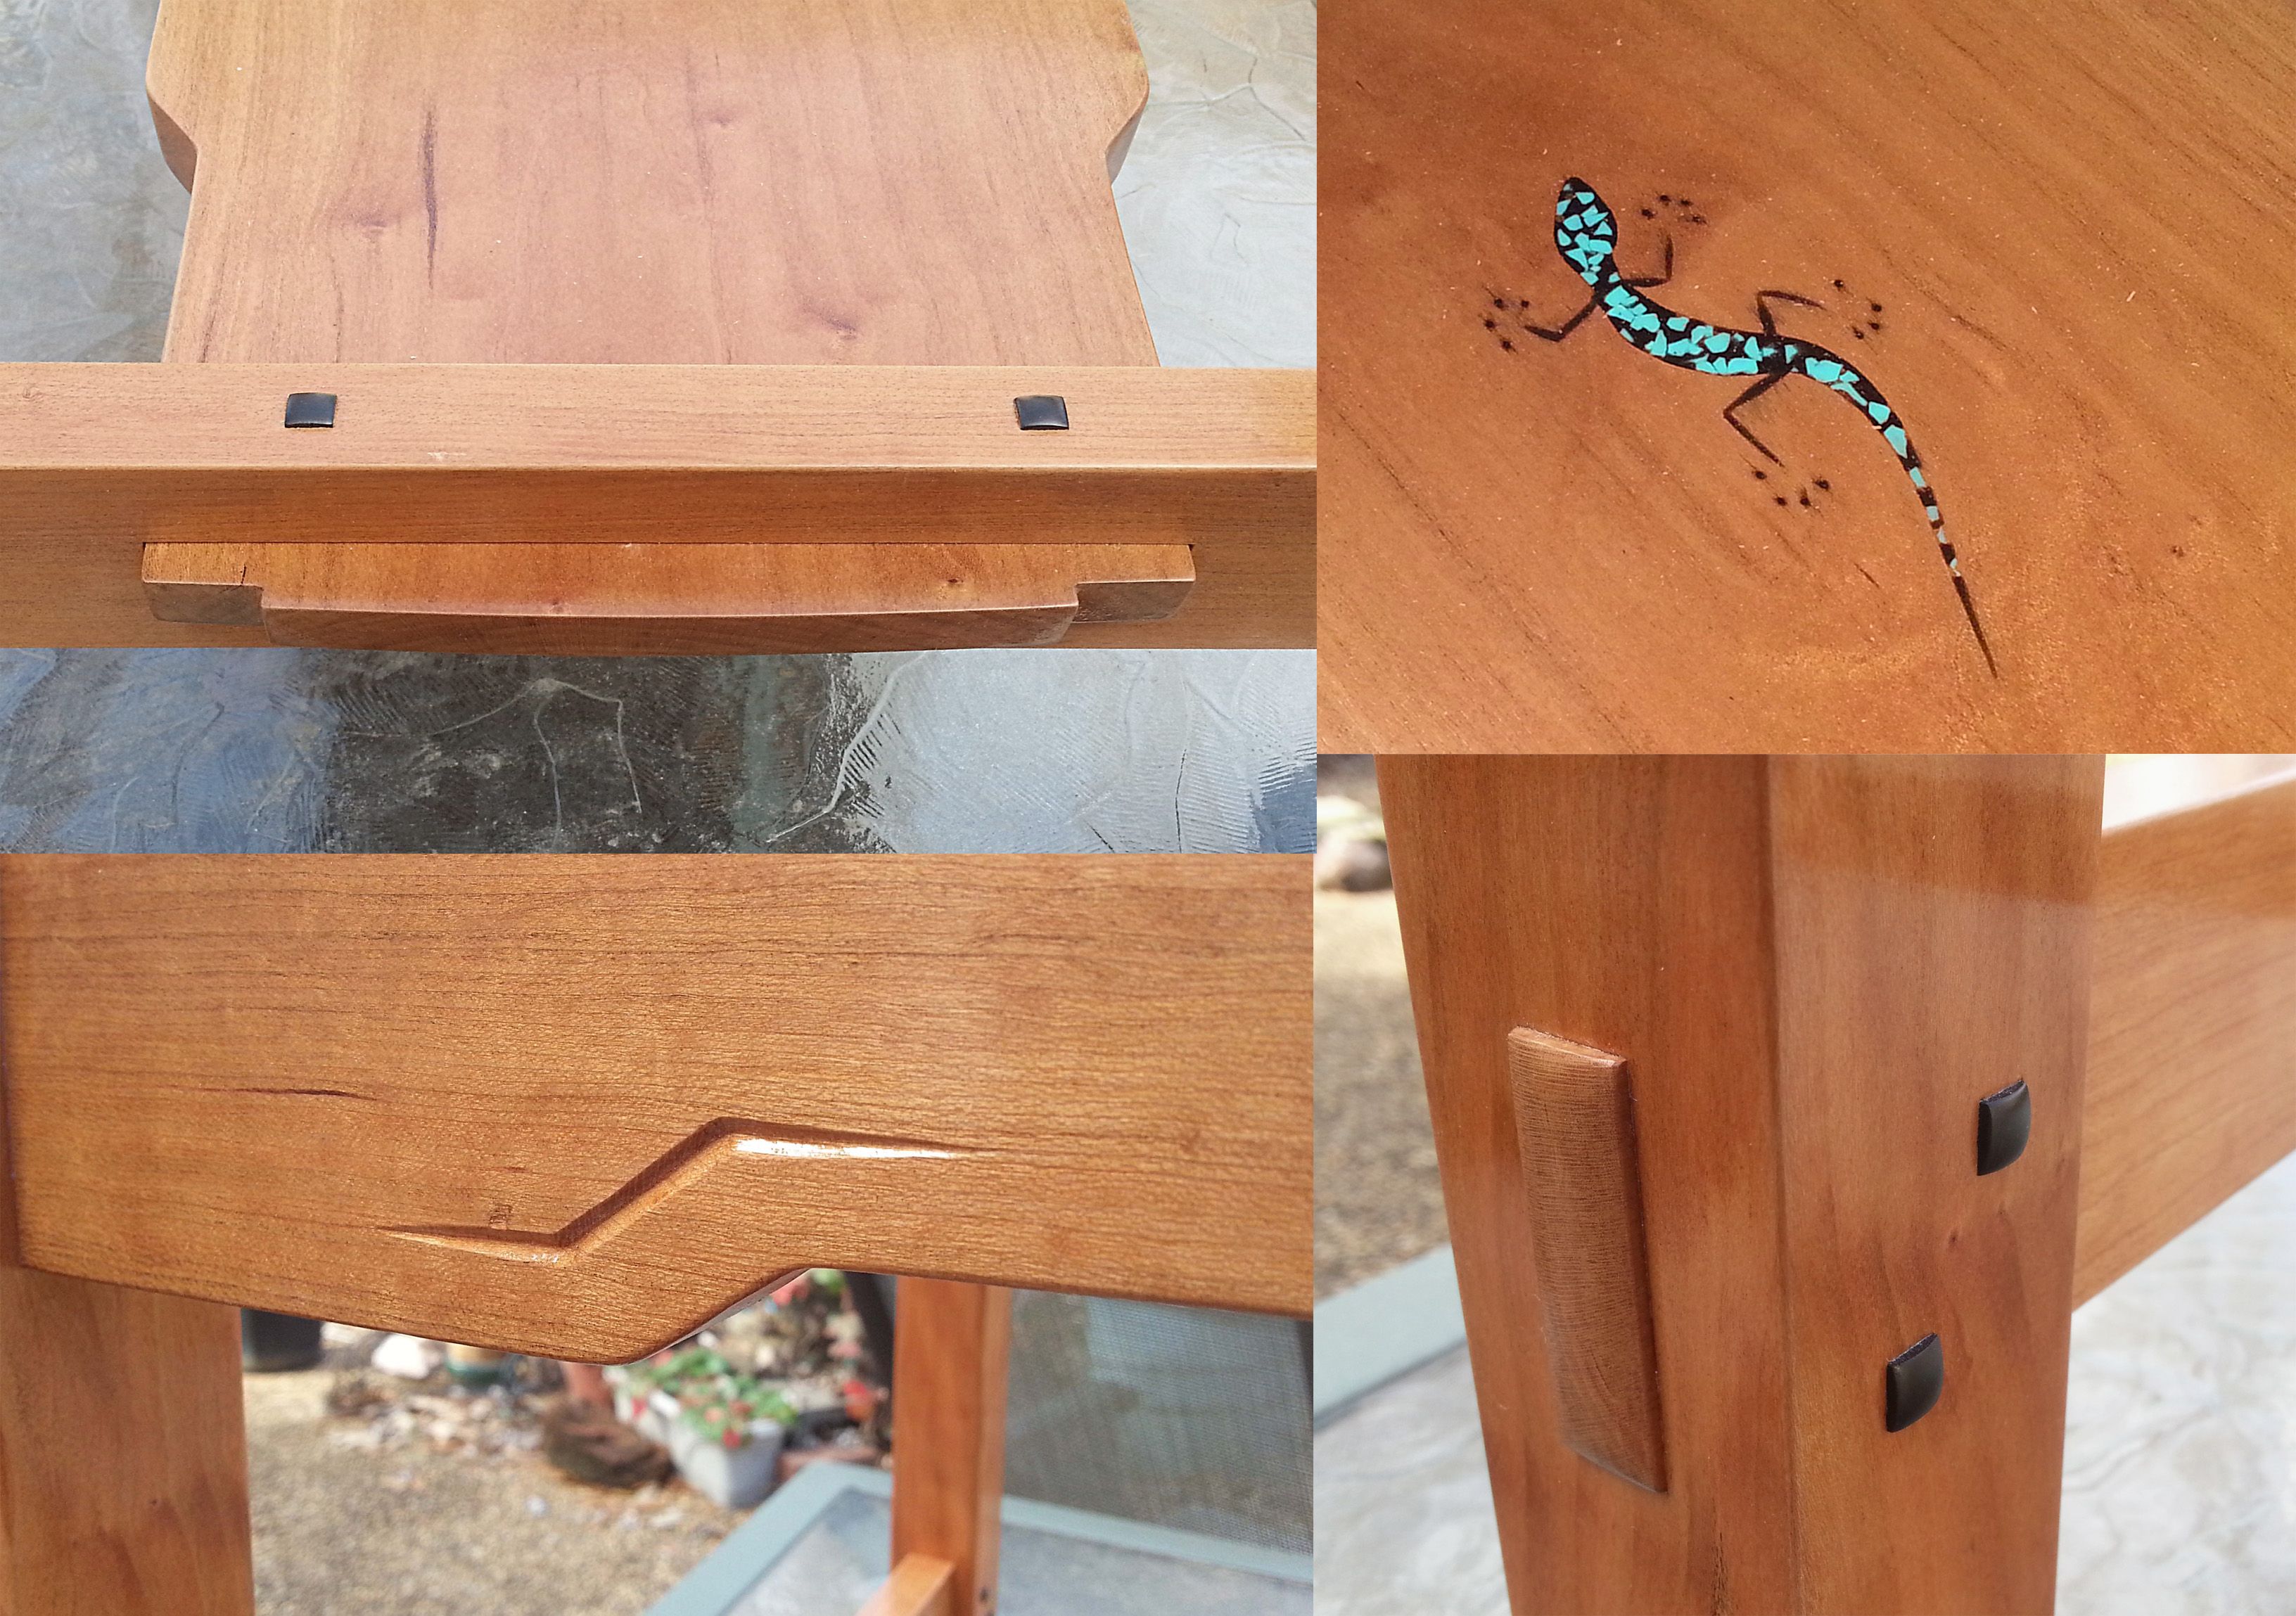
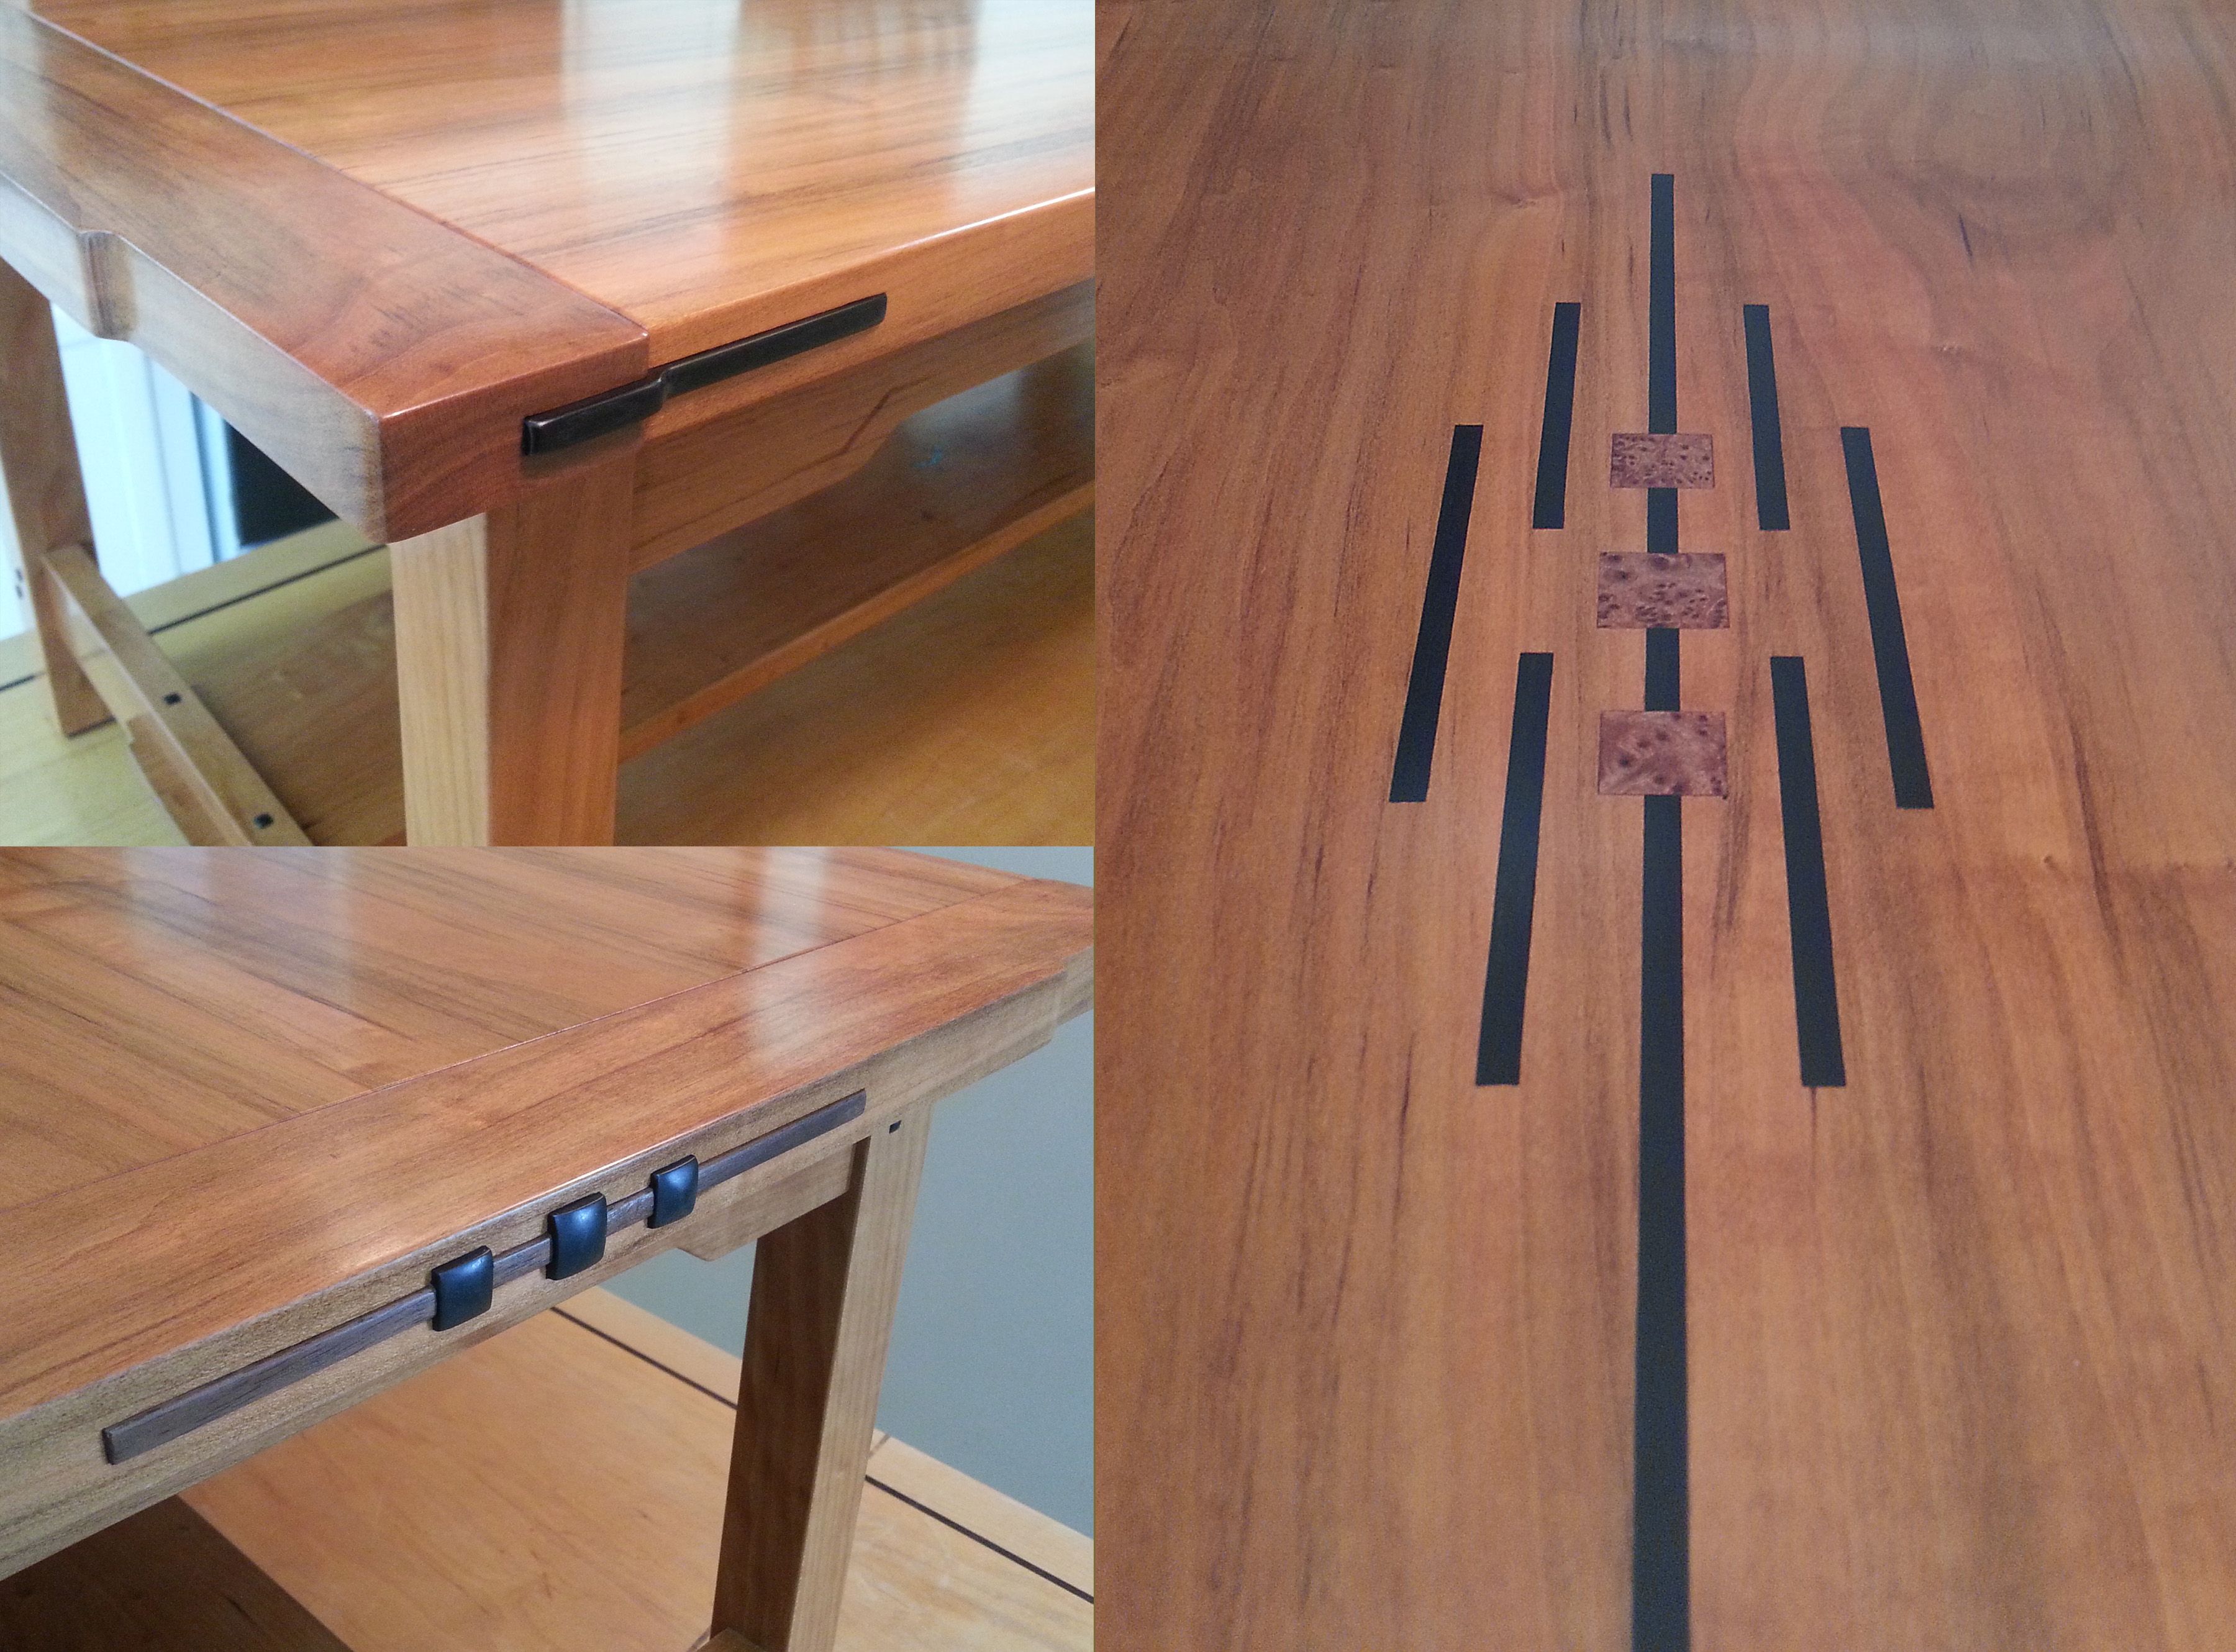
The inlay in the middle of the top is composed of ebony and redwood burl. Its features were inspired not only by the Greene brothers, but also by several of the talented craftsman who imitate the style and publish their works on the internet. Located in the middle of the center stretcher, out of the way and hard to notice, is an inlayed lizard. I sign all the work I’m proud of with a lizard and the nicer the piece, the nicer the lizard.
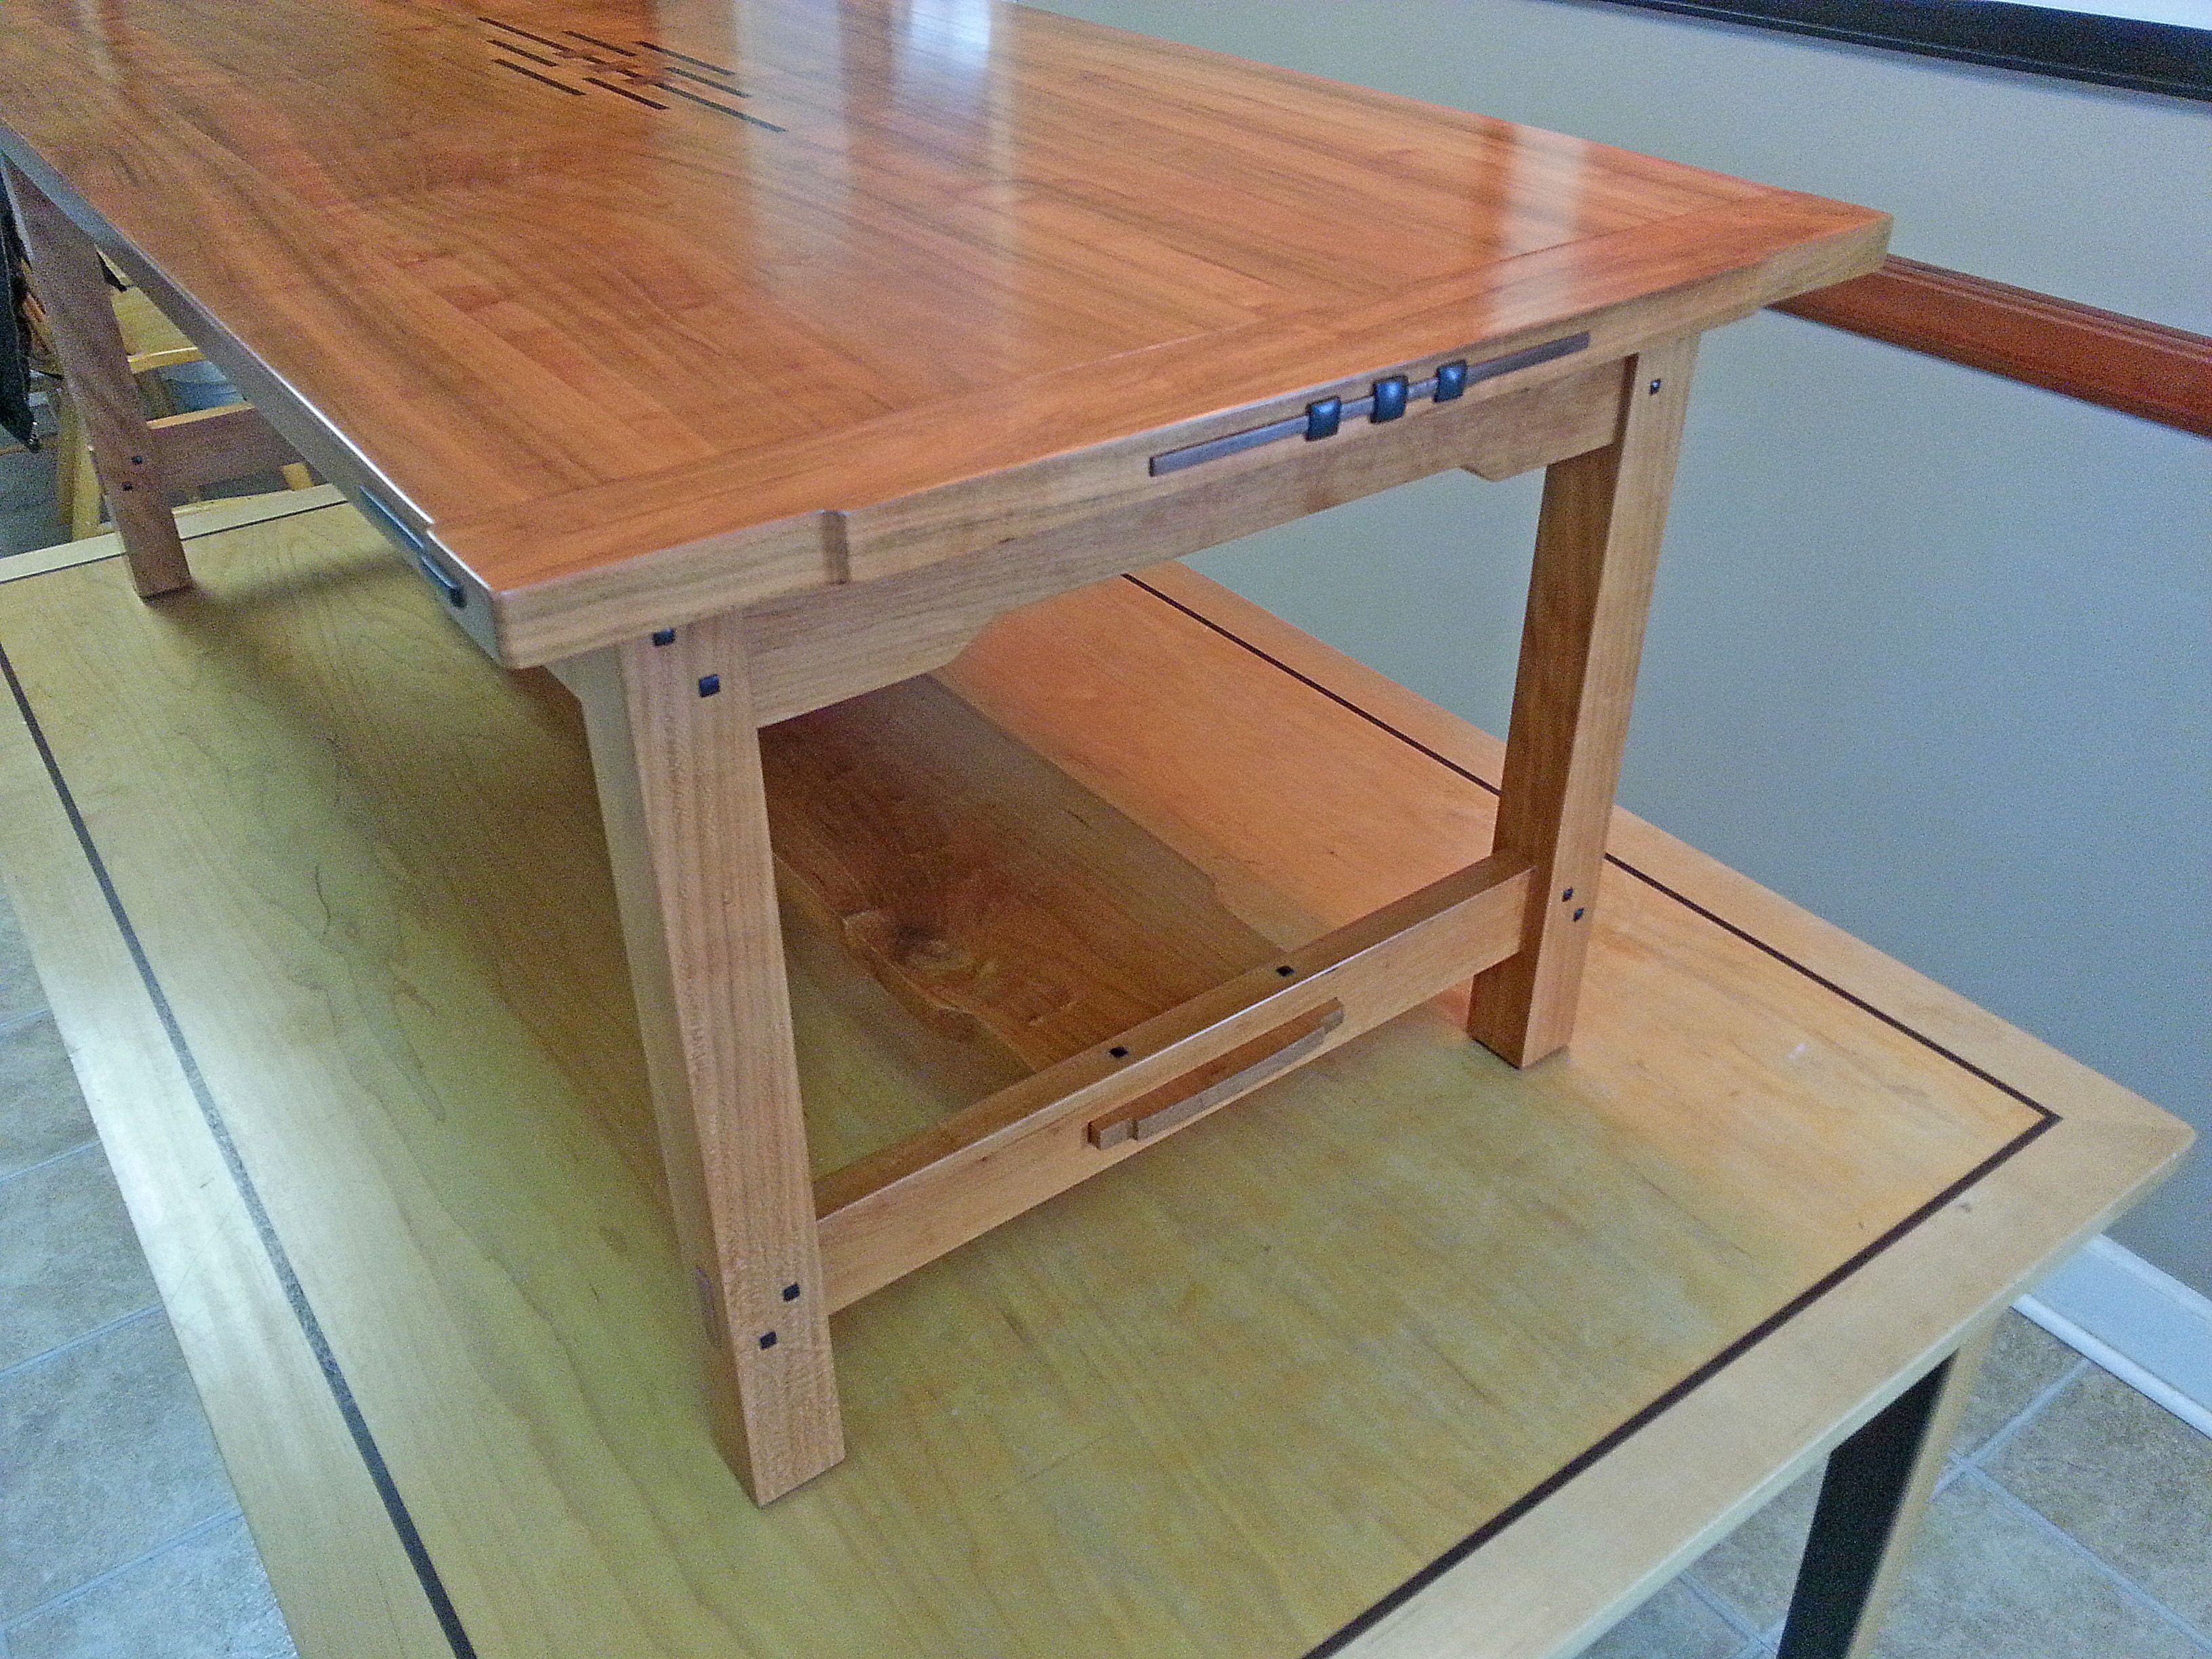
Joinery is primarily mortise and tenon, including the breadboard ends. The center square peg on the table ends hides the screwhead that holds the sprung breadboard end to the main section. They are then pinned from the underside at 4 places each. I also cut a small reveal where the top meets the end. On my other pieces that have the end flush, I have noticed some small amount of seasonal vertical movement. The Greenes (or Halls) raised this piece a bit presumably to compensate for this in an artistic way. I wanted it flush, so I just sanded in a small reveal.
The center stretcher terminates in a through tenon, while the shorter end stretchers have false through tenons. The table top is made from lumber from the same tree. Since I’m short of clear pieces from this tree, the center section (18″ wide) of the top is a shop sawn veneer, about 1/8″ thick with a lumber (cherry) core arranged in a reverse slip match. The outer edges are solid. The grooves for the ebony part of the inlay were made using a 1/4″ mdf template carefully cut on a router table. A plunge router with a spiral bit was then used to cut the grooves. I chisel was then used to square the ends. After the ebony was inset with epoxy and routed flush, the squares were marked and rough routed with a trim router. The edges were then cleaned up with a chisel. A stabilized redwood burl bottle stopper blank (Woodcraft) provided the material for the center squares. All inlay materials were trimmed close to flush with a trim router and a new sharp 3/8″ straight bit.
The table top end detail is walnut and ebony. The walnut is a good color match for the redwood burl. All of the square holes were cut with a very sharp hollow chisel mortiser bit and a mallet or the press itself, using a drill bit to remove most of the waste. The drilling is a separate operation due to the HCM’s tendency to kiss the sides of the square hole with the drill bit.
The lizard inlay is simply a lizard shaped cavity, shellacked with a seal coat, inlace turquoise nodules super-glued in place, and filled with a black dyed 30 min epoxy. It was flush trimmed just like the main top inlay. I used 1-2 drops on India ink to dye the epoxy, but since the ink does not “mix” well with the epoxy, it tends to bleed a bit. A better solution would be a powdered dye, but powdered colorants, particularly sanding dust, tend to introduce more air into the mix requiring back filling, so its not a perfect solution.
After sealing any endgrain with Zinsser sealcoat, the finish is 1 coat of Minwax antique oil, and 3 coats of Minwax wipe on gloss poly, followed by a 600 grit/0000 steel wool scuff and Johnson’s paste wax. Most pieces were finished before assembly to make it easier to scuff into the corners, but wax was done afterwards. A cheap paint brush with its bristles cut short makes it easy to dig the wax out of the corners and around the pegs.
Additional images can be viewed here.


Comments
I bond Ezee
Log in or create an account to post a comment.
Sign up Log in