Wooden Floor Sanding – Must Know Facts

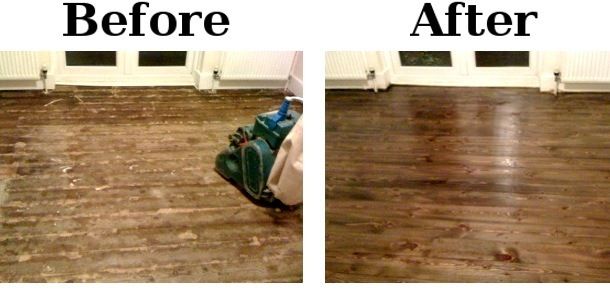
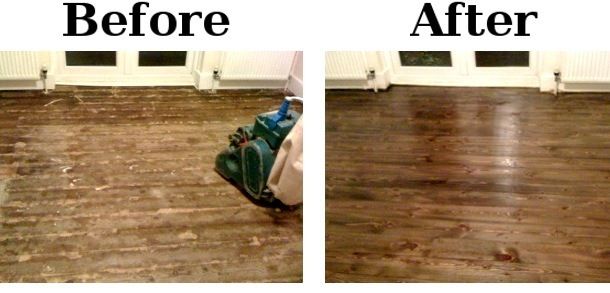
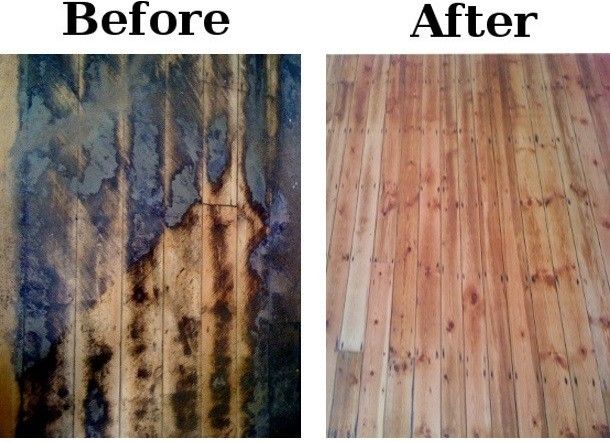
Before and After Photos - The best way to appriciate floor sanding
Floor sanding is a way to give your old wooden floor a new life. This is a process of removing the top surface of the wooden floor by sanding with abrasive materials. Those materials can vary.
First, it’s good to be mentioned that this technique isn’t suitable for all kinds of floors. Some of them are specially design for sanding. There are a lot of myths about floor sanding and DIY projects written about that.
The truth is that, it is preferable to book floor sanding services because these projects are not easy at all. All the general information, you need to know about this procedure you can read in this article, but keep in mind this is a job for professionals.
Floor sanding is a process with three stages: preparation, sanding and coating with a protective layer. Each stage is important by its own, because if one of them is not done properly it can ruin your floor. Usually floors which are suitable for this are between 7 and 10 year old, but of course it depends on how you treat the floor too. You can do floor sanding every ten years, but that depends on how many layers is your wood floor made of too.
Some of them also may need a major or minor repairs. The repairs may include: removing or replacement of damaged boards, fixing any loose floorboards, removing old tracks and rusted nails, protruding nails are hammered flat etc..The floor need to be whole and flat. The room need to be prepared too. It needs to be “naked”, removing carpets, electronics, furniture etc. Then you will need to inspect that every detail of the first mentioned have been done properly. Now the actual floor sanding can begin.
The second step of the floor sanding include removing the old layer of sealants and its paint. This is done by have machines. If you decide to do this by your own, you will need belt sander, edge sander, finishing sanders, dust extractor, random orbitals and detail sanders. The good brand machines like this are expensive, that’s why I mentioned floor sanding companies are sometime more inexpensive.
Also must know fact is that you will need to wear a suitable respirator mask and suit. When the upper lair of your wooden floor is being removed, sometimes you may see unpleasant surprise underneath – worms eaten cores. This problem can affect floor appearance and its value. Also, if the situation is really bad you may need to replace the whole floor.
This stage is optional. Staining is another name for painting. If you want to change the colour of your wood, the moment after sanding and before polishing is the time. Of course, a special paint needs to be used. Sometimes you will need to put some more layers of the paint to get the wanted colour.
The last stage from sanding your wooden floor is sealing. This need to be done to protect your floor from harming. You can use natural oil or hard wax oil. It’s protecting it from stains, weather conditions, furniture, and human harming. If you are going to hire a professional sander company, you need to tell them how is the room going to be use. If you are planning to have a lot of dance parties there, they will need to put some more layers of the sealant lacquer.
Some other stuff that you have to think about are:
- What would be the cost if I do it by myself?
- Check for some local professional floor sanding companies
- You may need to do some mathematic calculations and see how much would be the cost per square metre?
- Read a lot before you begin!
Floor sanding is a way to bring life to your old floors. It’s cheaper than changing the whole floor and much easier. Don’t underestimate the process. It isn’t an easy DIY project. Needs a lot of calculations and techniques to learn before you can do it perfectly. The best choice is a fully trained floor sanding services.


Log in or create an account to post a comment.
Sign up Log in