Track saw rails and jigs
Straight edge and router, cutting the groove for the ridge piece. I stopped the process in the middle of the second pass, so you can see the groove being sized to fit the melamine faced chipboard.If you know the difference in the width between your ridge piece and your cutter, you can set the straight edge with a shim piece between it and the router, then the second cut is made without the shim.
Of course, if you have a woodworking chum who has a dado set in his table saw, you could do it that way as well.
First things first.
1. I am an engineer for DeWalt and I work in the factory that makes our track saws. So, I have only used our track saws for both the jigs I’ll show, and the work I do. I am biased 🙂 I also might get in trouble sharing some of this, due to various clauses in my employment contract.
2. I have a very small workshop, 6sqm, so I don’t have room for a tablesaw. I am biased 🙂
If either of these trouble you, don’t read any further. I have tried to avoid being discriminatory as much as possible, but I am just as enthusiastic about the tools we make as I am about the projects we make with them.
I just finished reading the track saw review, and watching the video of the track saw cross cut table. I thought I would show some of the jigs I have created over the years I have been using the tool. I consider the track saw to be one of those tools that is extremely useful for beginners, and for people with small shops or small budgets.
First thing I’ll say is that the accessory rails and accessory attachments that are for sale with track saws from any manufacturer are not fundamentally bad. They are however expensive. That is why a lot of my jigs are built using homemade tracks.
As well as the cost and versatility advantage, homemade tracks are easier to mount edge guides to for ninety degree cutting, angled cutting (drill a countersink pilot hole through the ridge, screw an edge guide on, set the angle, fire a couple of brads through the track), and you can use screws or brads for positioning with far more impunity.
The track is very simple to make. First you need to measure the width of the groove on the bottom of your saw. Some saws will come with some form of adjustment mechanism for truing the saw to the rail. Use this to your advantage.
Take some 6-8 mm plywood that is flat, use a router and a straight edge (This straightness is probably the most critical part of this exercise) to cut a groove of a reasonable length for how you intend to use the rail (Short rail lengths if you want to make cross cutting jigs to use the track saw as a mitre saw, longer lengths if you want to use the saw for rip applications). The width needs to be conveniently close to the width of the groove in the base of your saw. If you box clever, you should also be able to find some man made material such as melamine faced chipboard to use as the ridge on the rail (which is why you should understand the range of any truing adjusters), and then make the groove in the plywood to accept this as well. (This is just one way to do this, you could equally as well use a hardwood, or a plywood piece, and you could cut it higher than need be and then reduce the height with a router on a ski jig.)
Glue the ridge part in to the groove you just routed and let the glue set. Put the track saw on the ridge, adjust the truing adjusters as necessary, so that the saw moves along the rail freely, and has no twisty play in it. Now, pull the saw to one end of your ridge, plunge, and cut as far as the other end of the ridge (remember to do this with the track on top of a piece of scrap material!). Turn the saw 180 degrees, and cut back. Then you can handsaw or jigsaw the rail free. Sand the running surfaces, wax them, put some duct tape, or similar on the underside to reduce slip, and there you are.
-
Straight edge and router, cutting the groove for the ridge piece. I stopped the process in the middle of the second pass, so you can see the groove being sized to fit the melamine faced chipboard.If you know the difference in the width between your ridge piece and your cutter, you can set the straight edge with a shim piece between it and the router, then the second cut is made without the shim.
Of course, if you have a woodworking chum who has a dado set in his table saw, you could do it that way as well.
-
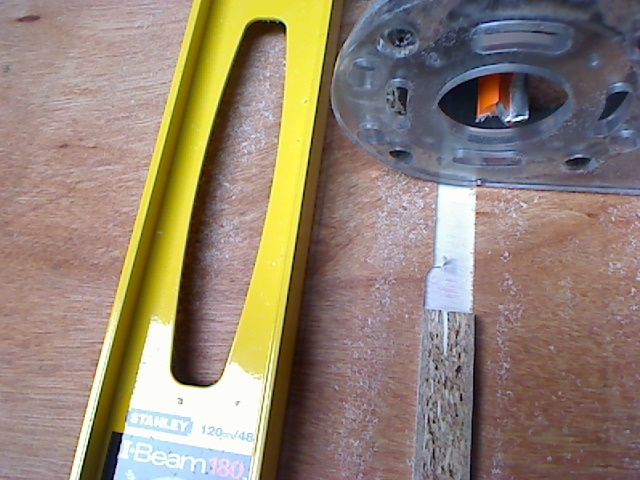
This is how mine look when I have cut them away from the plywood.
The fact that this saw has two grooves on the base makes it possible to cut a rail where you have two cuts. One, the outer one, registers only the inside kerf, similar to most accessory rails.
The inside one, cut using the saw on the other groove in the base, will be offset from the outside edge, and will show both edges of the kerf. Use a forstner bit or something similar to cut some viewing holes to line up cut marks on the workpiece with the rail.
This is most useful if you need to make cuts that take account of the tooth width, but the tooth width is not something easy to measure. Such as cutting a strip of a specific width off of the end of a sheet.
-
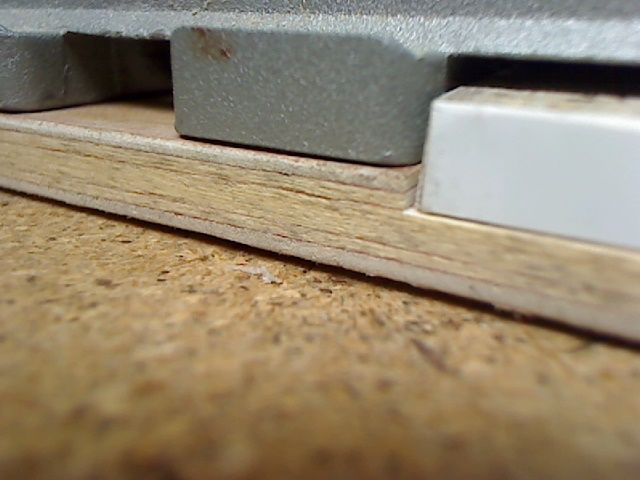
I use this jig to rip cut material that is thinner than the width of the rails. This jig is set at the max depth of cut for the saw, but you could double that if you wanted to cut, flip and cut.
The way this works is that you attach the fence strip, such that the blade is just going to trim the mounting blocks. Make that cut, so that you have a straight and perpendicular edge.
Then if you want to rip 5mm thin pieces from a piece of material, you move the rail 5mm over (a shim between the rail and the fence is a good option here)
Angling the shim also lets you taper table legs etc.
-
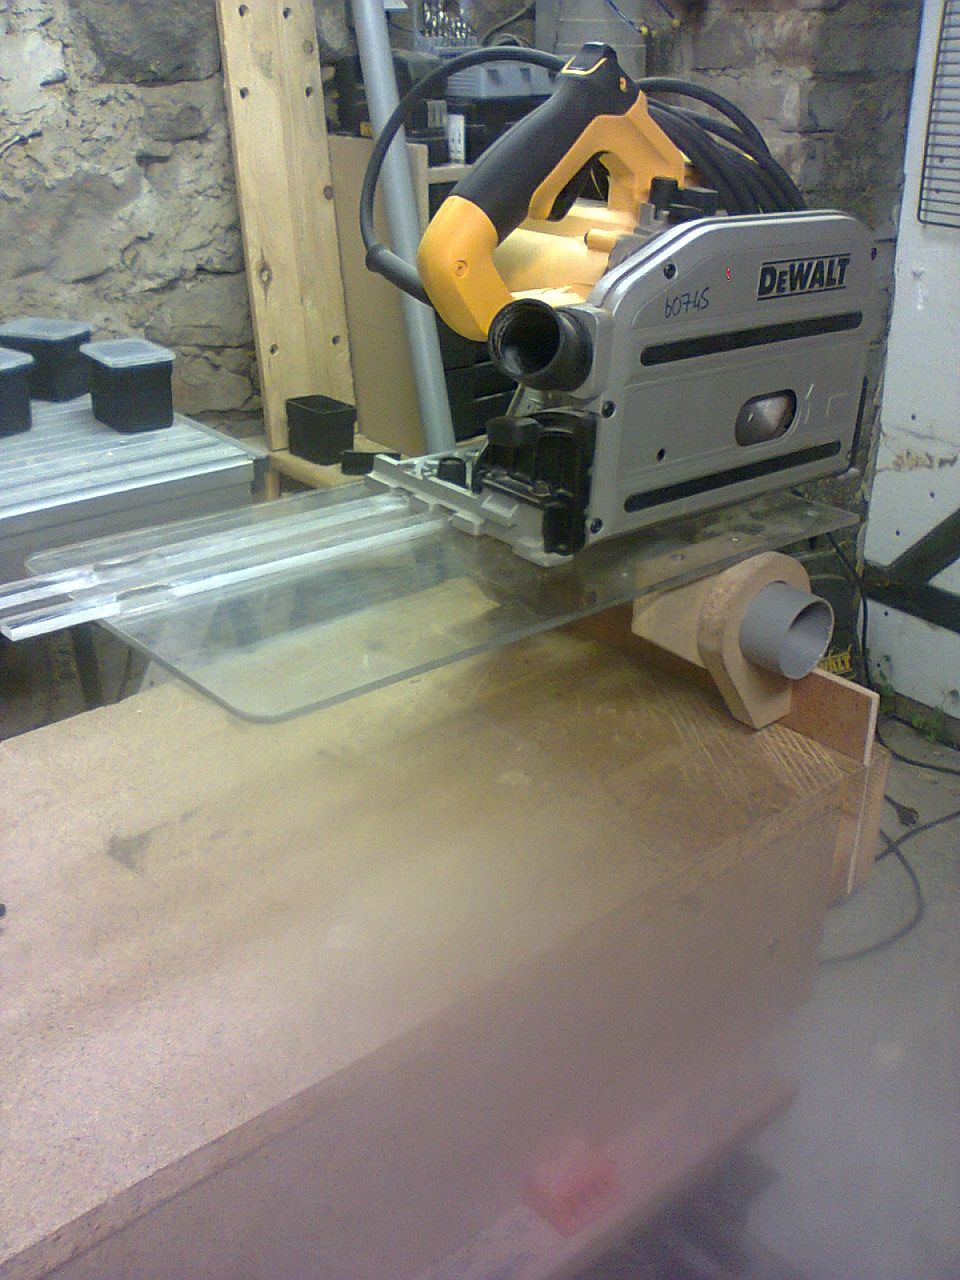
Apologies for the photo quality it was taken a while ago.
I made this jig because I do not have the space for a mitre saw. The jig is made from clear plastic, so that I can see the workpiece, and it hinges up.
If you box clever with guide bushes, you can also route a stopped groove between the two ridge sections, and then you can cut either end of a lap joint, move the workpiece and route out the waste in between. Not as good as a radial arm saw with a dado cutter, but functional enough in my shop.
-
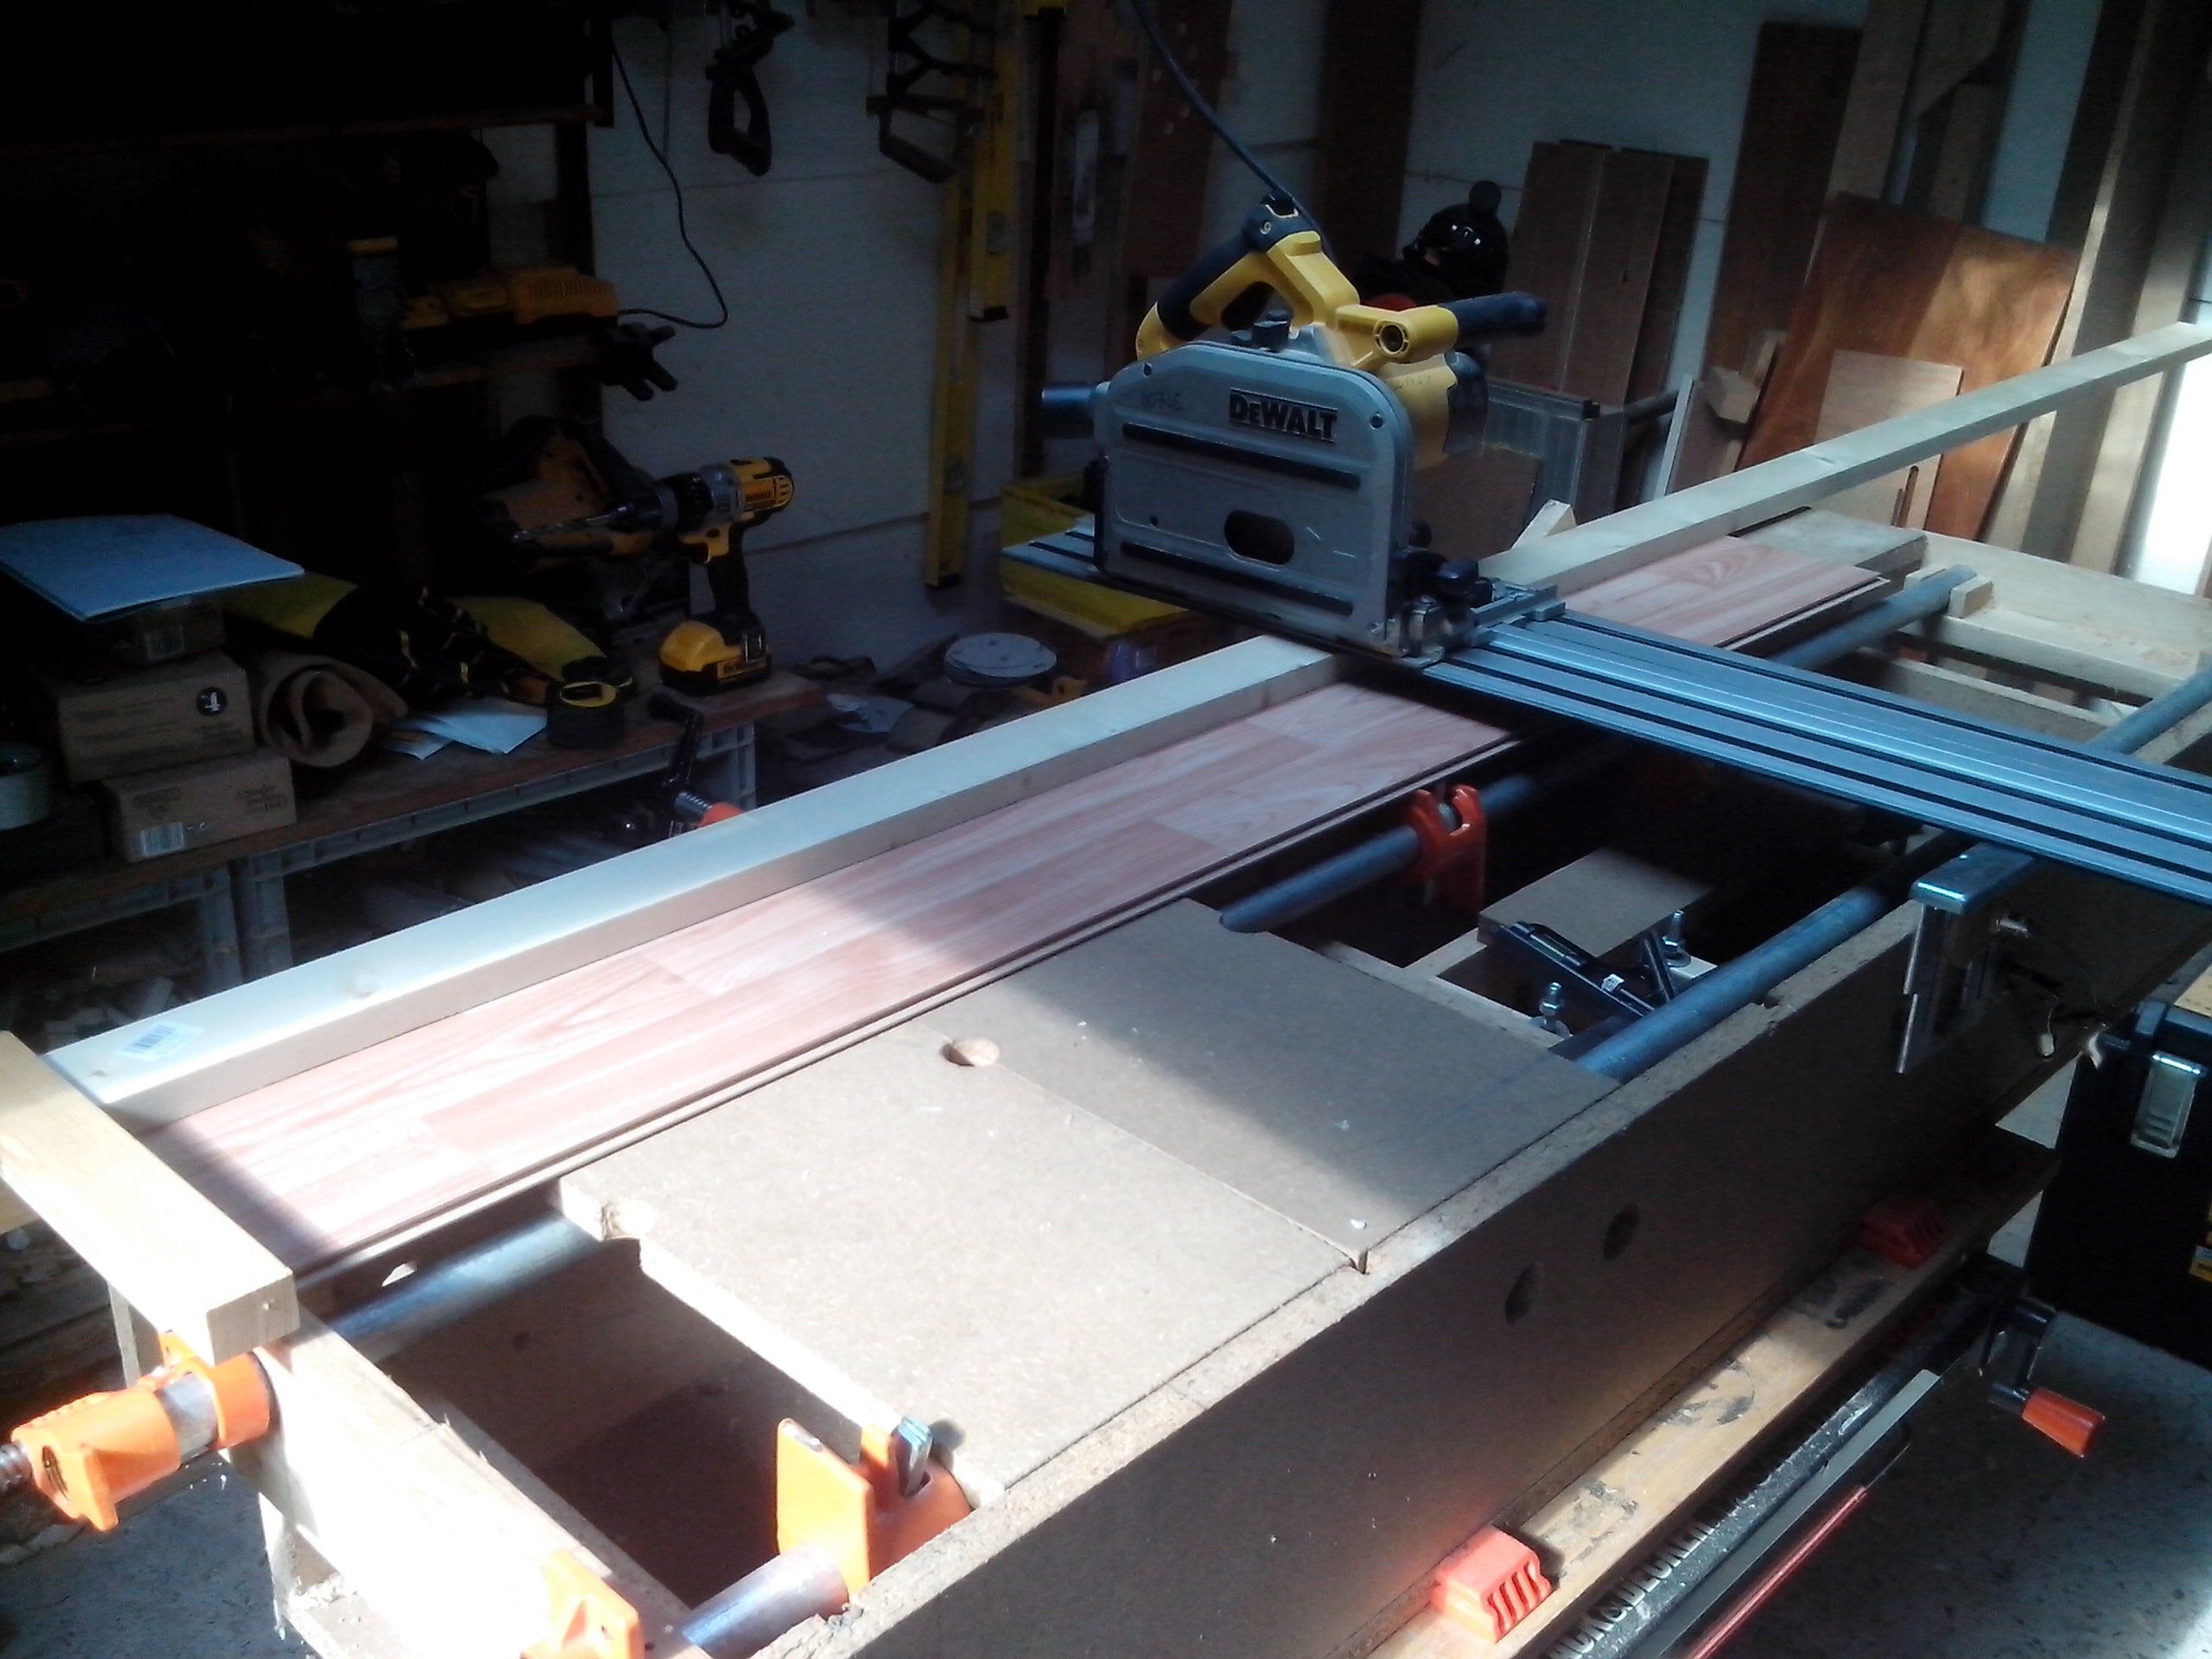
I used this for repeat cross cutting for some tables I built for the kids lego (they had just watched the movie and wanted massive tables to display all their models).
The flooring can be moved along the bench to teh desired length. The rail is held slightly higher than the workpiece by a couple of blocks attached to the base and to my bench. The block near the rest position of the saw has been cut by the passage of the saw, so gives me a very accurate position for both edges of the blade, so that I can cut to whichever side of the line I need.
In this case I used an accessory rail, but a homemade one will do just as well, and in some ways is better because you can screw through the plywood to mount the blocks, and cut the rail to match the usual width of boards you might cut, or to match a particular work bench edge to dog hole combination for example.


Log in or create an account to post a comment.
Sign up Log in