Coffee Table
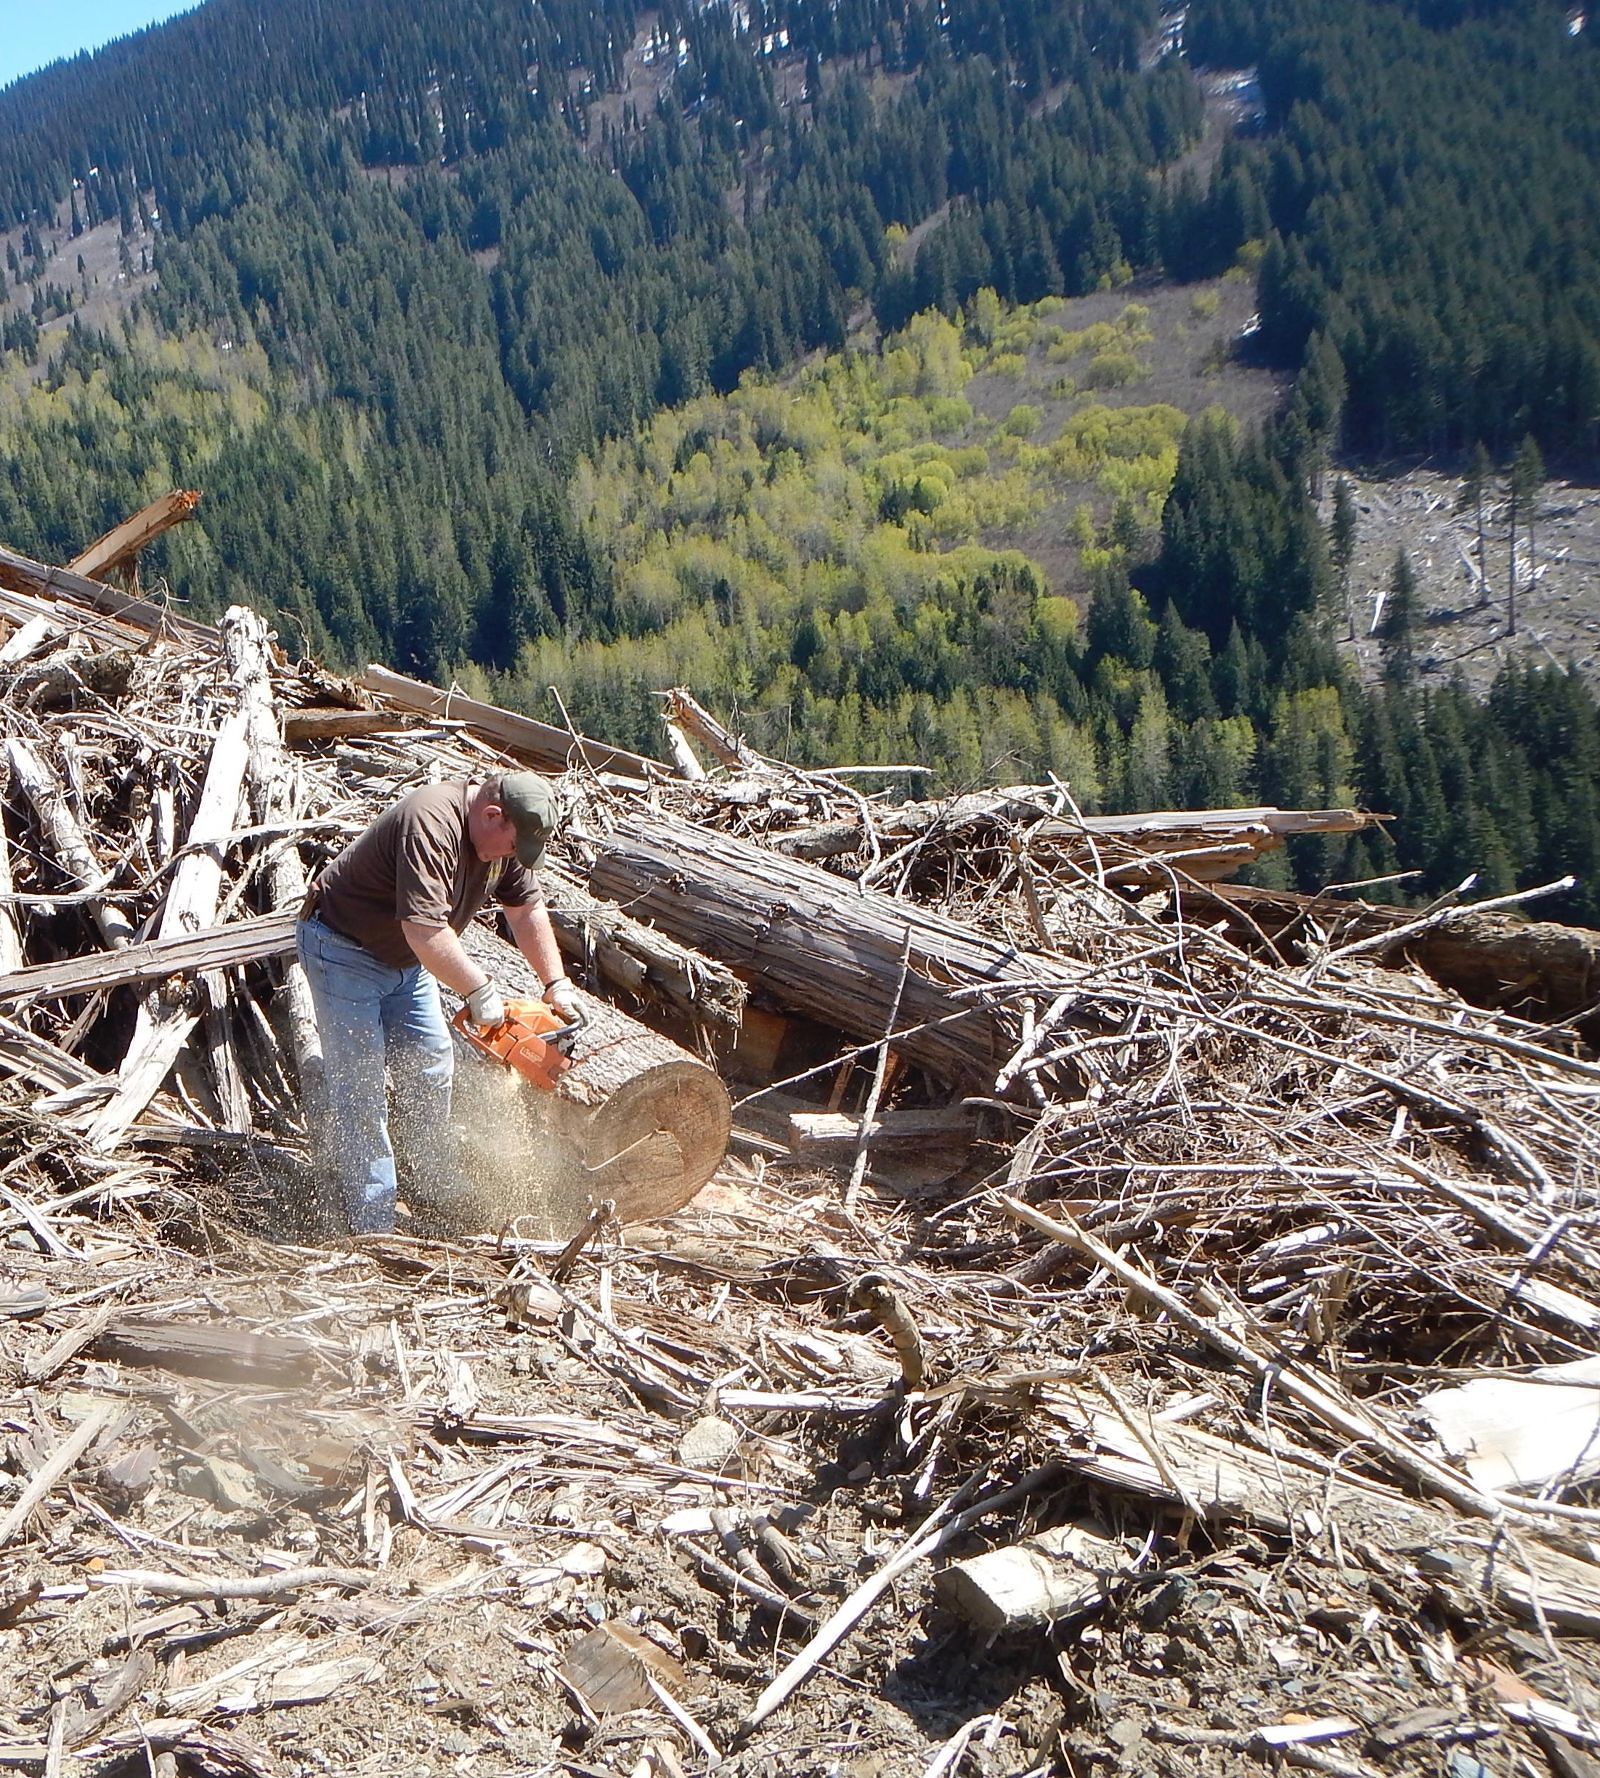
On May 9th, 2015 my wife and I were on our side by side up a local mountain with friends near an old logging show and saw a large log that was in a discard pile and would be eventually burnt to clean up the pile.
My wife remarked that she would like to have a coffee table built out of the log if possible. I happened to have my chainsaw with me at the time and cut off an eight-inch piece of the log, which was 30 inches in diameter. We then loaded the saucer (local term) in the back of our side by side and eventually went home that day.
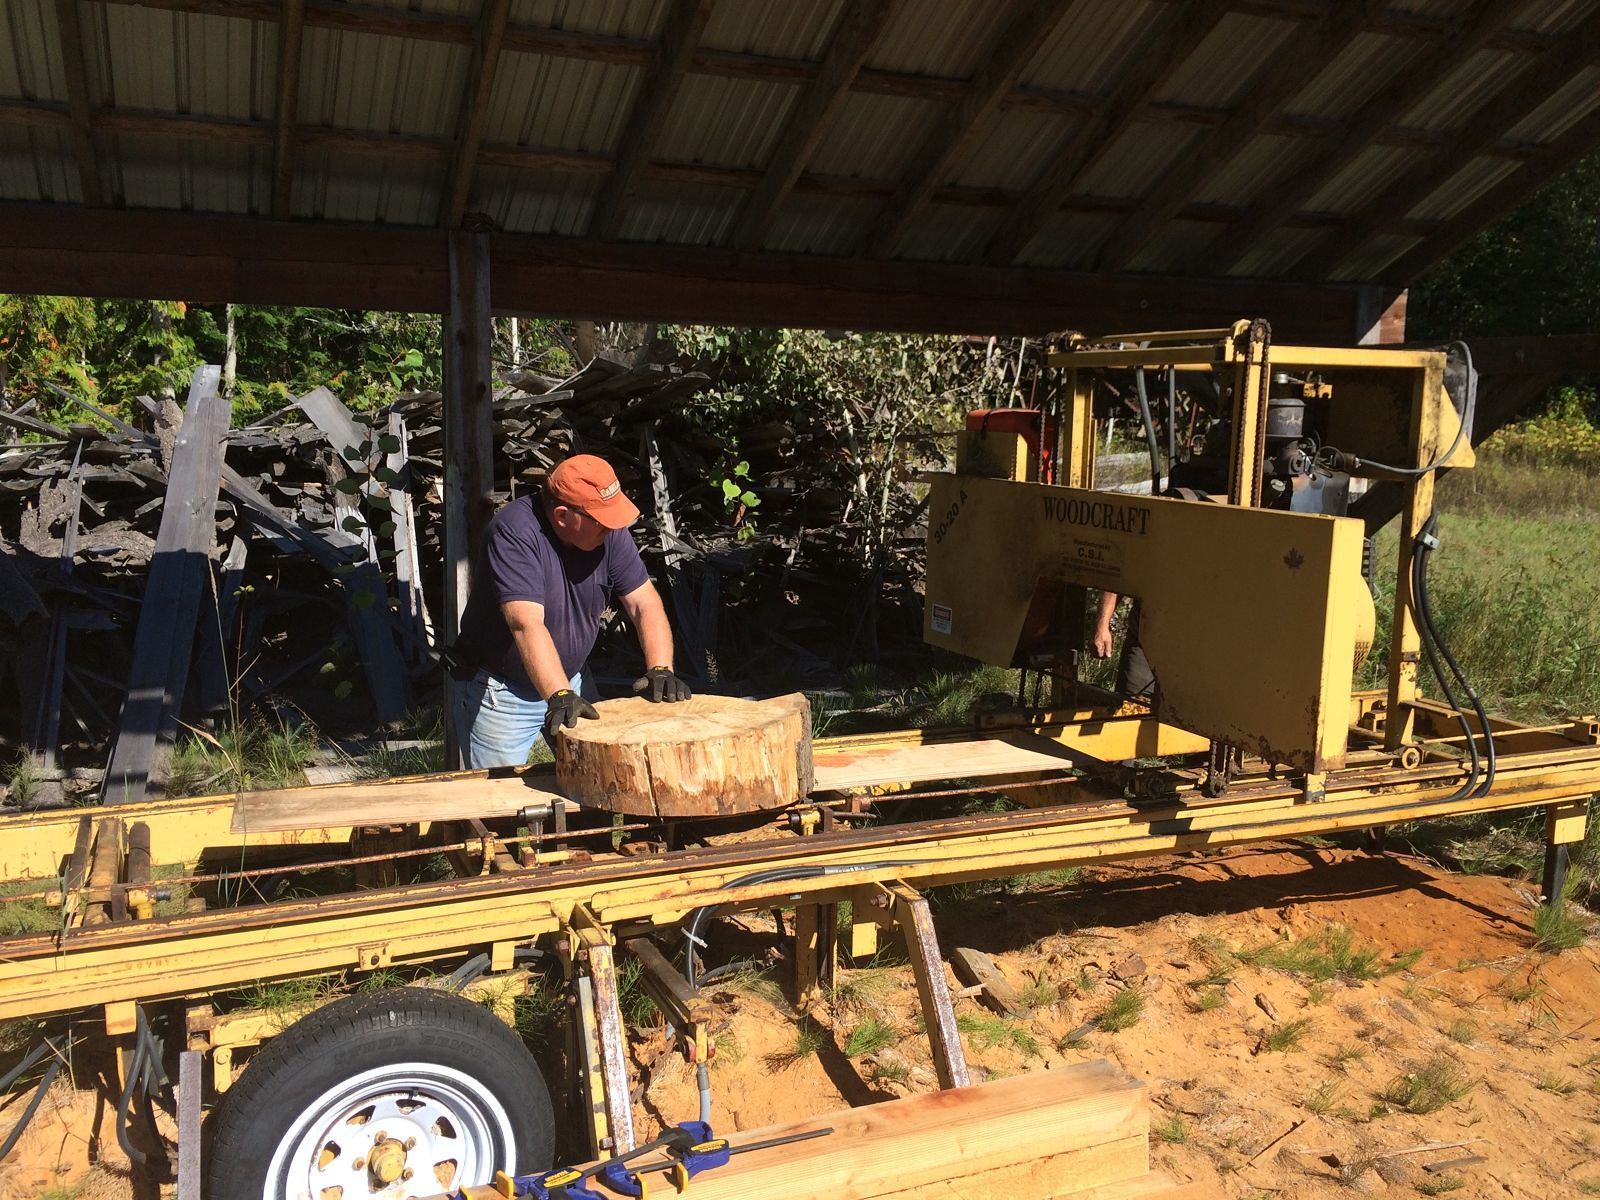
I placed the saucer in my workshop to dry until September 2016 at which time I took it up to my brother-in-laws farm. He has a band saw mill and I screwed it on a piece of ¾ inch plywood in order to hold it on the mill. We sawed the piece close to having parallel sides. I then took it back to my shop and allowed it to dry some more.
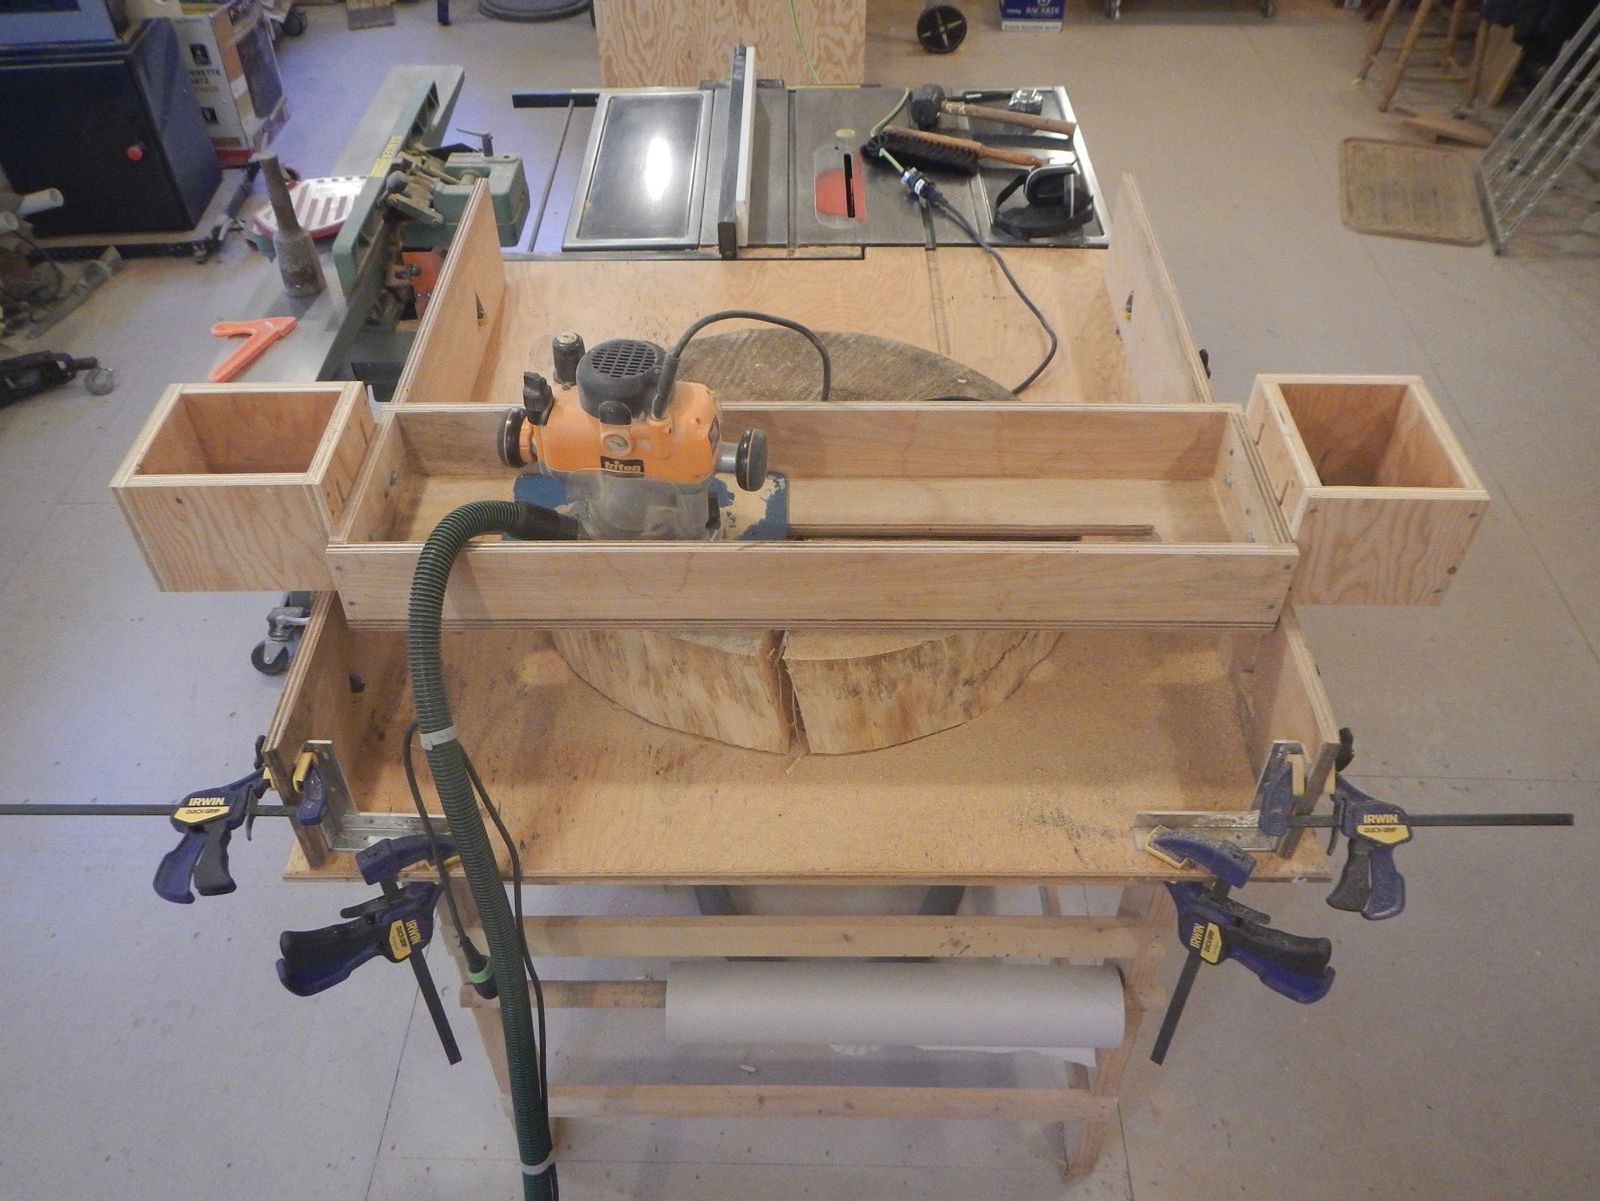
During the drying time I read the article by Nick Offerman in Fine Woodworking #222 regarding “Leveling Big Slabs in no Time Flat. I studied his design for the jig and then adapted it for my specific situation. I made the trough part of my jig very similar to Nick’s but I used ¾ inch plywood for the side rails.
On July 5th, 2017 I started working on the saucer using my Triton 3.25 hp router with a bowl router bit and the jig. I first did a pass on the bottom in order to get it somewhat smooth. I then turned the piece over and started working on the top. I made three passes with the jig and router and then started sanding.
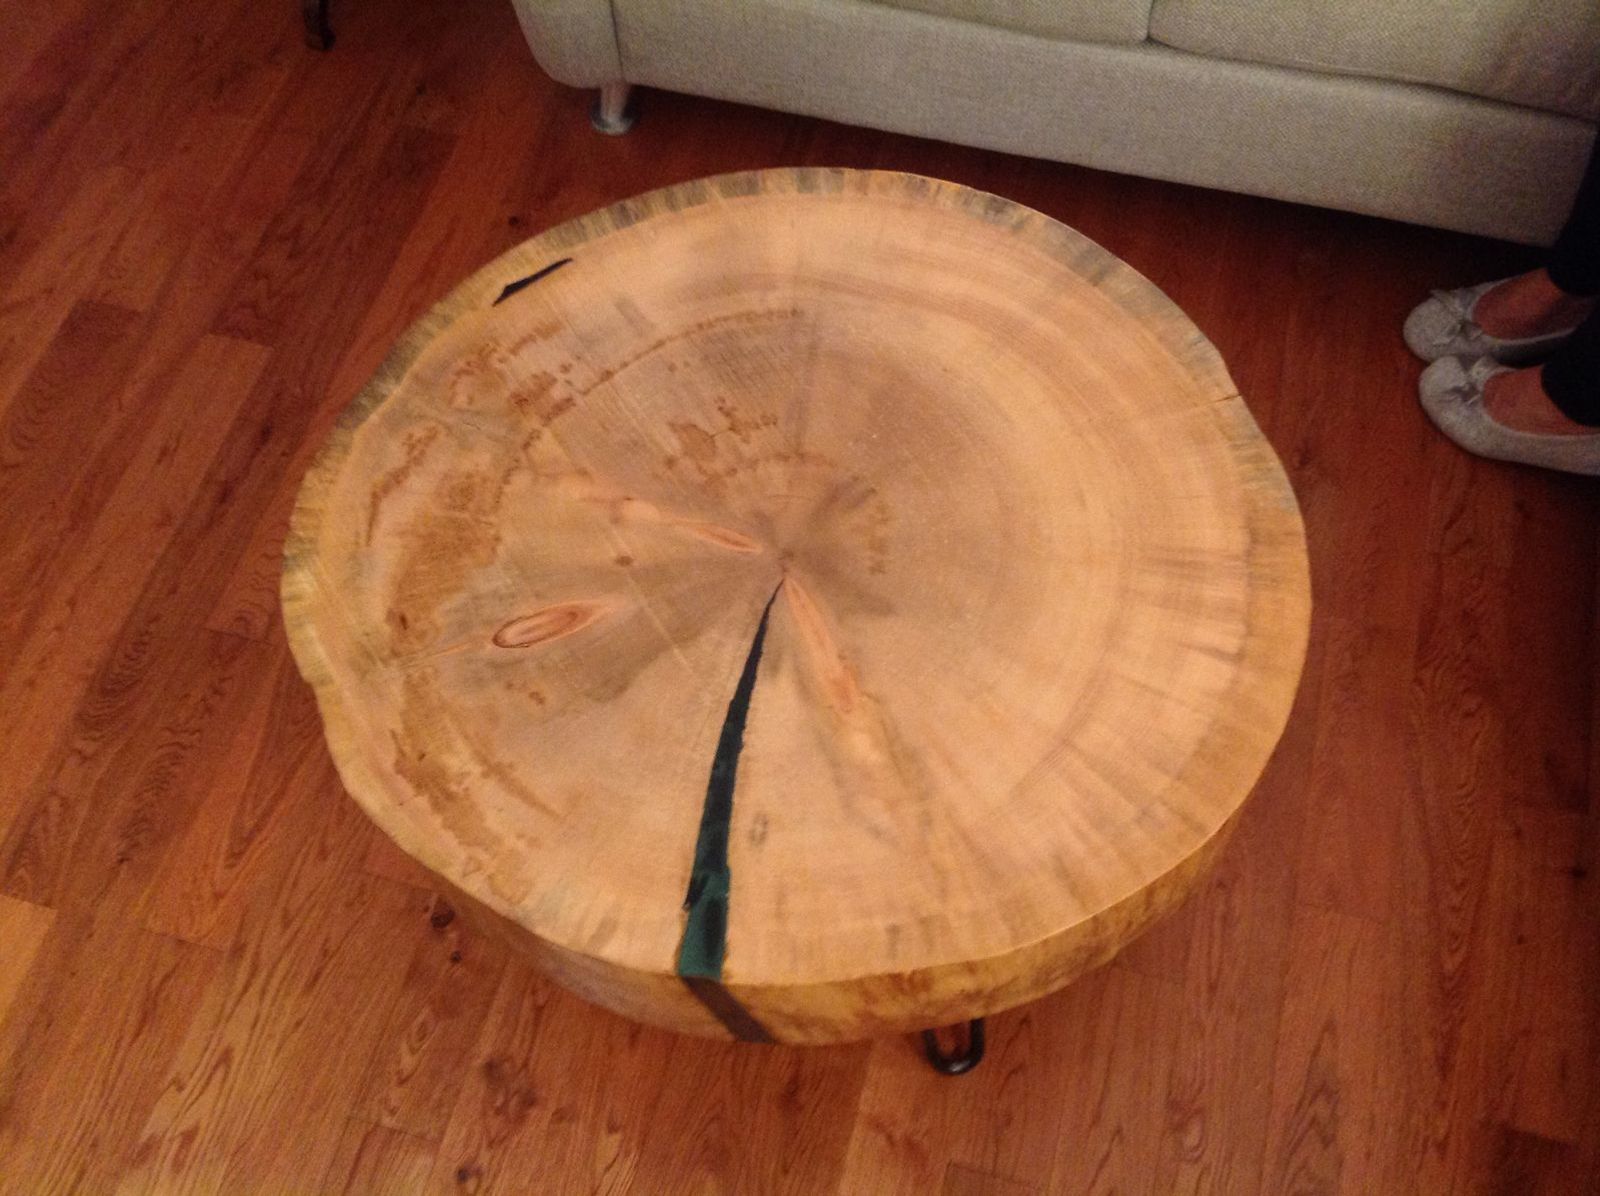
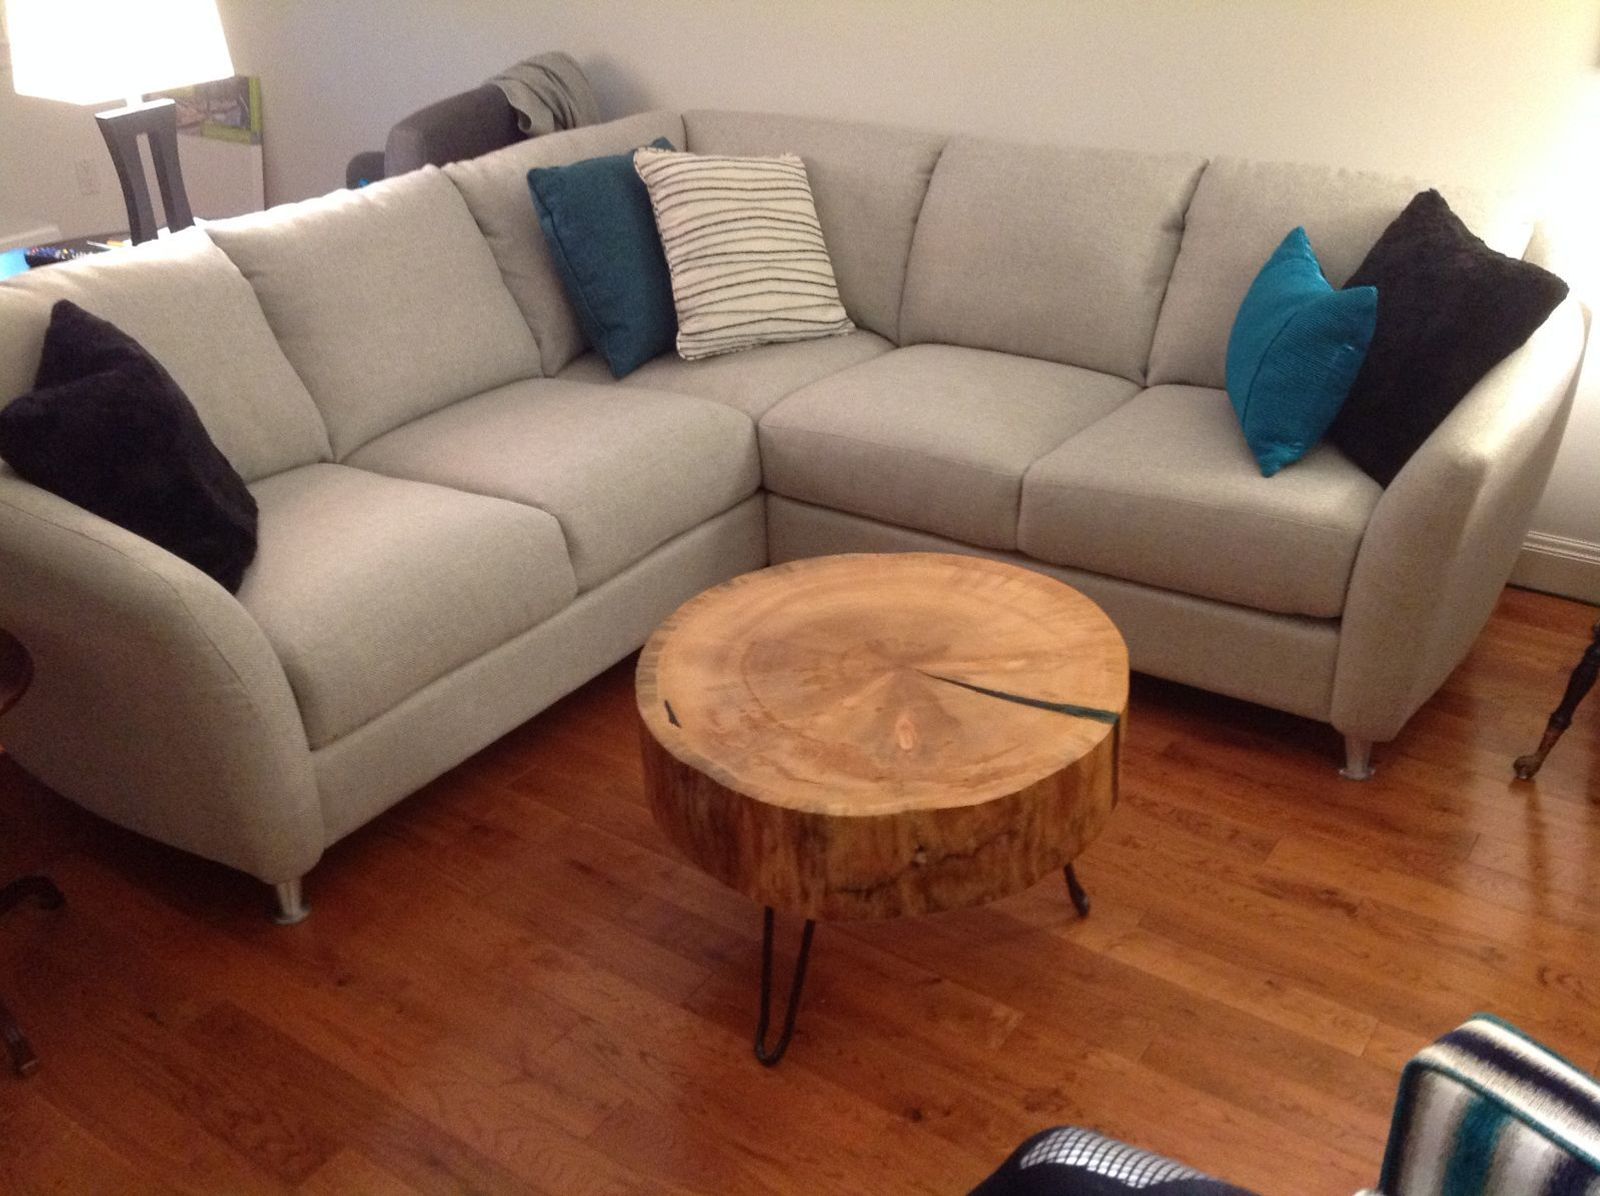
As you can see in the photos the saucer developed a crack or check that was approx. eleven inches long and on the outside one and one half inches wide going down to a point near the center.
After getting advice from one of my local Lumber Stores I purchased a product called G.2 Epoxy Glue, two part epoxy. I taped the bottom and side of the check with wide painters tape and reinforced the side with cardboard held there with a ratchet strap. I then made a series of four separate pours of the epoxy glue with approx. two days drying time between. Also during the mixing I coloured the Epoxy with “Saman” Turquoise a water based wood stain. On the first mixture I realized that a little of the Saman goes a long way on this job. Therefore the first pour was very dark. There was a sap pocket in this saucer as well, which I filled with epoxy.
After I finished with the four pours of Epoxy the Epoxy was a little proud of the surface of the saucer. I placed the saucer back in the jig and made one more pass over the top and everything came out perfect. I then started sanding the top with my Festool sander and went through all the grits that I have. I hand sanded the sides of the saucer and also used the Festool to ease the edges of the top a bit.
When sanding was complete I used Minwax, Oil-Modified, Polyurethane, Clear Semi-Gloss on it. I applied five coats, sanding between each coat.
Now the legs are a different story. I had tried to find legs to go with this table and considered several different types and options. I ended up deciding on hair pin legs and it happened that there is a man a short distance from our house that makes these legs. He is also a woodworker and uses them mostly for his own creations. He did however agree to make me three legs for this table. After doing some research we decided that the coffee table was best to be the same height as the cushions on our couch. Legs were ordered to reach that height.
Therefore on November 22nd, some thirty months after cutting the saucer, we placed the Coffee Table in our Living Room for use. It was a great challenge and I really enjoyed doing the project.
Thank you.
Ray O’Donnell
2399 Hillen Crescent
Magna Bay, British Columbia
V0E-1M7
250-955-6241
email: [email protected]


Comments
Very nicely done! Never leave home without a chainsaw.
Log in or create an account to post a comment.
Sign up Log in