My new bench.
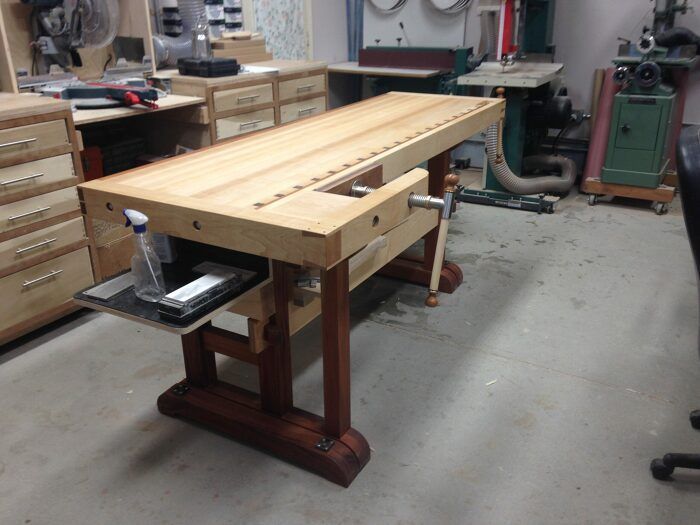
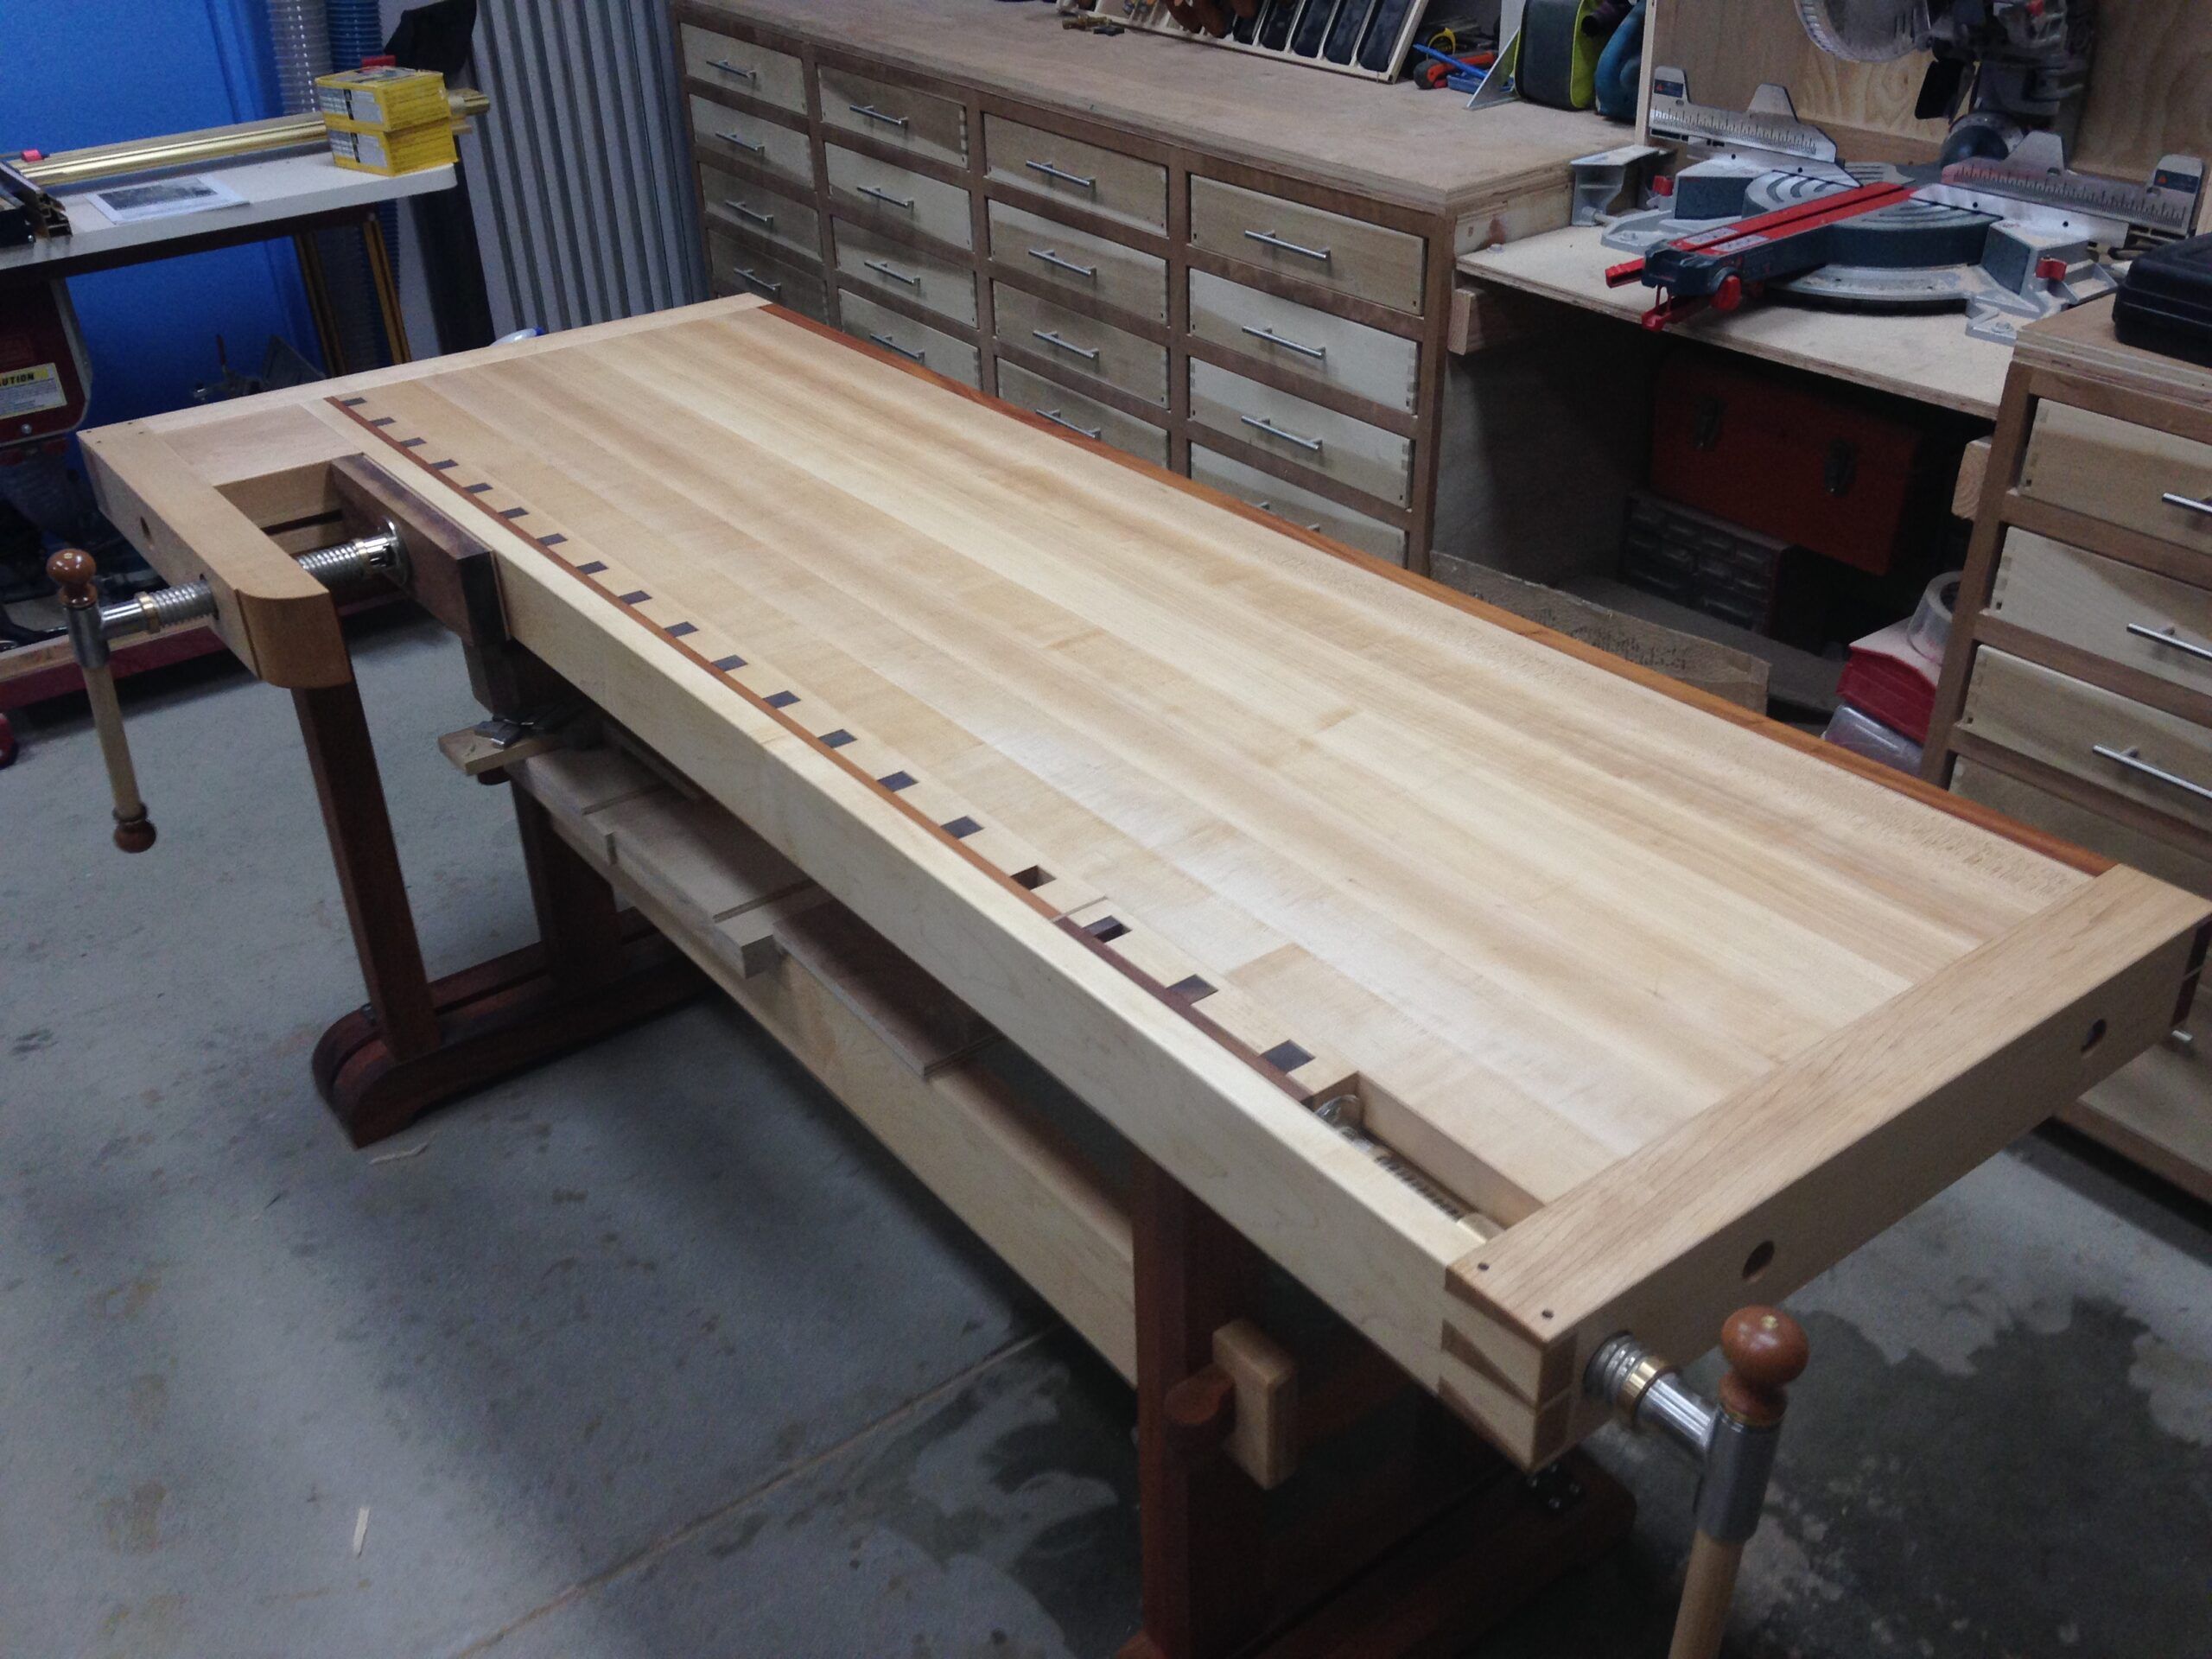
A long time in the making (on and off for ~1.5 years), but it’s finally built and I couldn’t be more happy with it. I am a Rob Cosman disciple and when I saw him use and build a traditional Scandinavian joiners bench a few years back, I immediately fell in love and knew I had to build one of my own.
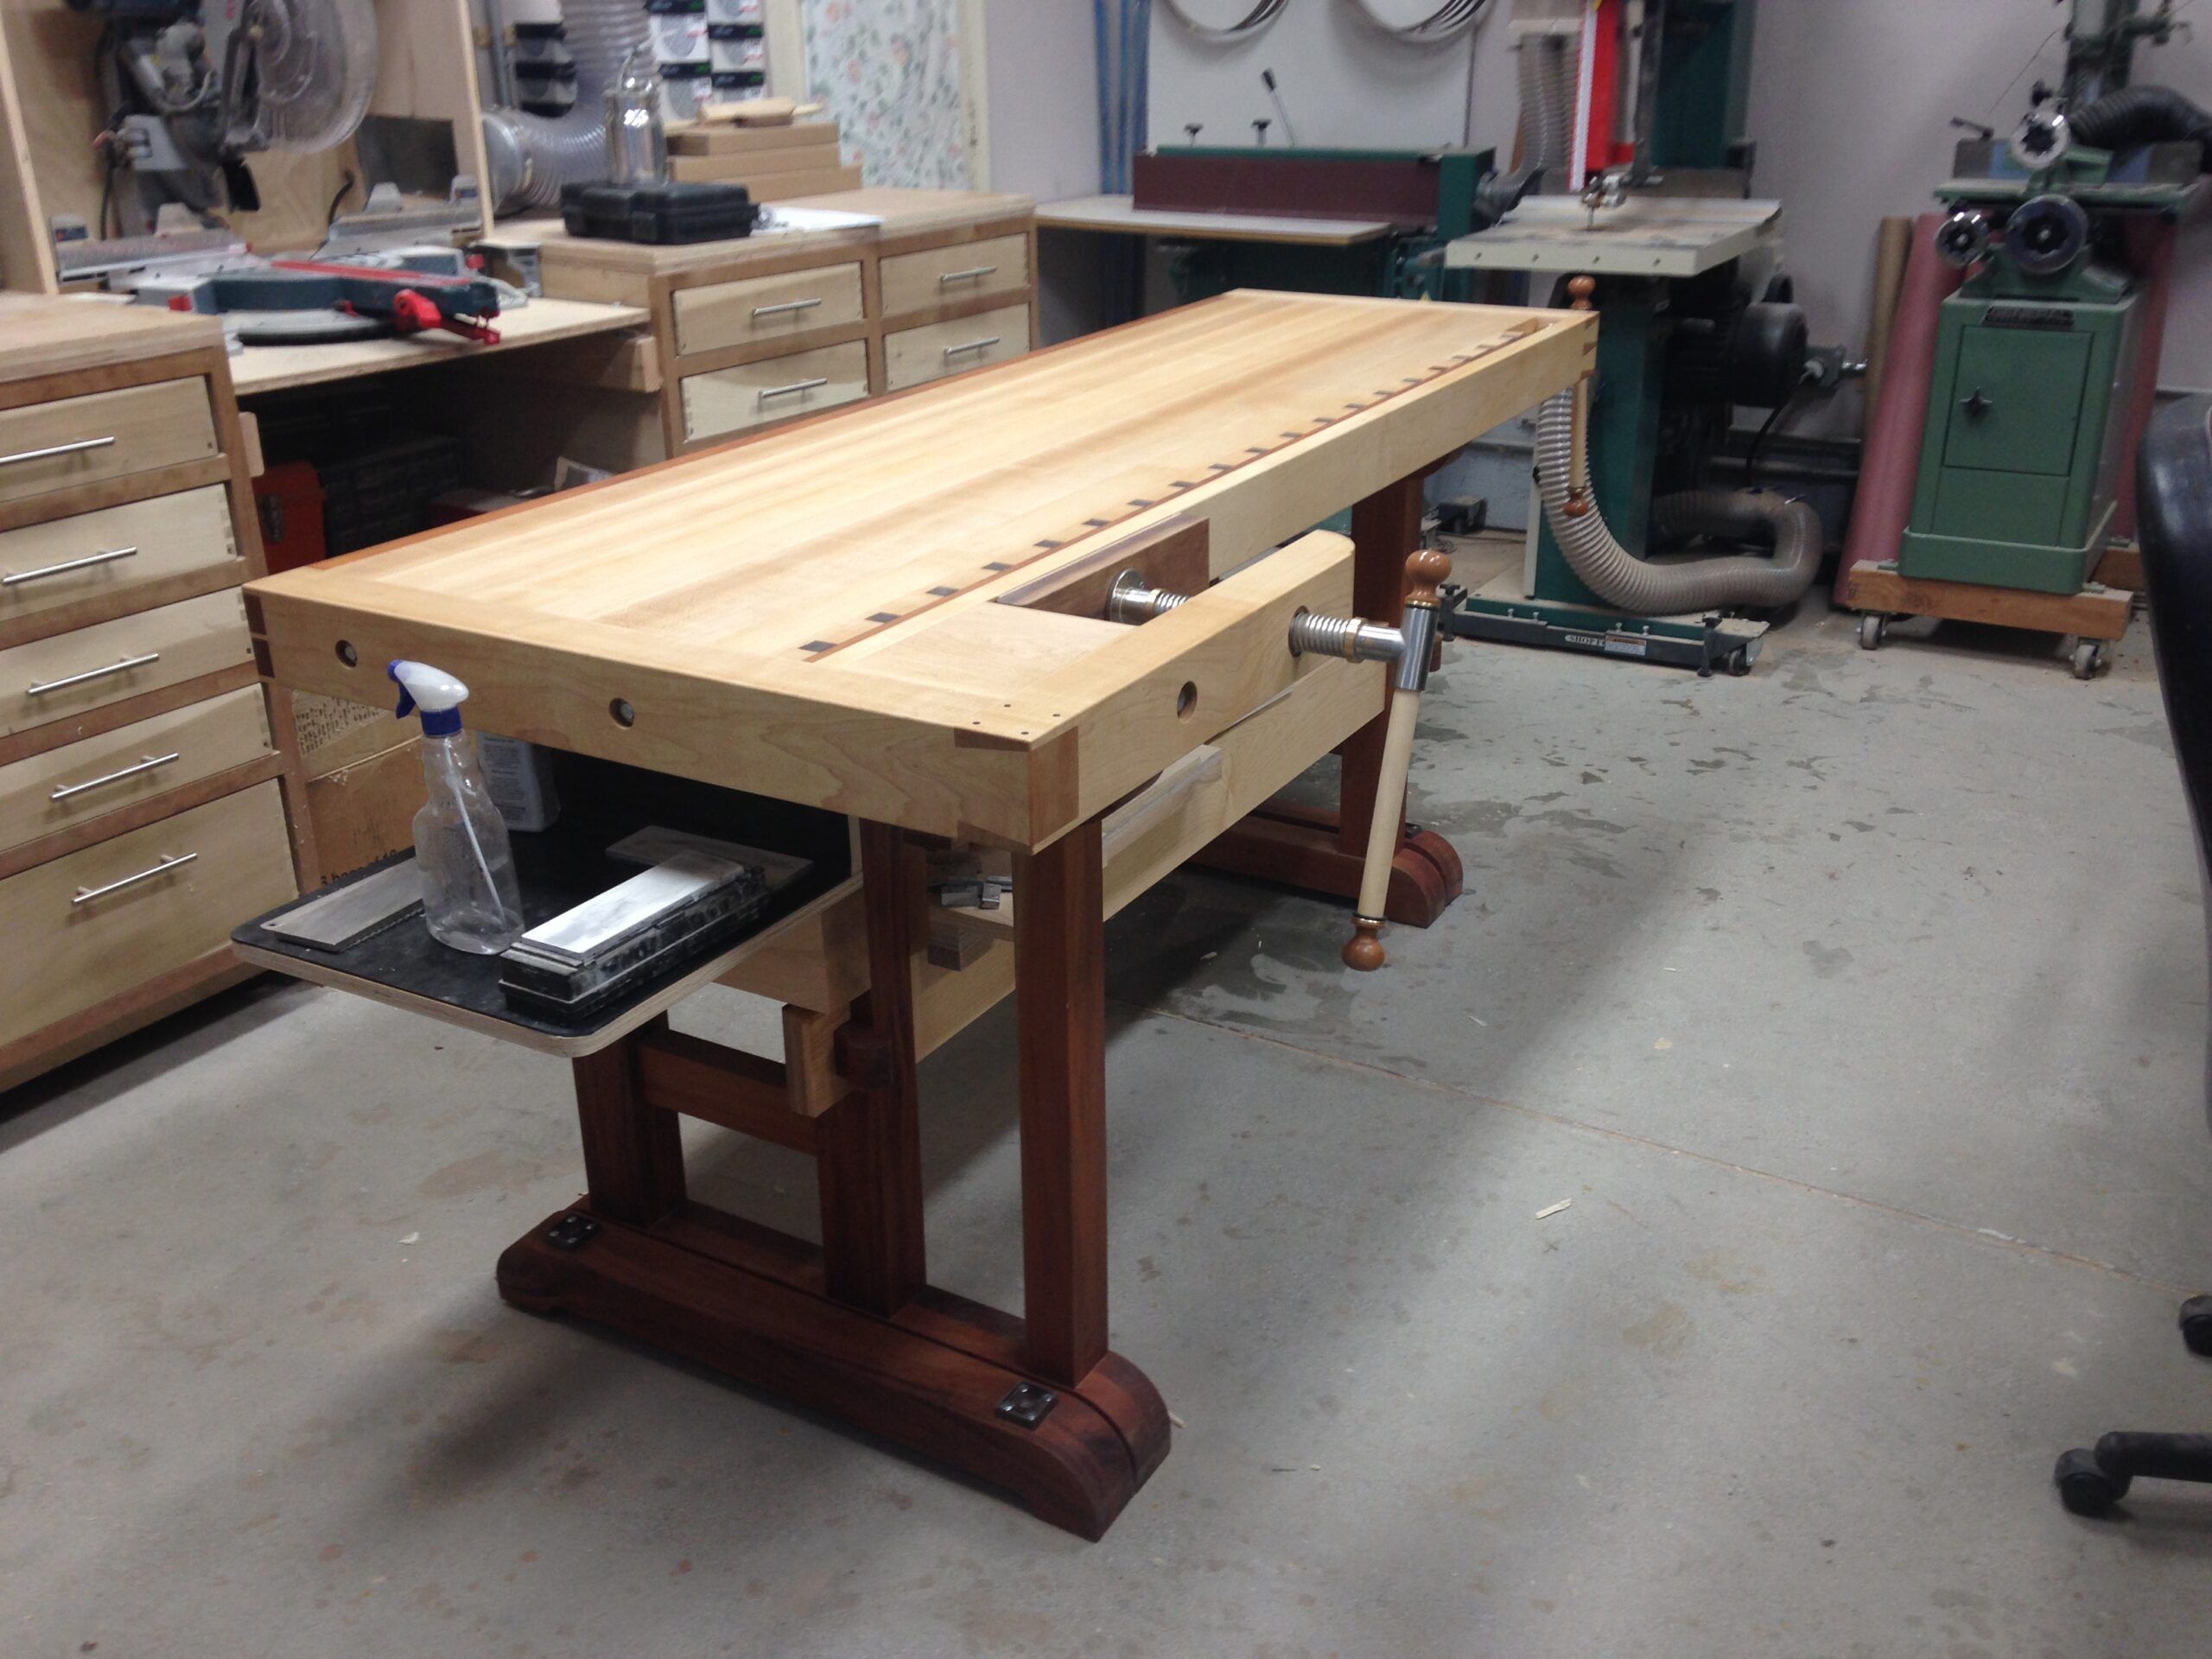
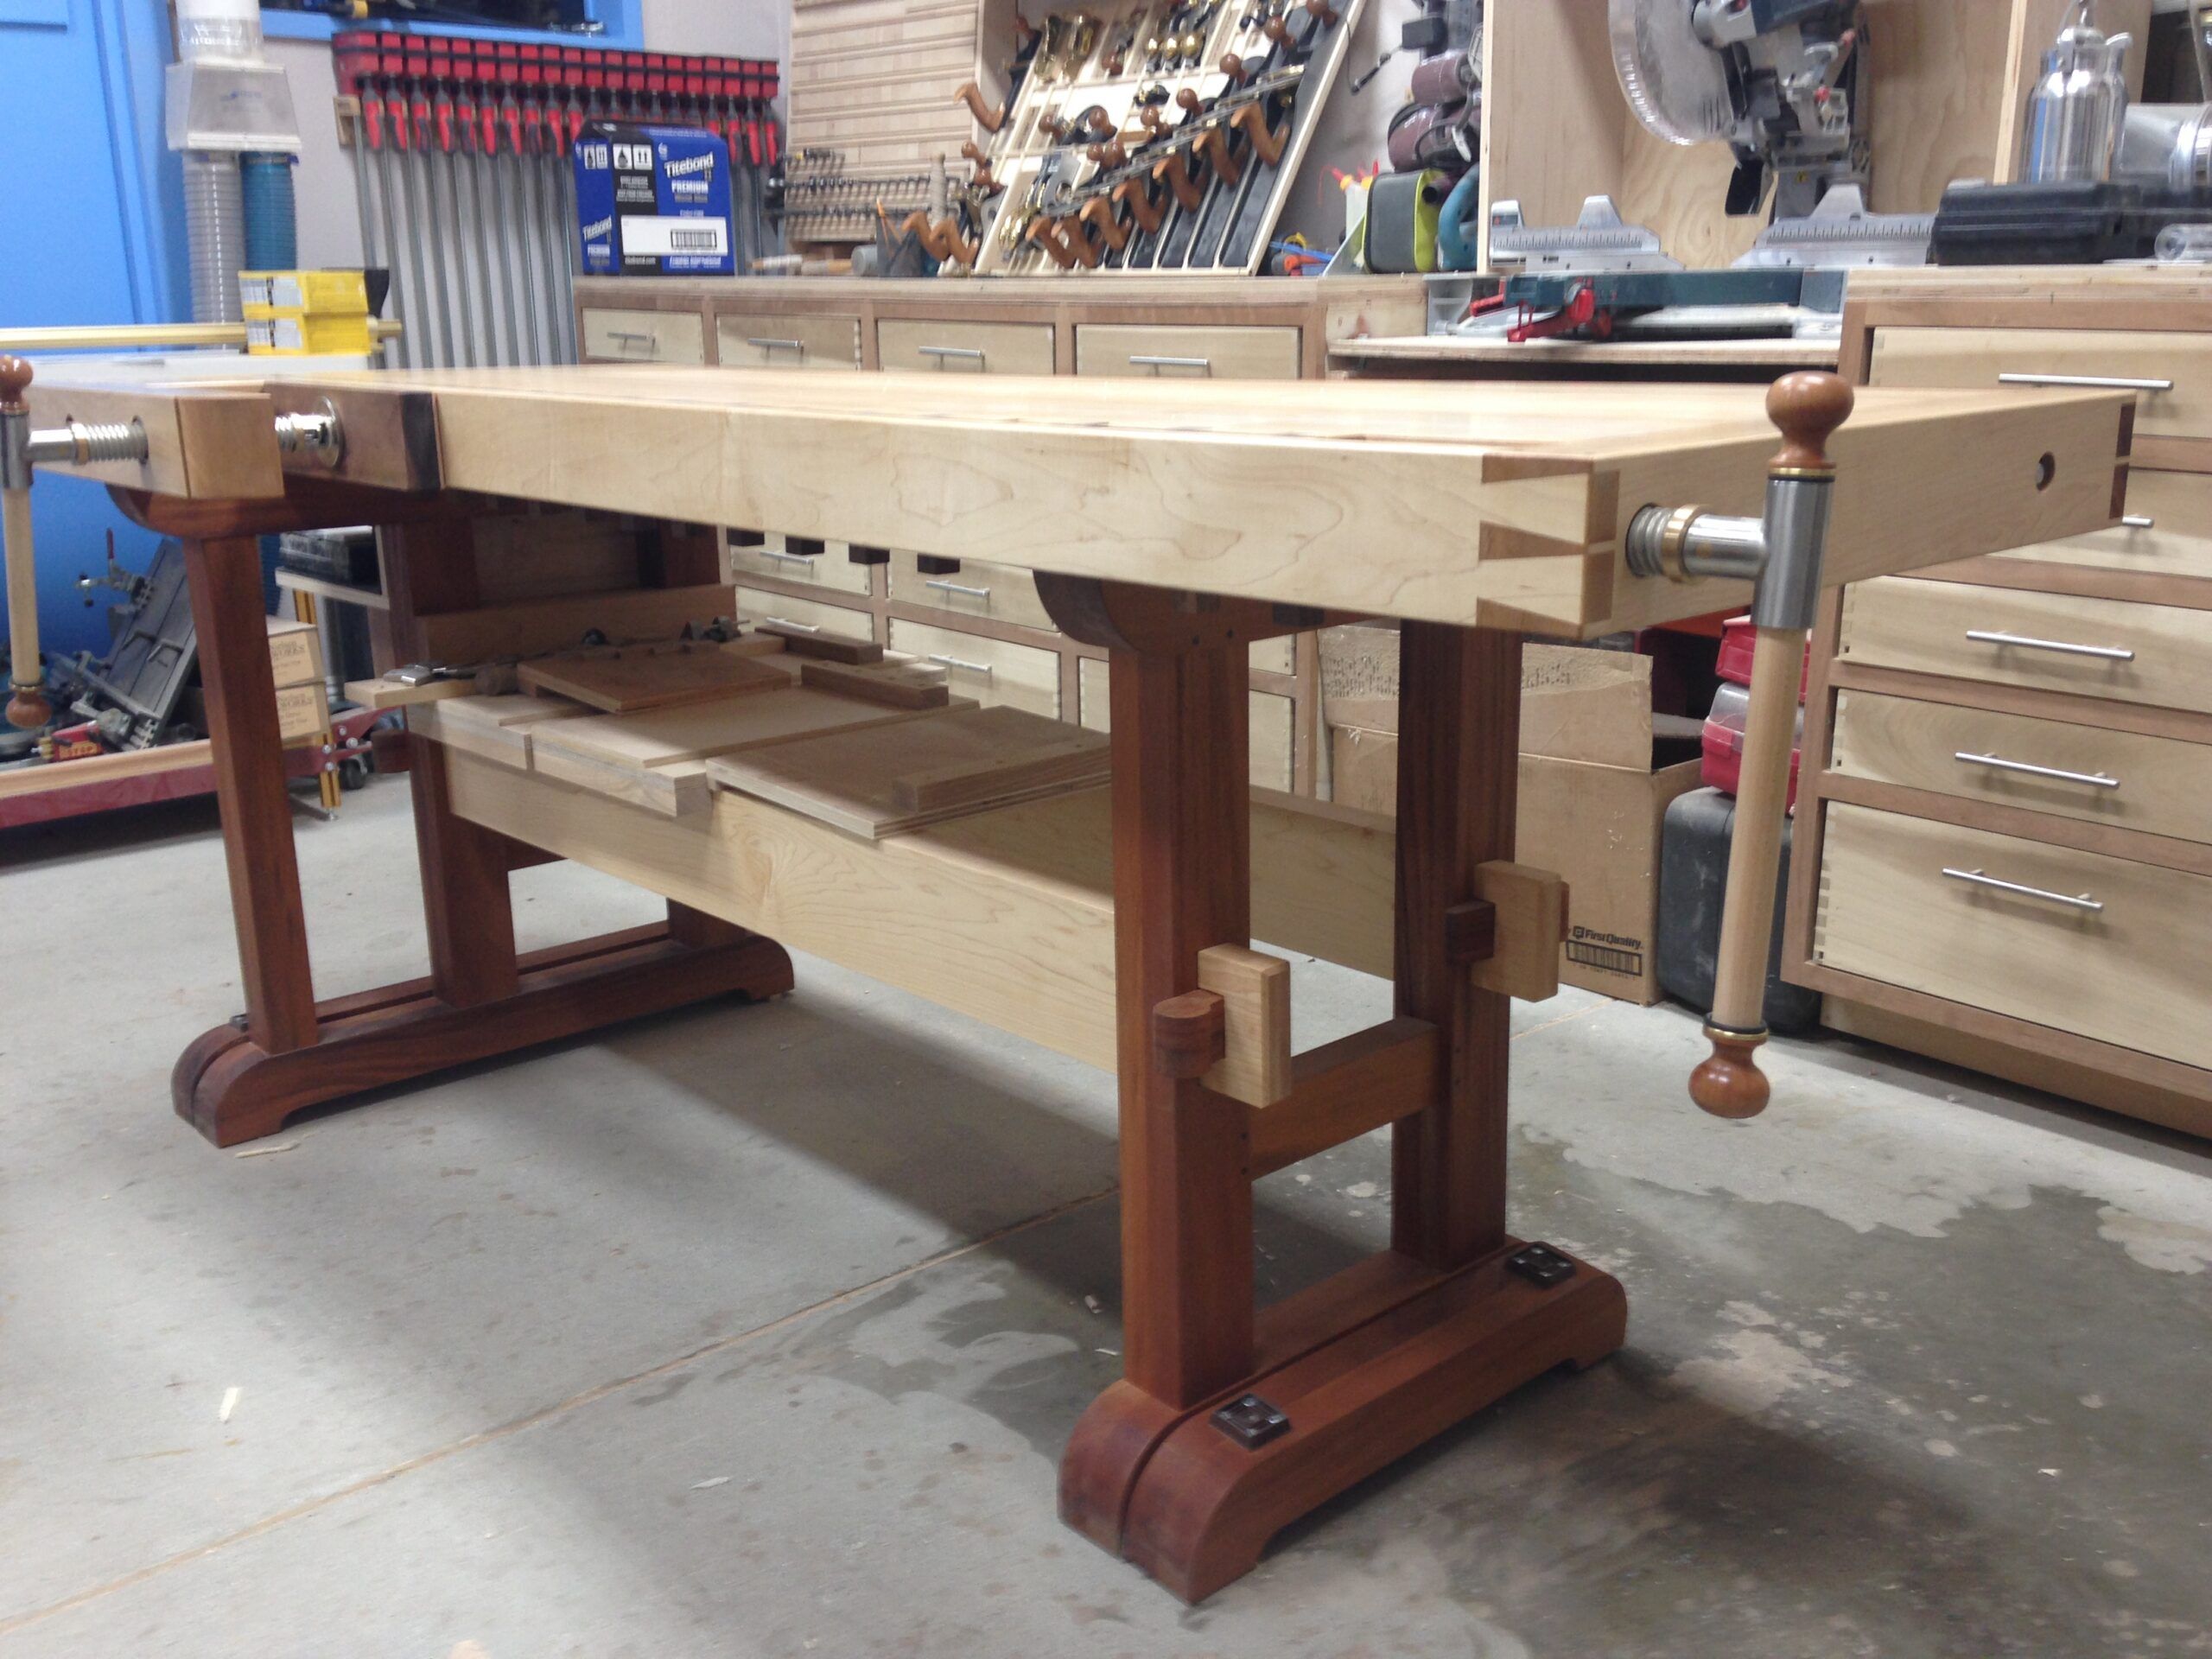
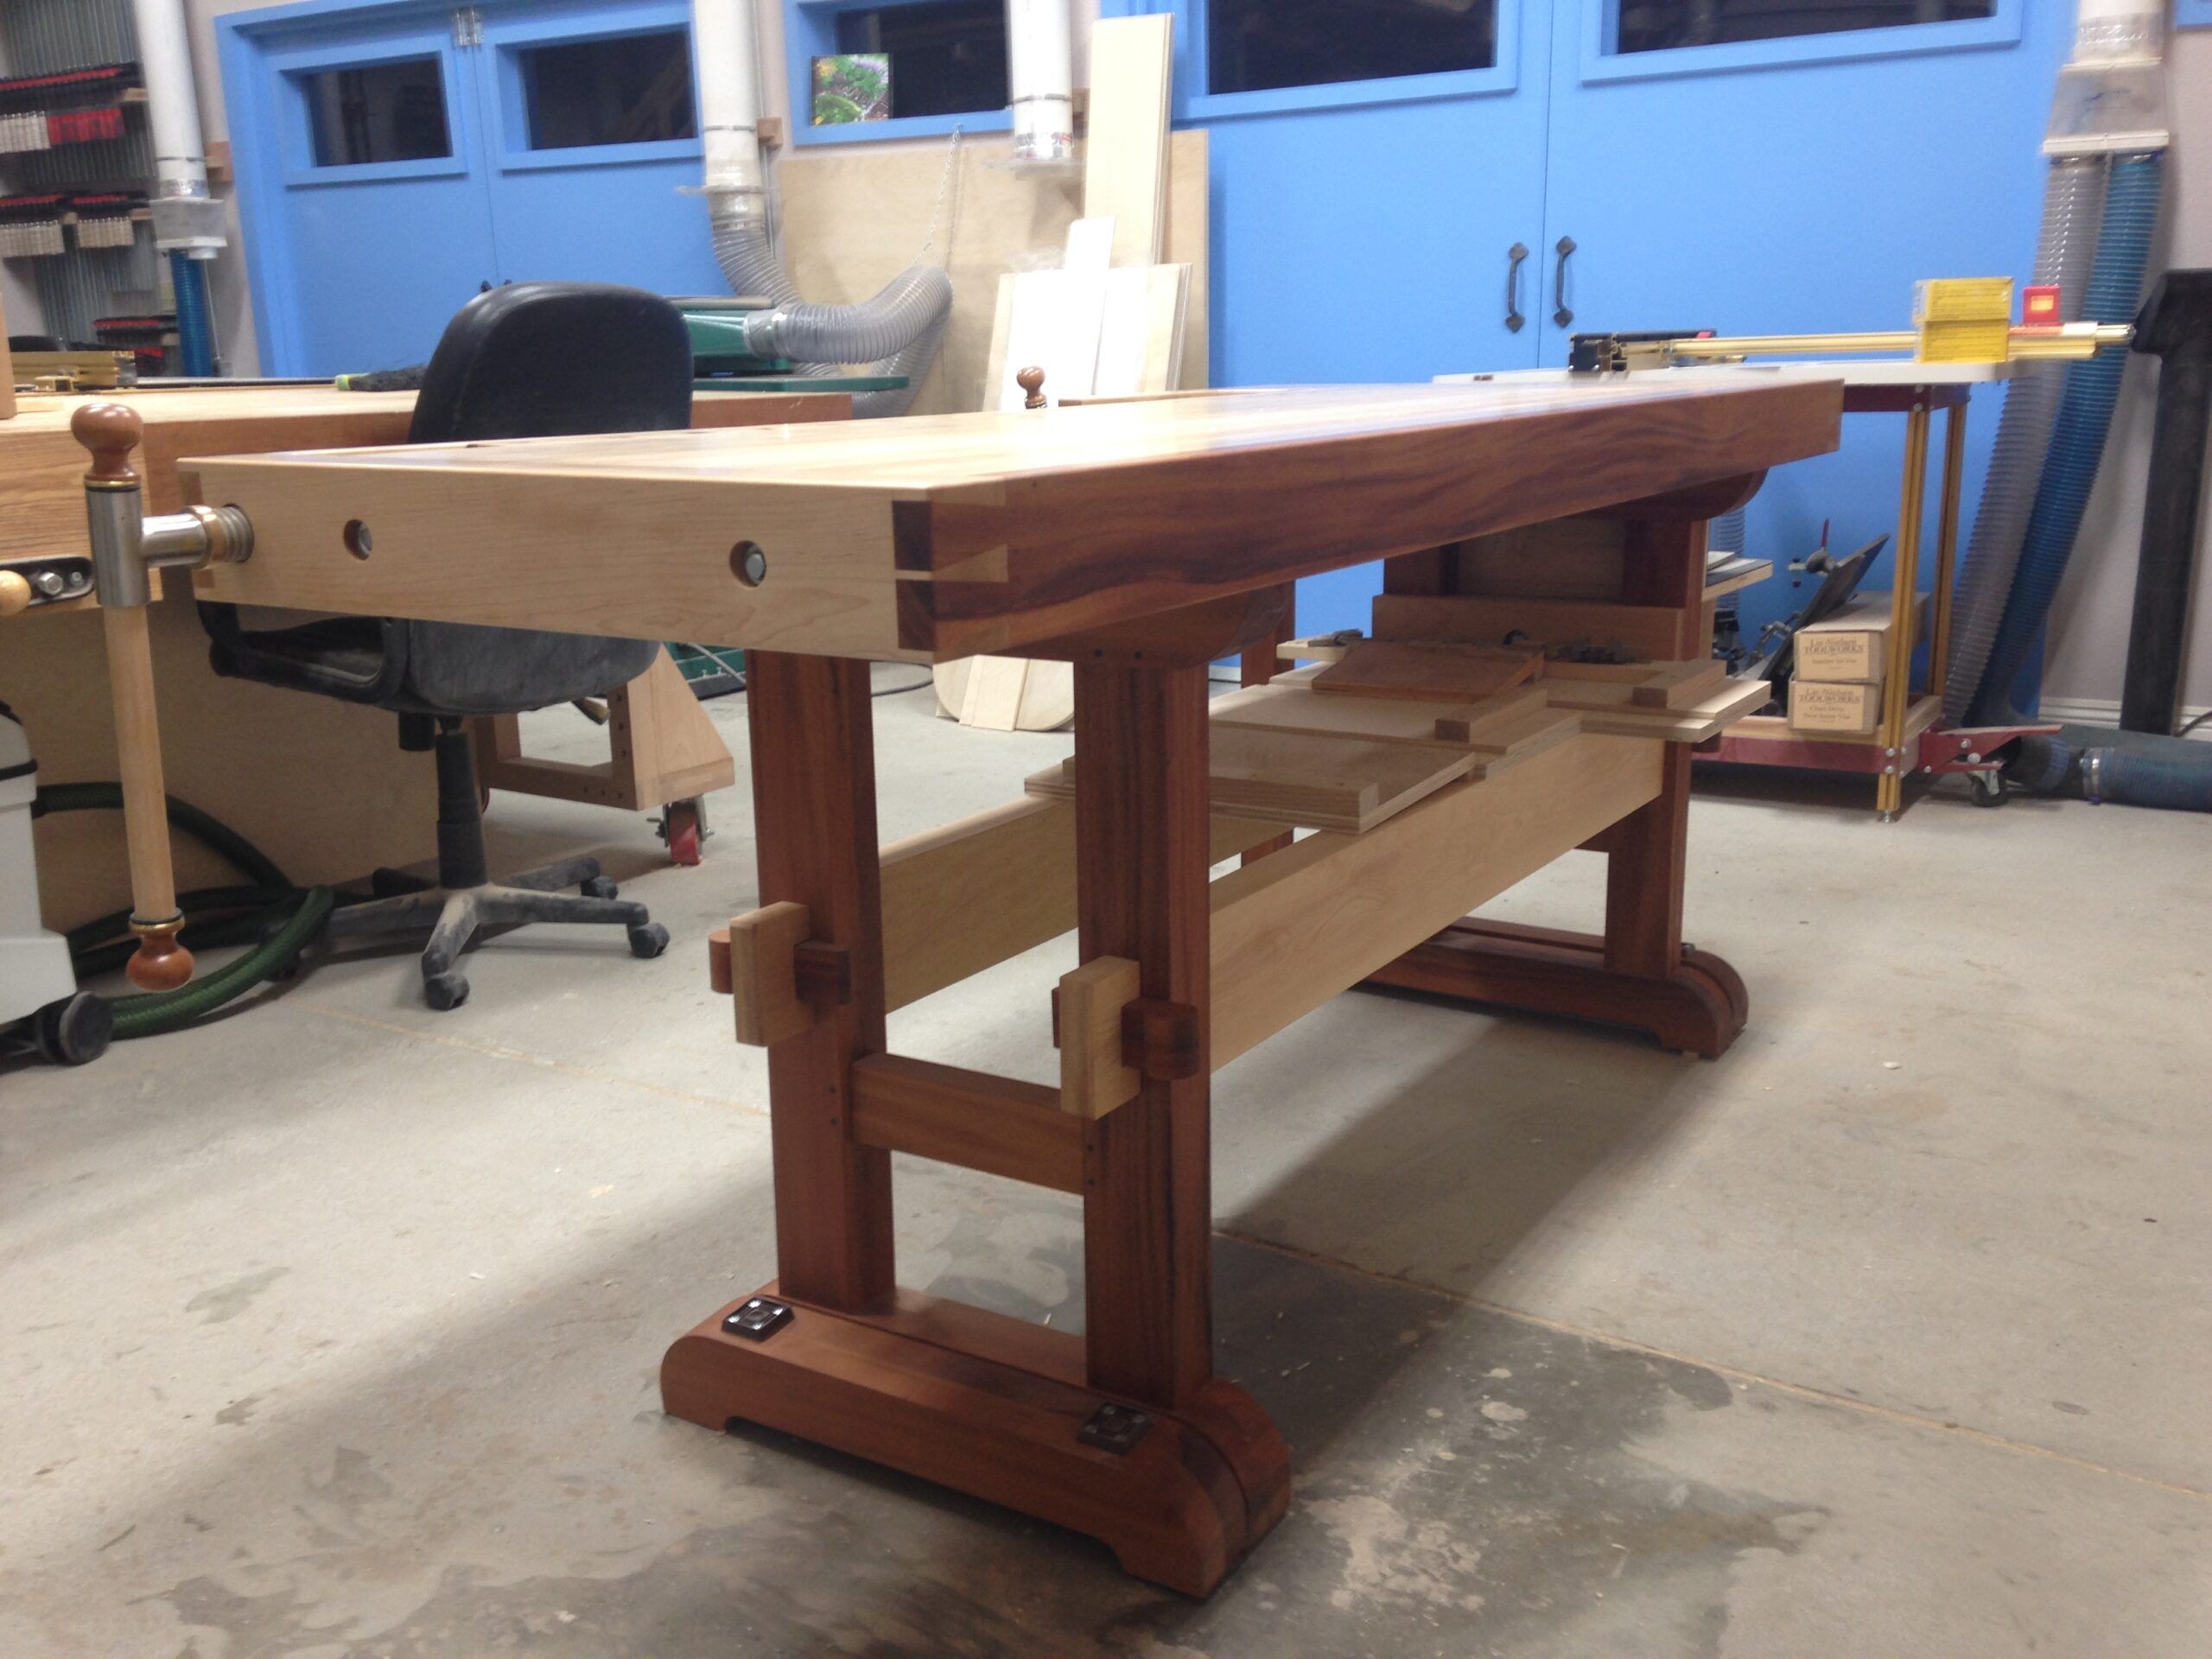
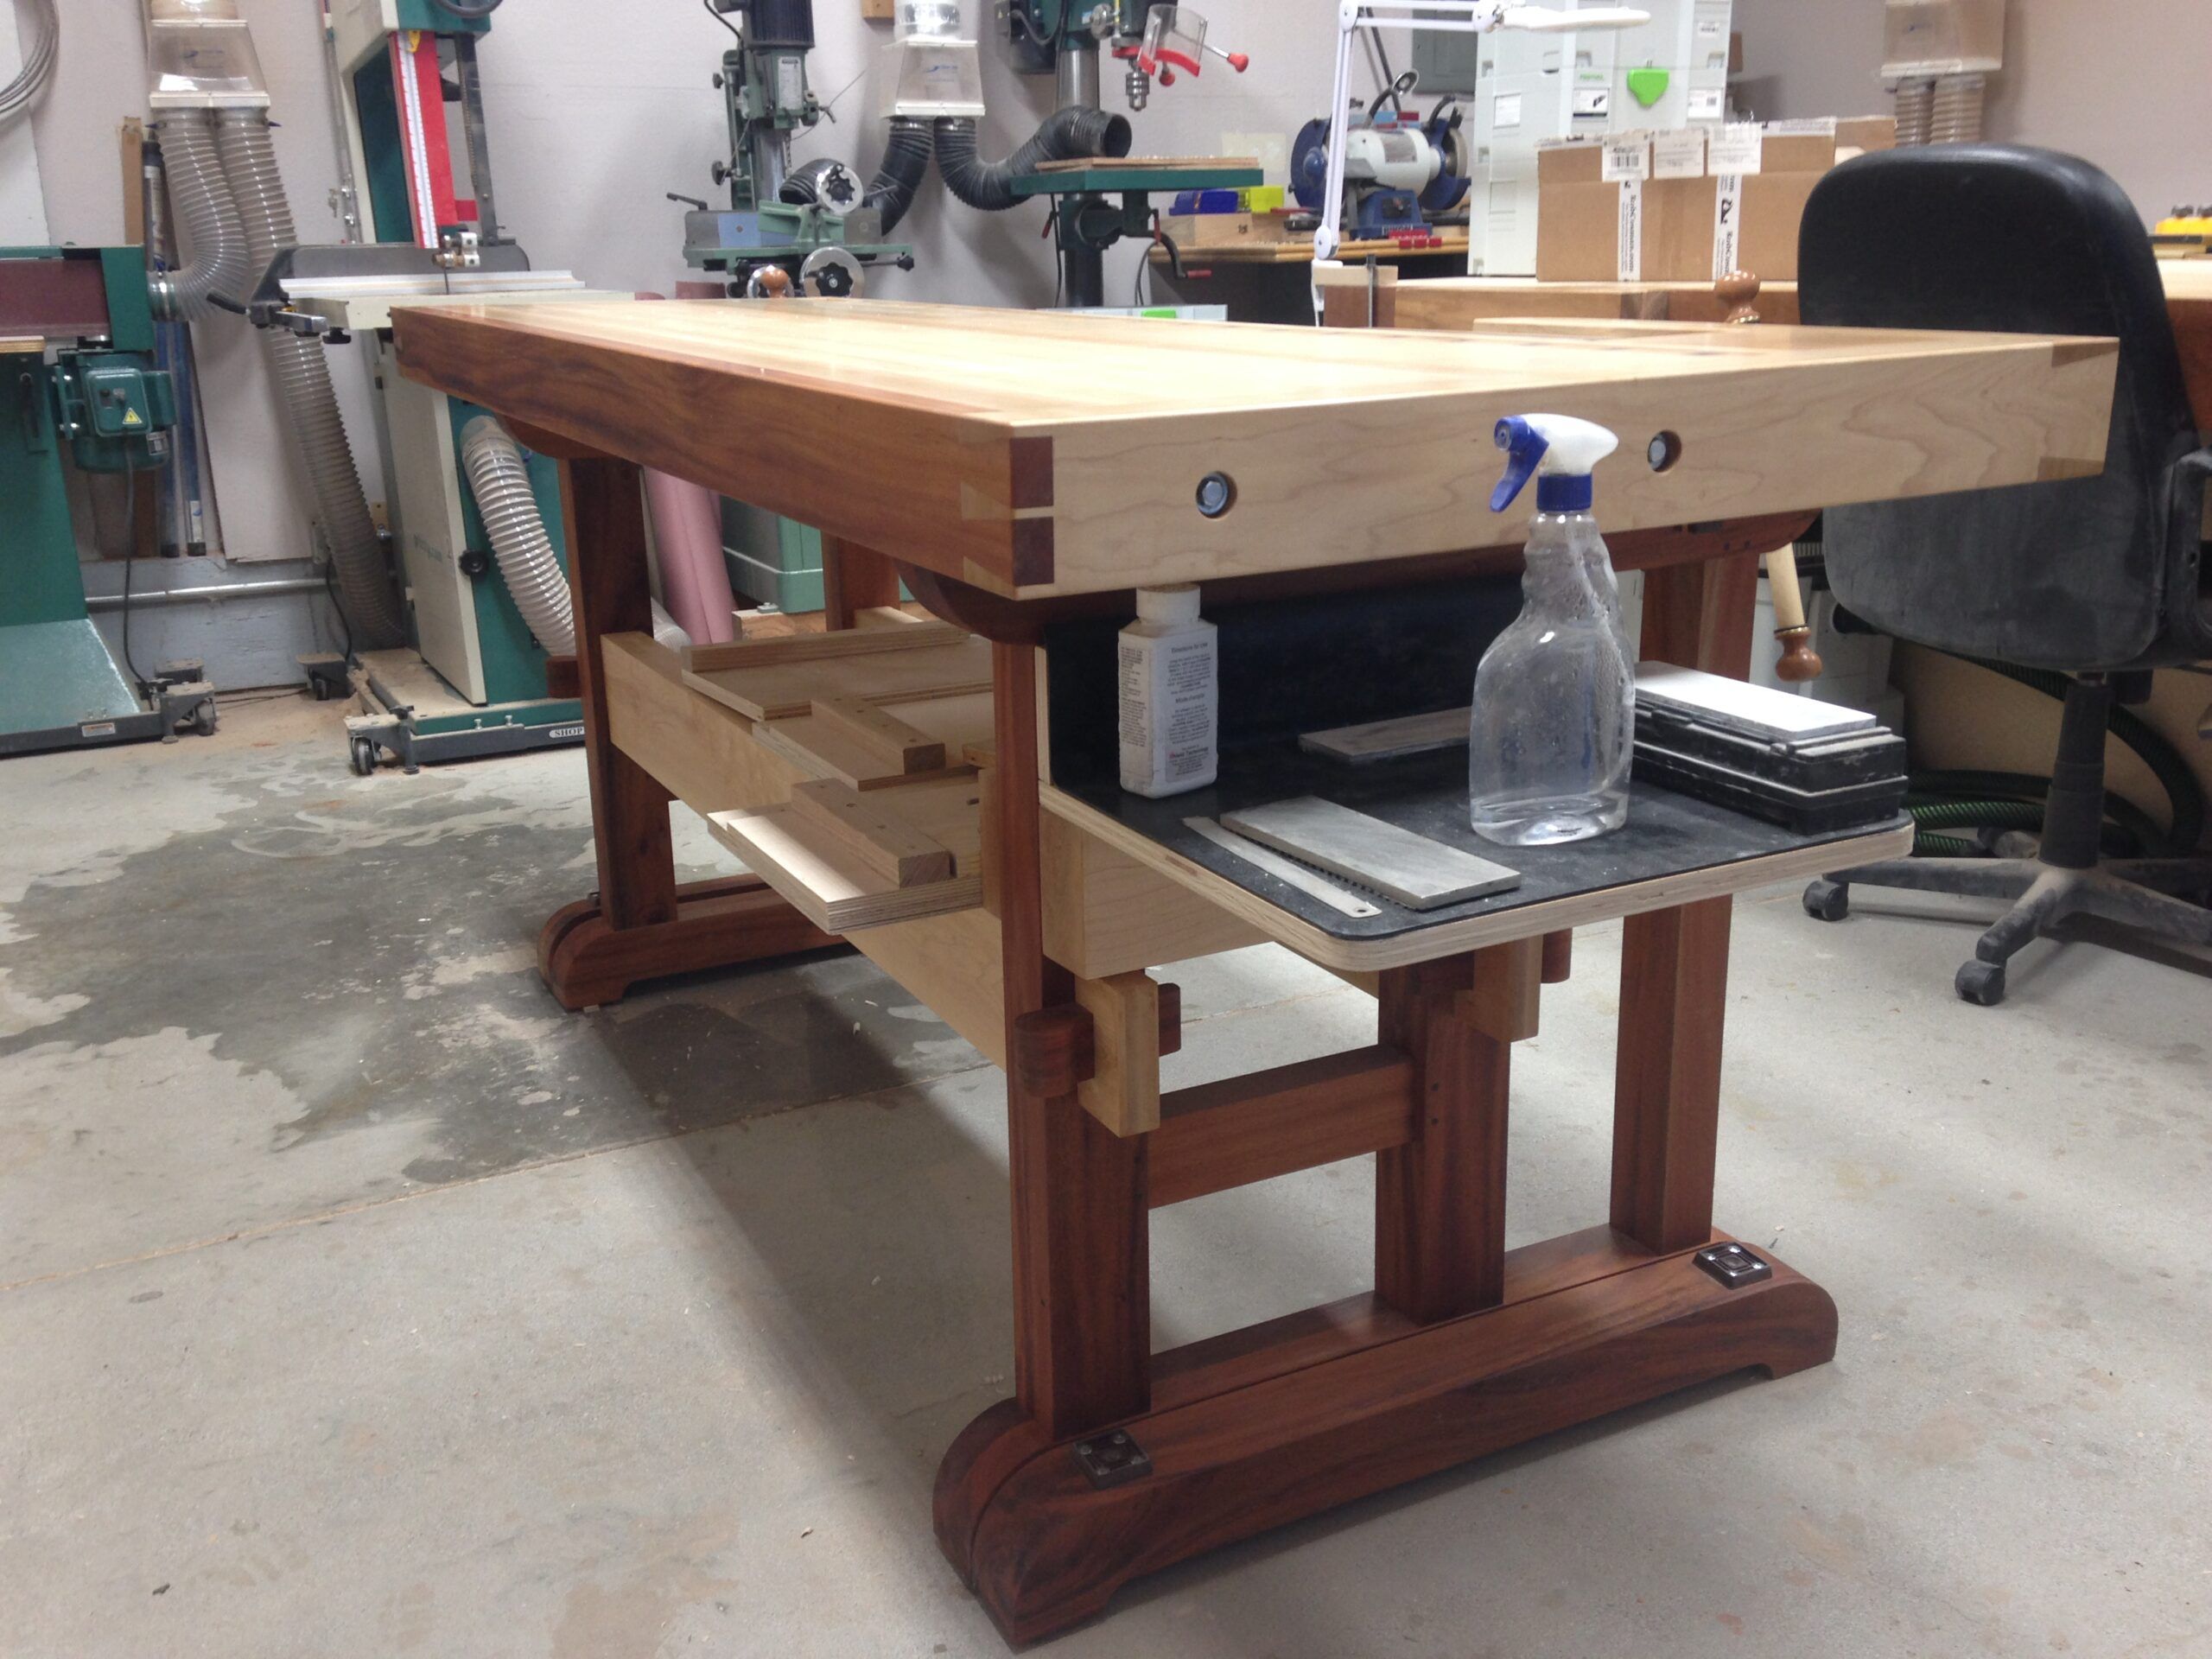
The bench is build out of mahogany (base and top racing stripes) and sugar maple (top and stretchers). The base is designed to be knocked apart and is held together by fairly massive keys. I am not planning on staying in this shop forever, but I am planning on keeping the bench that long and figured if I ever move it (it weighs ~450lb), it better come apart. The extra set of feet is to raise the bench height (~3.5 inches) in case I need to do detailed work and want to save my back (I am 54). The vise screws are from Rob Cosman. Not cheap, but well worth the money. The dogs have a spring loaded tongue that keeps them in the hole and lets them stay upright at any height. The entire bench is finished with four coats of Danish oil.
If you know about Rob’s bench, you know he likes tool trays. He uses the tool tray to hide expansion joints in his bench top. I personally hate them. So the question was, how to build a massive 4 inch thick, 26 inch wide slab of maple with end caps (which I love) and accommodate seasonal wood movement. Here in northern California, where I live, there’s not a lot of humidity, but we still get an occasional rain now and then. The solution I came up with is dry dovetails. the end caps are only glued at one end and the rest of the joint is dry all the way in to the mahogany dovetails in the back. The second bolt is also in an oblong hole. This allows the entire top to move in one direction and back.
The sharpening station on the left side of the bench is typical Rob Cosman fair. Since I am a freehand sharpener (a la Rob), it takes but only a few seconds for me to have a fresh edge on a chisel or plane iron. There really is no excuse for me to work with dull tools.
I calculated, not including my time and labor, the bench has ~$4500 worth of materials in it. Definitely not a cheap endeavor, but if I was going to build an heirloom that will be passed down to my son, his son… the expenditure was well worth it.
btw, those racing stripes are there for more than just good looks. They act as leveling guides when I need to clamp something plum in a shoulder vise.
What do you think? Was it worth the investment? Would love to hear your thoughts.


Comments
The bench looks fabulous. Good work.
thank you so much. appreciate the kind words.
hello from new york! this is amazing and i am endeavoring to build myself a bench to last a few lifetimes. i had a question about the rod that is in tension when you use the shoulder vise. i imagine that rod is attached to quite a few layers of the top. as the top expands, doesn't it "loosen" up that rod, and as a result, you get some joints opening up as you use the vise?
also, would you mind explaining what the two bolts to th left and right of the "cosman spray bottle" do?
finally, i think the shoulder vise hardware is overrated....
no... :-) i'm just jealous and salty and thinking of the day i upgrade this PIS lee valley vise in my hand to that vise on your bench.
hi there. so sorry for such a late response.
first, the two bolts securing the shoulder wise are 16 inches long. the way i designed and built the top is that all seasonal movement is directed from front to back. as a result, it's now been ~3 years and i never had to re-tighten them. i suspect that over time i probably will need to do it, but it's been solid so far.
second, the two bolts holding the end cap on (and the matching two on the other side) are also 16 inches and they are part of the expansion mechanism i talked about above. the end caps are only glued the first 3 or four inches in front. then the rest of the splined joint is dry. the bolts sit in oblong holes so that the top can move with seasonal changes.
as for the cosman wise hardware, well, the way i look at it is; this is my forever bench. yes the hardware is expansive ($1000 for shoulder and tail wise hardware), but i want to do it once and i want to do it right. btw, i could not be happier with it. it's everything rob said it would be and more.
i hope this answered your questions.
Nice looking bench! I recently upgraded my bench and isn’t it so nice to work on a solid and efficient bench? It’s like I love woodworking all over again.
Question: how do you like that sharpening shelf? Is it retractable or is it fixed? Does it get in the way? And can you sharpen at such a low height? I know this is personalized for most people but I find it easier to sharpen at a level a bit higher than my workbench surface.
I did scan through Cosman’s video on how he made the sharpening shelf so I’m a little bit familiar with this invention. Just curious how it’s working out for others over time.
hello, and apologies for a late response.
the sharpening shelf is fixed and is not retractable. it's held by a single bolt and is easily removable (though i never remove it). it never gets in the way as i don't work on that side of the bench. as for the height, i learned freehand sharpening directly from rob, so i emulate his technique. if you know anything about it, you know that hand and wrist positioning is the key to consistent repeatability. by having it at that height, i assume exactly the same stance every time i sharpen and my shoulders, elbows and wrists lock perfectly at the height of the stone.
one thing i must say about the whole freehand sharpening method. it was not easy for me and required a lot of practice. i almost gave up on it a few times. what kept me going were the potential benefits (which are huge). we all know that the key to building quality furniture is razor sharp tools. while we all know that, in practice we're all guilty of going to long without sharpening because it's such a pain using jigs and machines. by learning freehand, i never have to work with dull tools. it literally takes me 30 seconds to put a fresh razor sharp edge on my chisel or plane iron and back to work i go.
Log in or create an account to post a comment.
Sign up Log in