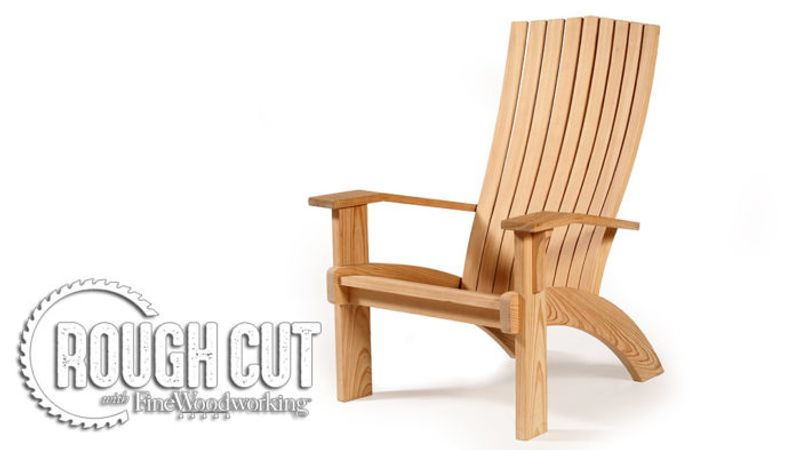
Classic Woodworking: Contemporary Adirondack Chair (104)

This video is an episode teaser. You can watch full episodes on our website by becoming a Fine Woodworking member.
Already a member? Log In

This week on Classic Woodworking, Tom McLaughlin shares his contemporary take on a classic design: the Adirondack lawn chair. Using cypress, Tom shows how to cut a comfortable curve into the seat and back of this chair. The mitered joint on the arm rest is an additional detail which makes for a smooth, slanting arm that resolves into a drink holder. Expect to enjoy time outdoors in this updated version of an old favorite.
For more information on cutting and cleaning up curves, see the articles Flawless Curves on the Bandsaw and Smooth Curves with Hand Tools
.
For more information on cutting tenons on the tablesaw, see the article Perfect Tenons by Machine
.
For more information on pattern-routing, see the article The Best Bits for Pattern-Routing
.
To find out which woods are best for the outdoors, see the article 5 Woods for Outdoor Furniture
.
Download free plans, or purchase a set of printed plans (coming soon).


Comments
I´ll be eagerly waiting for the plans and hopefully more detailed guidelines for the construction of this chair. I still believe there is too much information on such a short video, don't get me wrong, I like this format but you are getting too close to the edge as far as content/time is concerned. Tom is a great teacher.
I'm logged in, but still can only see the short clip rather than the full episode 804. Is the full episode up online yet?
The full video is available to those with a paid FineWoodworking.com membership. So if you're logged in, and have a membership reach out to [email protected] to make sure there isn't something wrong in the system.
This is one of the best designs for an Adirondack chair I have seen. As always, Tom does a really nice job of laying it all out.
Great video. Thanks!
An episode featuring the design/build of a chair should include someone sitting in the finished product!
Love the episodes, can't wait for the next one. For a general overview of each project the length of show is perfect. As a person battling with lung cancer breathing is no joke. I watched the last 2 episodes and was shocked you weren't wearing any breathing protection.
The show takes some pretty big jumps over important steps to fit within the timeframe of a TV show. It would be a much better service to the craft if the online version was much longer.
I agree there are some big jumps over important steps in the video. I downloaded the plans and printed them in a 1:1 ratio to create the templates. The 5/8 in. router guide will not fit in the 1/2 in. slot...oops. I must redo my template. Additional steps in the instructions would be nice (for the novice ...me). I like the design...looking forward to sitting in the finished chair!
In reply to DVDShanghai:
"I downloaded the plans and printed them in a 1:1 ratio to create the templates. The 5/8 in. router guide will not fit in the 1/2 in. slot...oops."
The "1/2 in. slot" is not intended to be the slot for the guide bushing. It represents the mortise itself.
My chair is finished...nice and comfortable.
about those soon to be available printed plans?
In the video he references a back arm support. However it doesn’t show up on the plans. Lots of little details missing between the video and the plan. I sure wish they would do a better job proofing these videos. It’s disappointing.
I just looked at both the printed plans and the digital plans. In both cases the Armrest rear support is shown in two places.
Printed plans? Digital plans? Not sure where you got those. I only have the pdf plans i downloaded from FWW. As would have it, i came across more mistakes. The furthest back seat support is curved to meet the back rest pieces in the video. I can see this in the video but it is not mentioned. This detail does not show up in the plan. (PDF plan that i have.). I dont see where the is anything more then this PDF as far as plans.
The bridle joints baffle me. The plan calls for them to be 3-1/4" deep, but my 10" table saw only raises to about 2-5/8" with my crosscut sled - which has 1/2" plywood base.
You could cut them at the bandsaw or with a handsaw.
Can confirm that the bandsaw works fine. Double side tape the 6 degree block to the fence. Just make sure the skinny end is thick enough so the workpiece clears the table during the whole cut. Thanks for the suggestion!
Log in or create an account to post a comment.
Sign up Log in