Arts and Crafts on Display
Versatile cabinet is a lesson on building in the Stickley style
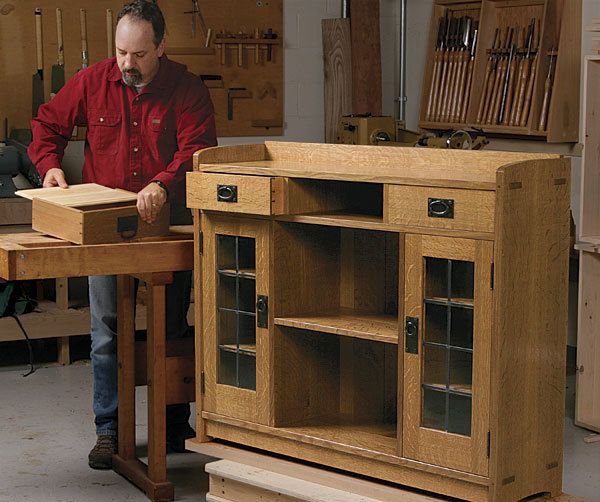
Synopsis: With its quartersawn oak, exposed joinery, fumed finish, and hand-hammered hardware, this case piece would not be out of place in an antique Stickley catalog. The through-mortises are a critical feature of the design. The leaded-glass doors are a typical Arts and Crafts detail, too. Also, the parts are varied in thickness: The sides are a full inch thick, the top and bottom are 7/8 in. thick, and the remaining interior dividers are 3/4 in thick. Each piece is slightly inset from the other, creating subtle shadow lines.
Simple is not always easy. Take Arts and Crafts furniture. woodworkers fond of the style—with its beefy parts, rectilinear lines, and exposed mortise-and-tenon joinery—may think the furniture is easy to make. But this simple form is unforgiving of mistakes. Make one slip-up in proportions, hardware choice, or finish, and the design falls down. I’ve been building Arts and Crafts furniture for a long time, and I’ve worked through the challenges in making a piece that’s true to the style.
This case piece is an original design, yet it would not be out of place in an antique Stickley catalog. with its quartersawn white oak, exposed joinery, fumed finish, and hand-hammered hardware, it breathes Arts and Crafts. The leaded-glass doors are typical, too, and add to the handcrafted look. You can have panels made by a local artist or you can make them yourself. If you are interested in building in this style, I hope you’ll find a few valuable lessons here. Also, this piece is a versatile one: I designed it to hold books and cherished items, but it could work as a sideboard, too.
When building an Arts and Crafts piece, the most important step is to choose good wood. The tight grain and magnificent ray fleck of quartersawn oak is the primary ornamentation, so don’t skimp on the lumber. I found some great boards online that I supplemented with lumber from a local yard.
With a large project like this, I start from the outside and work my way in because it’s easier to build the case first and fit the interior dividers after. The top and bottom of the case attach to the sides with through-tenons. To help keep the case square and the wide boards flat, I added a stub tenon between the through-tenons.
The through-tenons are prominent features of the design, so you must get them right. For clean cuts and no gaps, I fitted the router with a guide bushing and straight bit and cut the mortises using a full-size template. Then I cut the dadoes between mortises for the stub tenons. Finally, I squared up the mortises with a chisel.
To cut the remaining mortises for the backsplash and the lower apron, attach a fence to the router and use a spiral upcut bit. Then square them with a chisel.
From Fine Woodworking #211
For more tips on making leaded-glass doors, check out this video.
For the full article, download the PDF below:
Fine Woodworking Recommended Products

Drafting Tools

Blackwing Pencils

Blum Drawer Front Adjuster Marking Template

Get the Plan
Digital plans, a cutlist, and a SketchUp drawing for this project are available in the Fine Woodworking store.


Log in or create an account to post a comment.
Sign up Log in