Tool Chest with Drawers
Build a custom chest to store your hand tools in style.
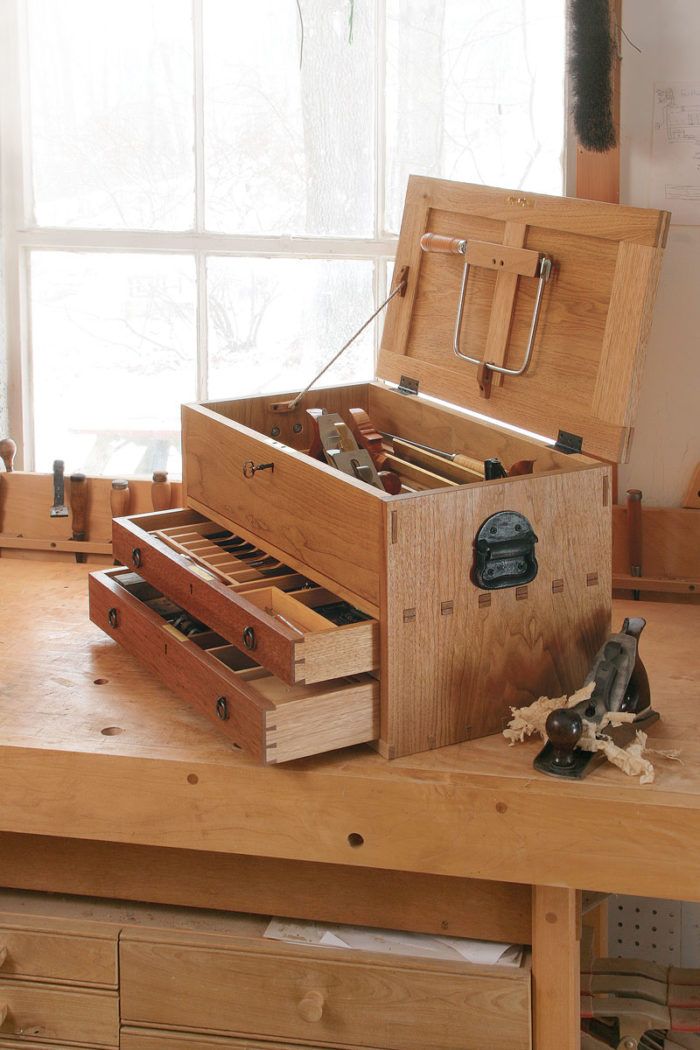
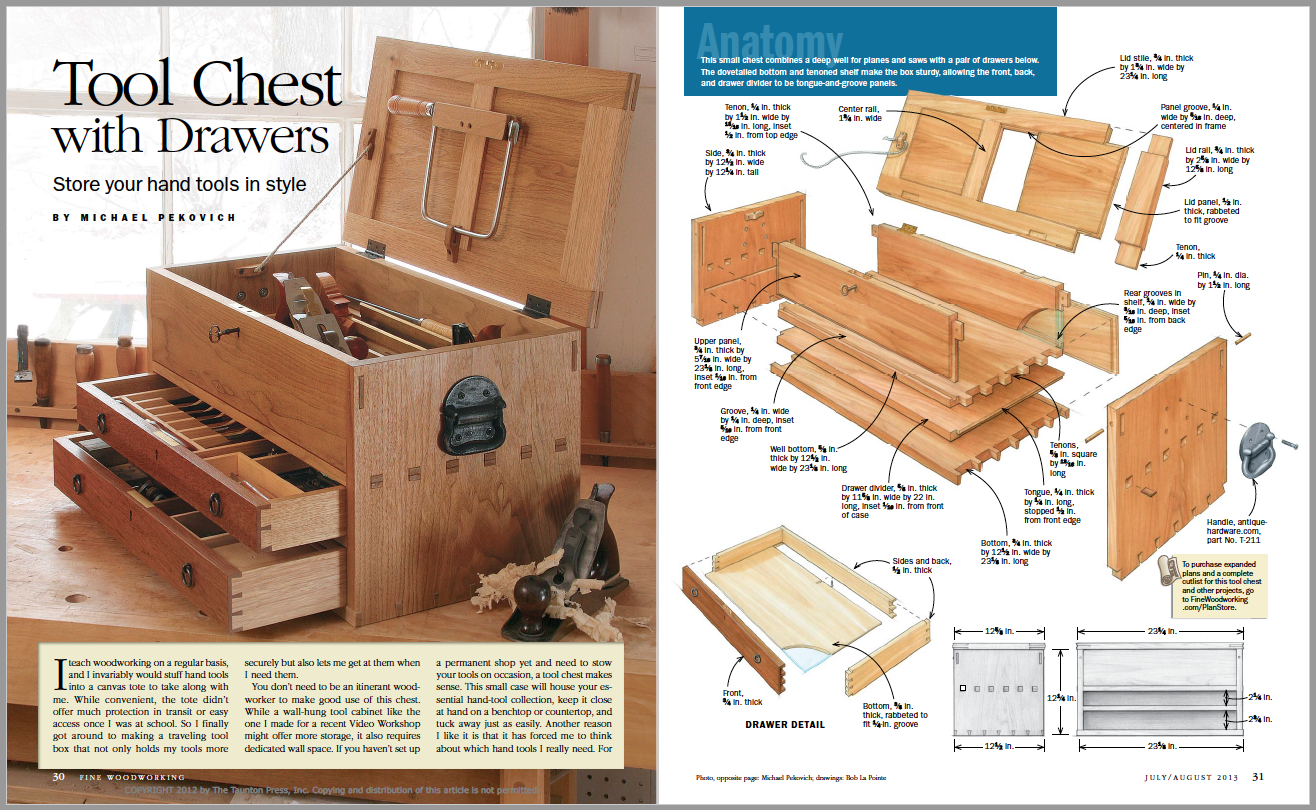
Synopsis: This traveling tool box is designed to hold your essential hand tools, keeping them close at hand on a benchtop or countertop and tucking away easily when not in use. The design combines a deep till for planes and saws with a pair of drawers below. The sides and bottom are attached with through-dovetails, and the fixed shelf is attached with through-tenons. The rest of the joinery is mostly routed grooves and rabbeted panels. Dimensions: 12-5/8 in. deep by 23-1/4 in. wide by 13 in. tall.
I teach woodworking on a regular basis, and I invariably would stuff hand tools into a canvas tote to take along with me. While convenient, the tote didn’t offer much protection in transit or easy access once I was at school. So I finally got around to making a traveling tool box that not only holds my tools more Tool Chest with Drawers Store your hand tools in style BY MICHAEL PEKOVICH securely but also lets me get at them when I need them.
You don’t need to be an itinerant woodworker to make good use of this chest. While a wall-hung tool cabinet like the one I made for a recent Video Workshop might offer more storage, it also requires dedicated wall space. If you haven’t set up a permanent shop yet and need to stow your tools on occasion, a tool chest makes sense. This small case will house your essential hand-tool collection, keep it close at hand on a benchtop or countertop, and tuck away just as easily. Another reason I like it is that it has forced me to think about which hand tools I really need. For more on that, check out my free video at FineWoodworking.com/extras.
I studied quite a few classic tool chests as I designed this one. I went with a well deep enough to store handplanes and backsaws up top, and drawers below that allow easy access to chisels and layout tools.
To keep the weight down, I made the case from butternut. It’s as light as pine but a lot prettier. Another thing I love about butternut is how it works with hand tools. It dents easily, so be sure to keep your work surface clean and chip-free. It also has a tendency to be a little fuzzy, but a sharp handplane leaves a glass-smooth surface and brings out the luster in the wood.
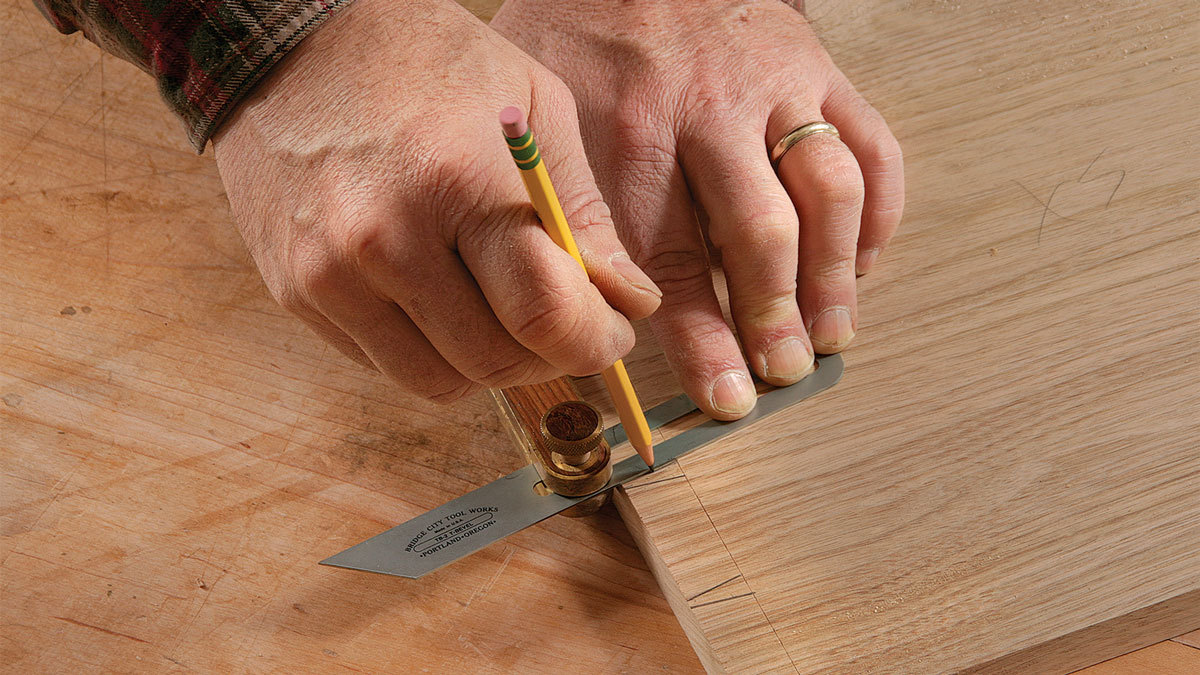
The case joinery looks impressive but is pretty simple. The sides attach to the bottom with hand-cut through-dovetails, and the well bottom is attached with through-tenons, also hand-cut. I like to leave this type of joinery a little proud to add interest. The rest of the case joinery is mostly routed grooves and rabbeted panels. I built the frame-and-panel lid with tenons and bridle joints that I cut quickly and easily at the tablesaw, though you could do them with hand tools, too.
 From Fine Woodworking #234
To view the entire article, please click the View PDF button below.
Fine Woodworking Recommended Products
WoodRiver Router Bit Storage Case
Woodriver Rechargeable Desiccant Bag

Get the Plan
CAD-drawn plans and a cutlist for this project are available in the Fine Woodworking store.


Comments
Hello Michael, and others. I'm new to woodworking, and was curious about how to determine how much stock is required for this project. Is there a method to figuring this out, other than taking all the measurements, adding a few inches for kerf widths and waste, and just kind of "going with the flow"?
That's the best way of doing it. We shy away from giving board foot calculations because it's all based upon the boards you have available. Say for instance, you have 100 bf of white oak that is warped, you're not going to be able to use all 100 bf of it. You might be able to get 75bf of usable stock. So cut lists don't really give you the whole picture. There is a materials list that is available as part of the plans available in the Taunton store, but that is a list of parts, not a cutlist per say. We really don't believe in cutlists for the reason above.
Hi, I am preparing to build the tool chest but I am not sure how the back panels fit or are attached to the case. There are no photos of the back of the case and the plans do not show how the back panels fit in. It would be nice to know this as I plan and prepare the wood. Thanks for your time.
"...and the plans do not show how the back panels fit in."
Which plans are you looking at? Pages 5 and 6 of the digital plans show the details for the sides, fixed shelf, and back panels. This is also shown in the upper right part of the printed plans. The back panels fit into grooves in the bottom, fixed shelf, and case sides. The top back panel also has tenons on it that extend into through mortises in the case sides. It's essentially the same as the front panel. You can see the ends of those tenons in the photo at the top of this page.
Thanks for your reply that is helpful.
What a great project, big kudos to Mike for posting this project. Great learning project especially the wedged through tenons and dovetails. Fitting the locks was also a great experience. The top compartment fit my planes perfectly. What is really special is just how nice it is to take to classes with just about all my tools neatly stored and available. Thanks Mike, you rock!
Log in or create an account to post a comment.
Sign up Log in