Dead-Flat Assembly Table – Build a Sturdy Base with Storage
Build a sturdy base with plenty of storage and find tips for installing full-extension drawer slides
Videos in the Series
 |
Build a Torsion Box Assembly Table: TabletopThe strength of a torsion box comes from the connection between the edges of the outer frame and inner grid and the top and bottom skins. It’s not critical that the inner grid is perfectly spaced. However, it is critical that it is flat and true to ensure a perfect bond with the skins. |
 |
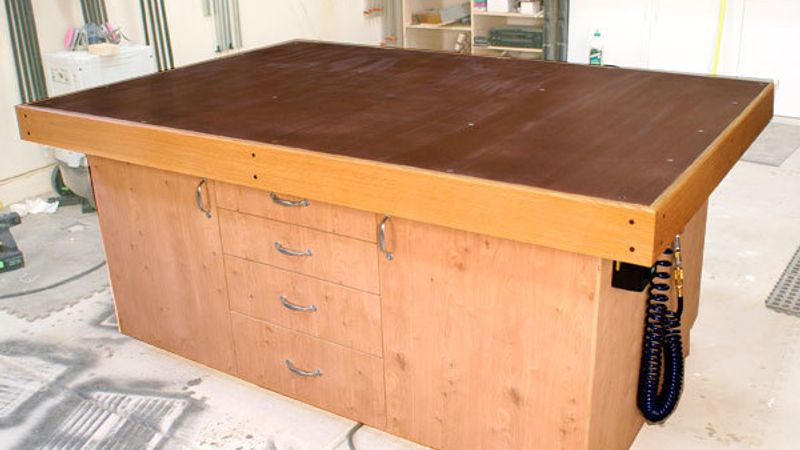
Build a Torsion Box Assembly Table: Sturdy Base with StorageThe base for my assembly table is made of two plywood cabinets that are joined with three stretchers on top and two toe kicks on the bottom. Four doors offer access to shelves inside each cabinet, and a stack of drawers fits in between the two cabinets on both sides for a total of eight drawers. |
 |
Build a Torsion Box Assembly Table: Euro-style HingesEuro-style cup hinges are a great choice of hardware when installing cabinet doors in kitchens, shop furniture, and built-in cabinetry. |
A sturdy base
The base for my assembly table is made of two plywood cabinets that are joined with three stretchers on top and two toe kicks on the bottom. Four doors offer access to shelves inside each cabinet, and a stack of drawers fits in between the two cabinets on both sides for a total of eight drawers.
 Cut the parts
Begin by cutting the four vertical partitions that will serve as the cabinet sides. Then cut dadoes on the inside faces of each partition to accept the upper and lower shelves. To ensure that the dadoes line up, cut matching dadoes on each panel before resetting your fence for the next cut. Then use a jigsaw to cut a 3-in. by 3-in. notch in the bottom corners of each partition for the toe-kick.
Next, prepare the three stretchers and the toe kicks. The stretchers should be ripped from a single wide board after cutting the rabbets and dadoes. This will ensure that all the joints line up when it comes time to assemble the base.
| Quick Tip: 3/4-in.-thick plywood is closer to 23/32 in. thick. Before cutting your dadoes and rabbets, measure the exact thickness of the material and shim your dado blade to match. For router-cut dadoes, use a specially sized plywood router bit. Read more… |

Join the two cabinets
Once all your parts are cut to size and the joinery is prepared, it’s time for assembly.
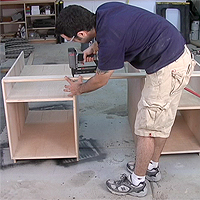
All of the parts are joined with glue and brads. Assemble each cabinet one at a time. Then install the stretchers and toe kicks to connect the two cabinets.
It’s critical that the shelves and stretchers are assembled square in order to make the door and drawer installation go smoothly later on. Use a square to support the workpieces as you assemble the parts.
Building drawers
The eight drawers are simple plywood boxes assembled with rabbets and dadoes. A floating plywood bottom panel is captured in a groove along the bottom, and a false drawer front is applied to each drawer after they are installed in the cabinet.
 Before you start cutting the drawer parts, measure the drawer-box opening and subtract the thickness of your drawer slides to determine the actual width of the drawers. I used full-extension drawer slides that measured 1/2 in. thick, so my drawers measured 1 in. less than the drawer box opening.
With the dimensions set, cut the sides and back for each drawer. Then cut rabbets on each end of the drawer fronts and backs. To speed up this joinery process, I attached a sacrificial board to my tablesaw fence and butted the blade right up against it.
Next, dry-assemble the drawer boxes and measure for the bottom panel, making sure to account for the depth of the groove. Finally, assemble the drawers with glue and brads, taking extra care to make them square.
 Install the drawers
With a little planning, installing the drawers is pretty straightforward. I sized my drawers to fit with a 1/4-in. gap in between each drawer, so I prepared a 1/4-in.-thick spacer to help set the drawerslides.
Position the first set of drawer slides by placing the 1/4-in. spacer on top of the toe kick. Check for square and then rest the slide on the spacer and screw it to the cabinet wall. Do this for both sides and then attach the mating drawer-slides to the drawer and slide it into place.
With the first drawer installed, place the 1/4-in. spacer on top of the fitted drawer to find the location of the next set of drawer slides. Follow the same procedures until all the drawers are installed.
 The false drawer fronts are also easy to size and apply with a simple strategy. I cut the drawer fronts and the doors from a single piece of plywood for a continuous grain pattern.
Determining the height of each drawer front follows a similar process to installing the drawer slides. Begin by measuring the height of the lower drawer front. Cut it to size and apply it, then place a thin spacer on the top edge to measure for the next drawer front. Continue this process until all the drawer fronts are cut to size.
Hanging the doors
Similar to the drawers, the simple plywood doors should be cut to size once the case is assembled to account for any unexpected adjustments to the plan dimensions. Clamp a board to the bottom edge of the cabinet and measure up to determine the door height. To determine the width, measure from the outside edge of the cabinet to the drawer edge and subtract 1/8 in. for clearance.
I installed the doors with Euro-style cup hinges, which consist of two parts: a cup that attaches to the door and a bracket that attaches to the cabinet. Once you get these installed they can be adjusted in every direction for perfect alignment.
 Quick Tip: For more tips and a demonstration on how to install Euro-style cup hinges, watch the video… Quick Tip: For more tips and a demonstration on how to install Euro-style cup hinges, watch the video… |
 Completing the assembly table
Once the cabinet is assembled and all of the doors and drawers are installed, I applied a few coats of polyurethane finish and then dropped on the torsion-box tabletop.
I also decked out my cabinet with a few accessories. One end of the table has a French-cleat hanging system to hold small tools. The other end offers access to my air compressor and an auxiliary power switch.
Marc Spagnuolo is a furniture maker outside Phoenix, Ariz., and host of The Wood Whisperer video podcast. To watch the full-length version of this project video, visit www.TheWoodWhisperer.com
Series Editor: Matt Berger
More from FineWoodworking.com:
- From FWW # 32 – Ian Kirby writes about The Torsion Box
- Here’s a drafting table with a torsion box top
- How to Make Thick, Light Tabletops by Brian Sargent
- Make a torsion box kitchen table top


Comments
Is there a order guide for this? Like how much of each 3/4 to order etc?
User-7409172: See episode #19 on Marc's own website, the Wood Whisper, referenced at the end of the article. It doesn't give full info, but has a layout with more info.
Log in or create an account to post a comment.
Sign up Log in